A New Chart Plotter
Like I said in the post, we decided to add a chart plotter with a depth sounder in it to the fly bridge. It would make the fly bridge more functional.
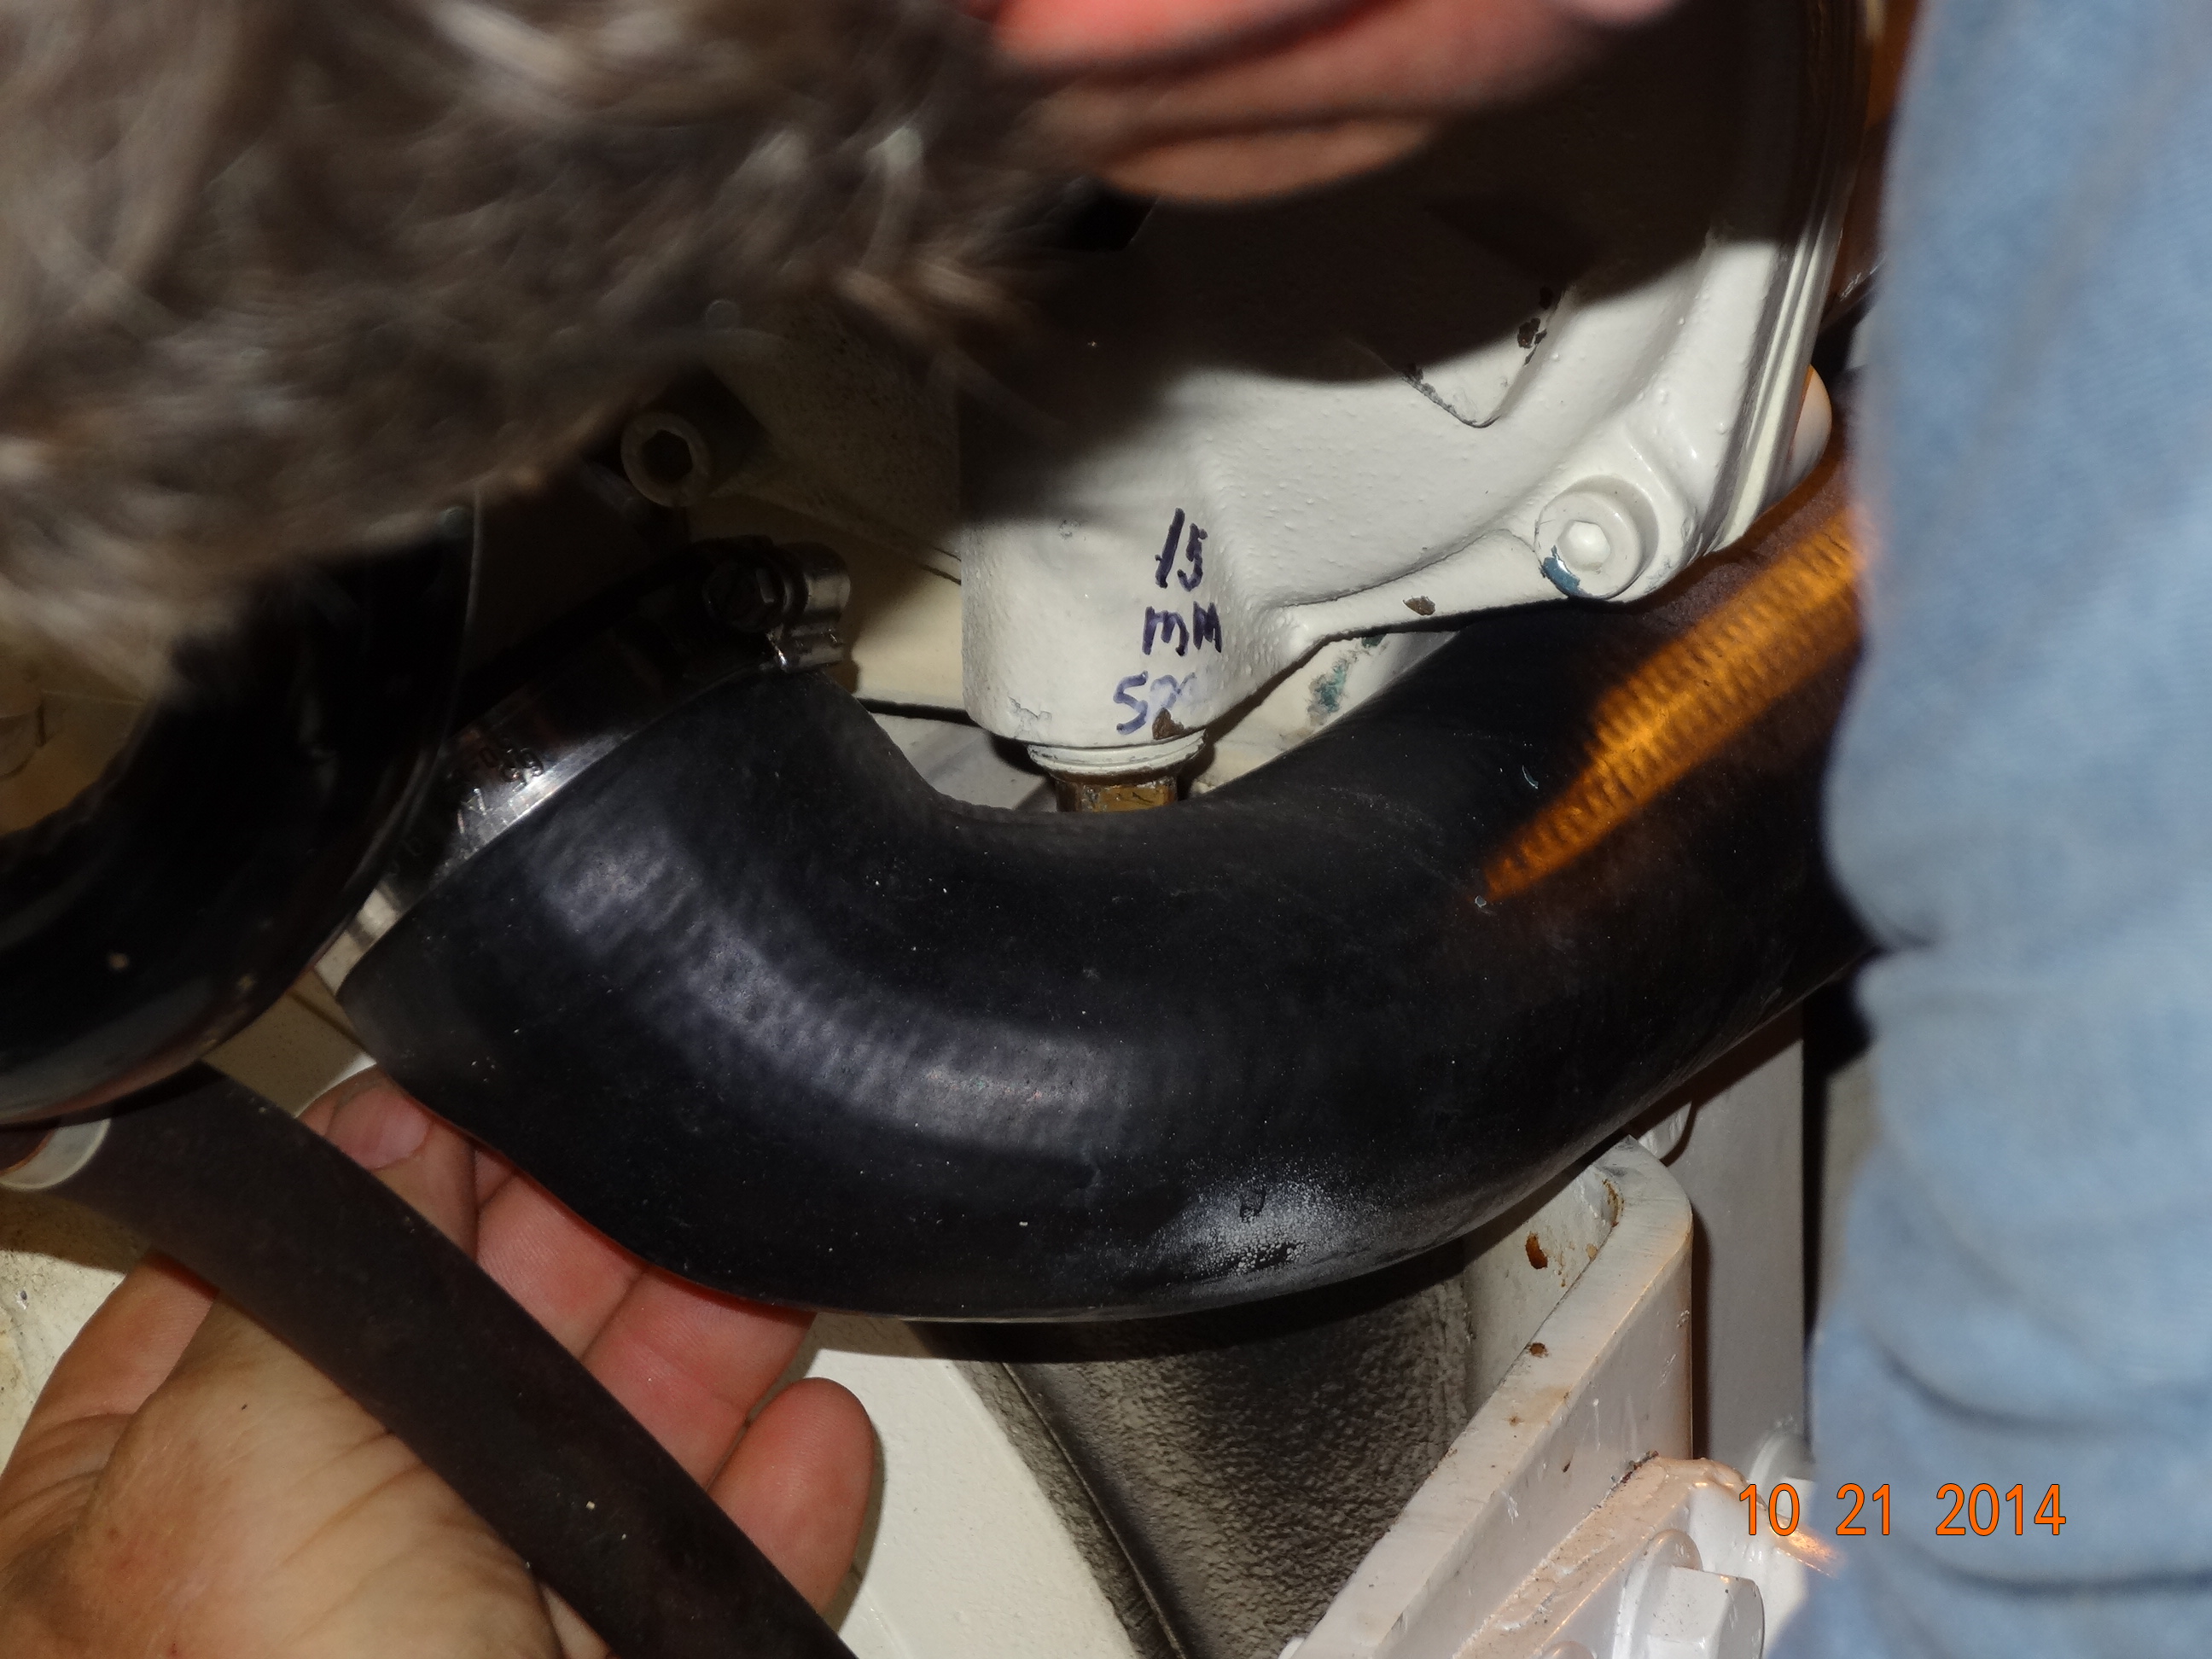
The first thing we had to do, was put the transponder (a transponder is what sends signals thru the hull of the boat to the bottom of water to tell you how deep it is) in the lowest part of the hull then run the cord up from there to the fly bridge where we’d insert it into the Raytheon Chart Plotter. Have you ever looked at these cords before? The cords are all nice and thin and then the heads are huge. It’s like giving birth to a Hermes child, little body, big head. You’d think they would make the heads a little smaller so they could run thru the tiny spaces you have to feed them thru.
Oh well, on with the story. The cable will end up coming up from the bilge to behind the microwave.

Holes where the cables come up
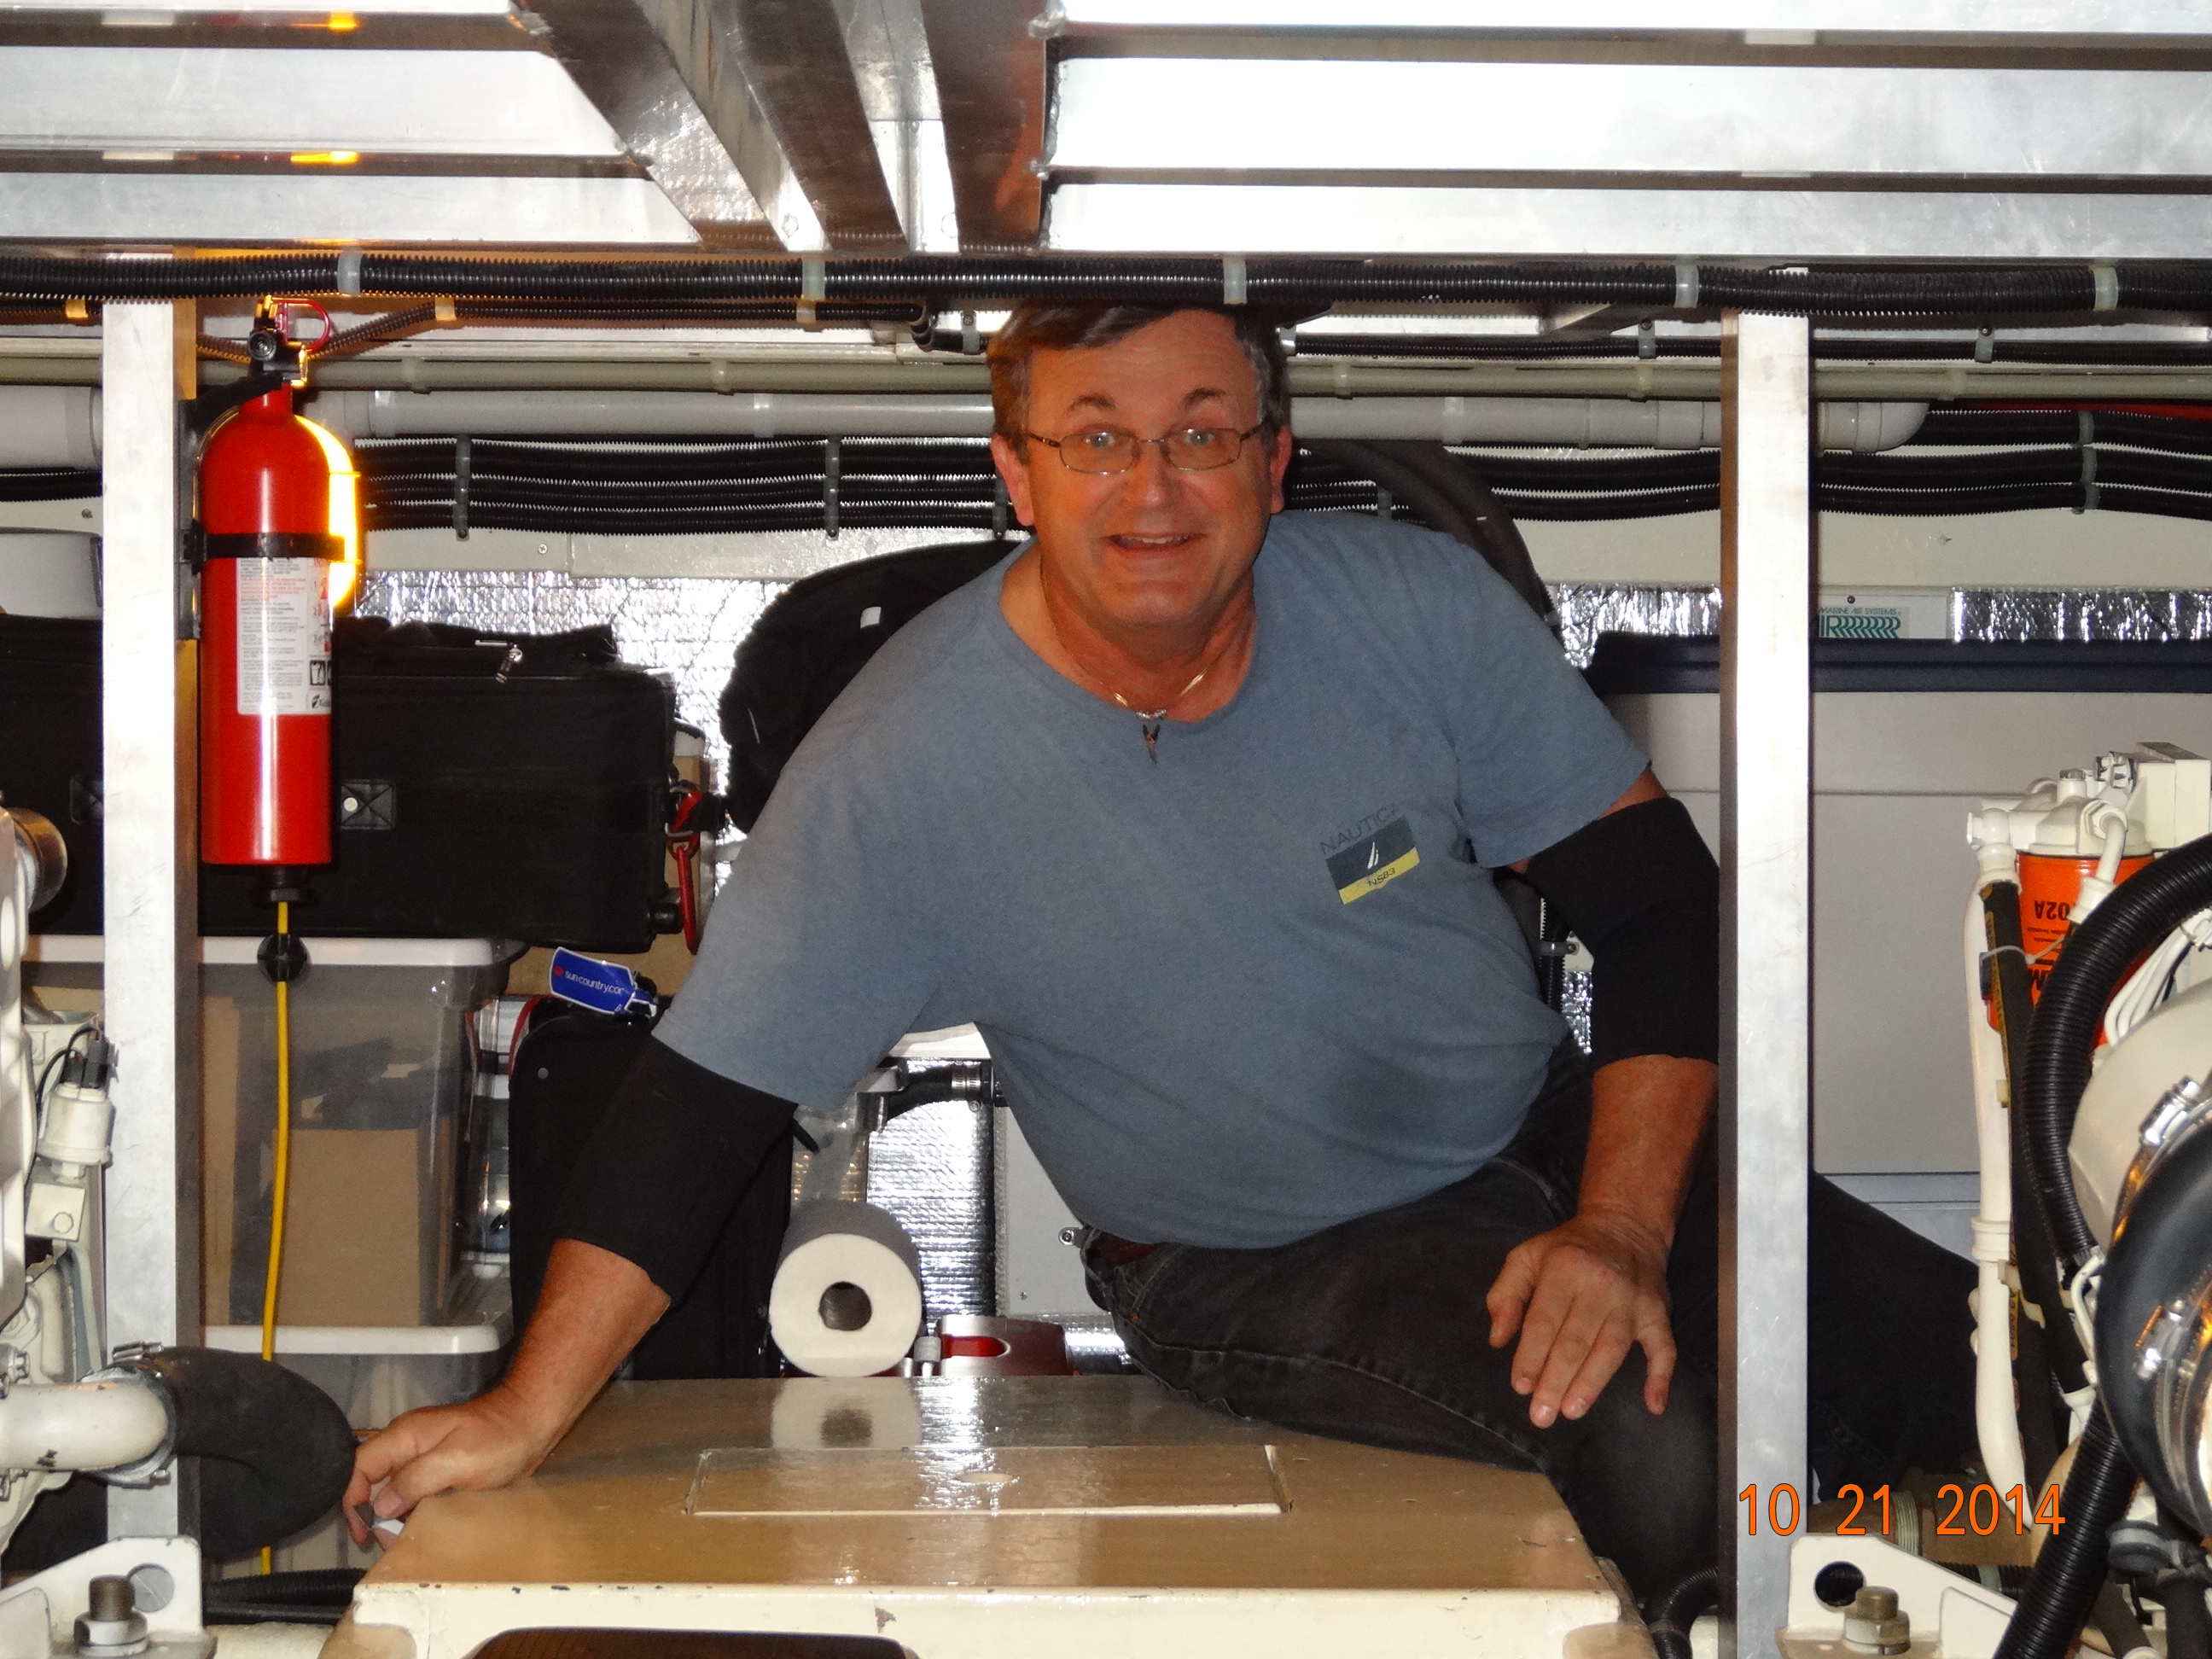
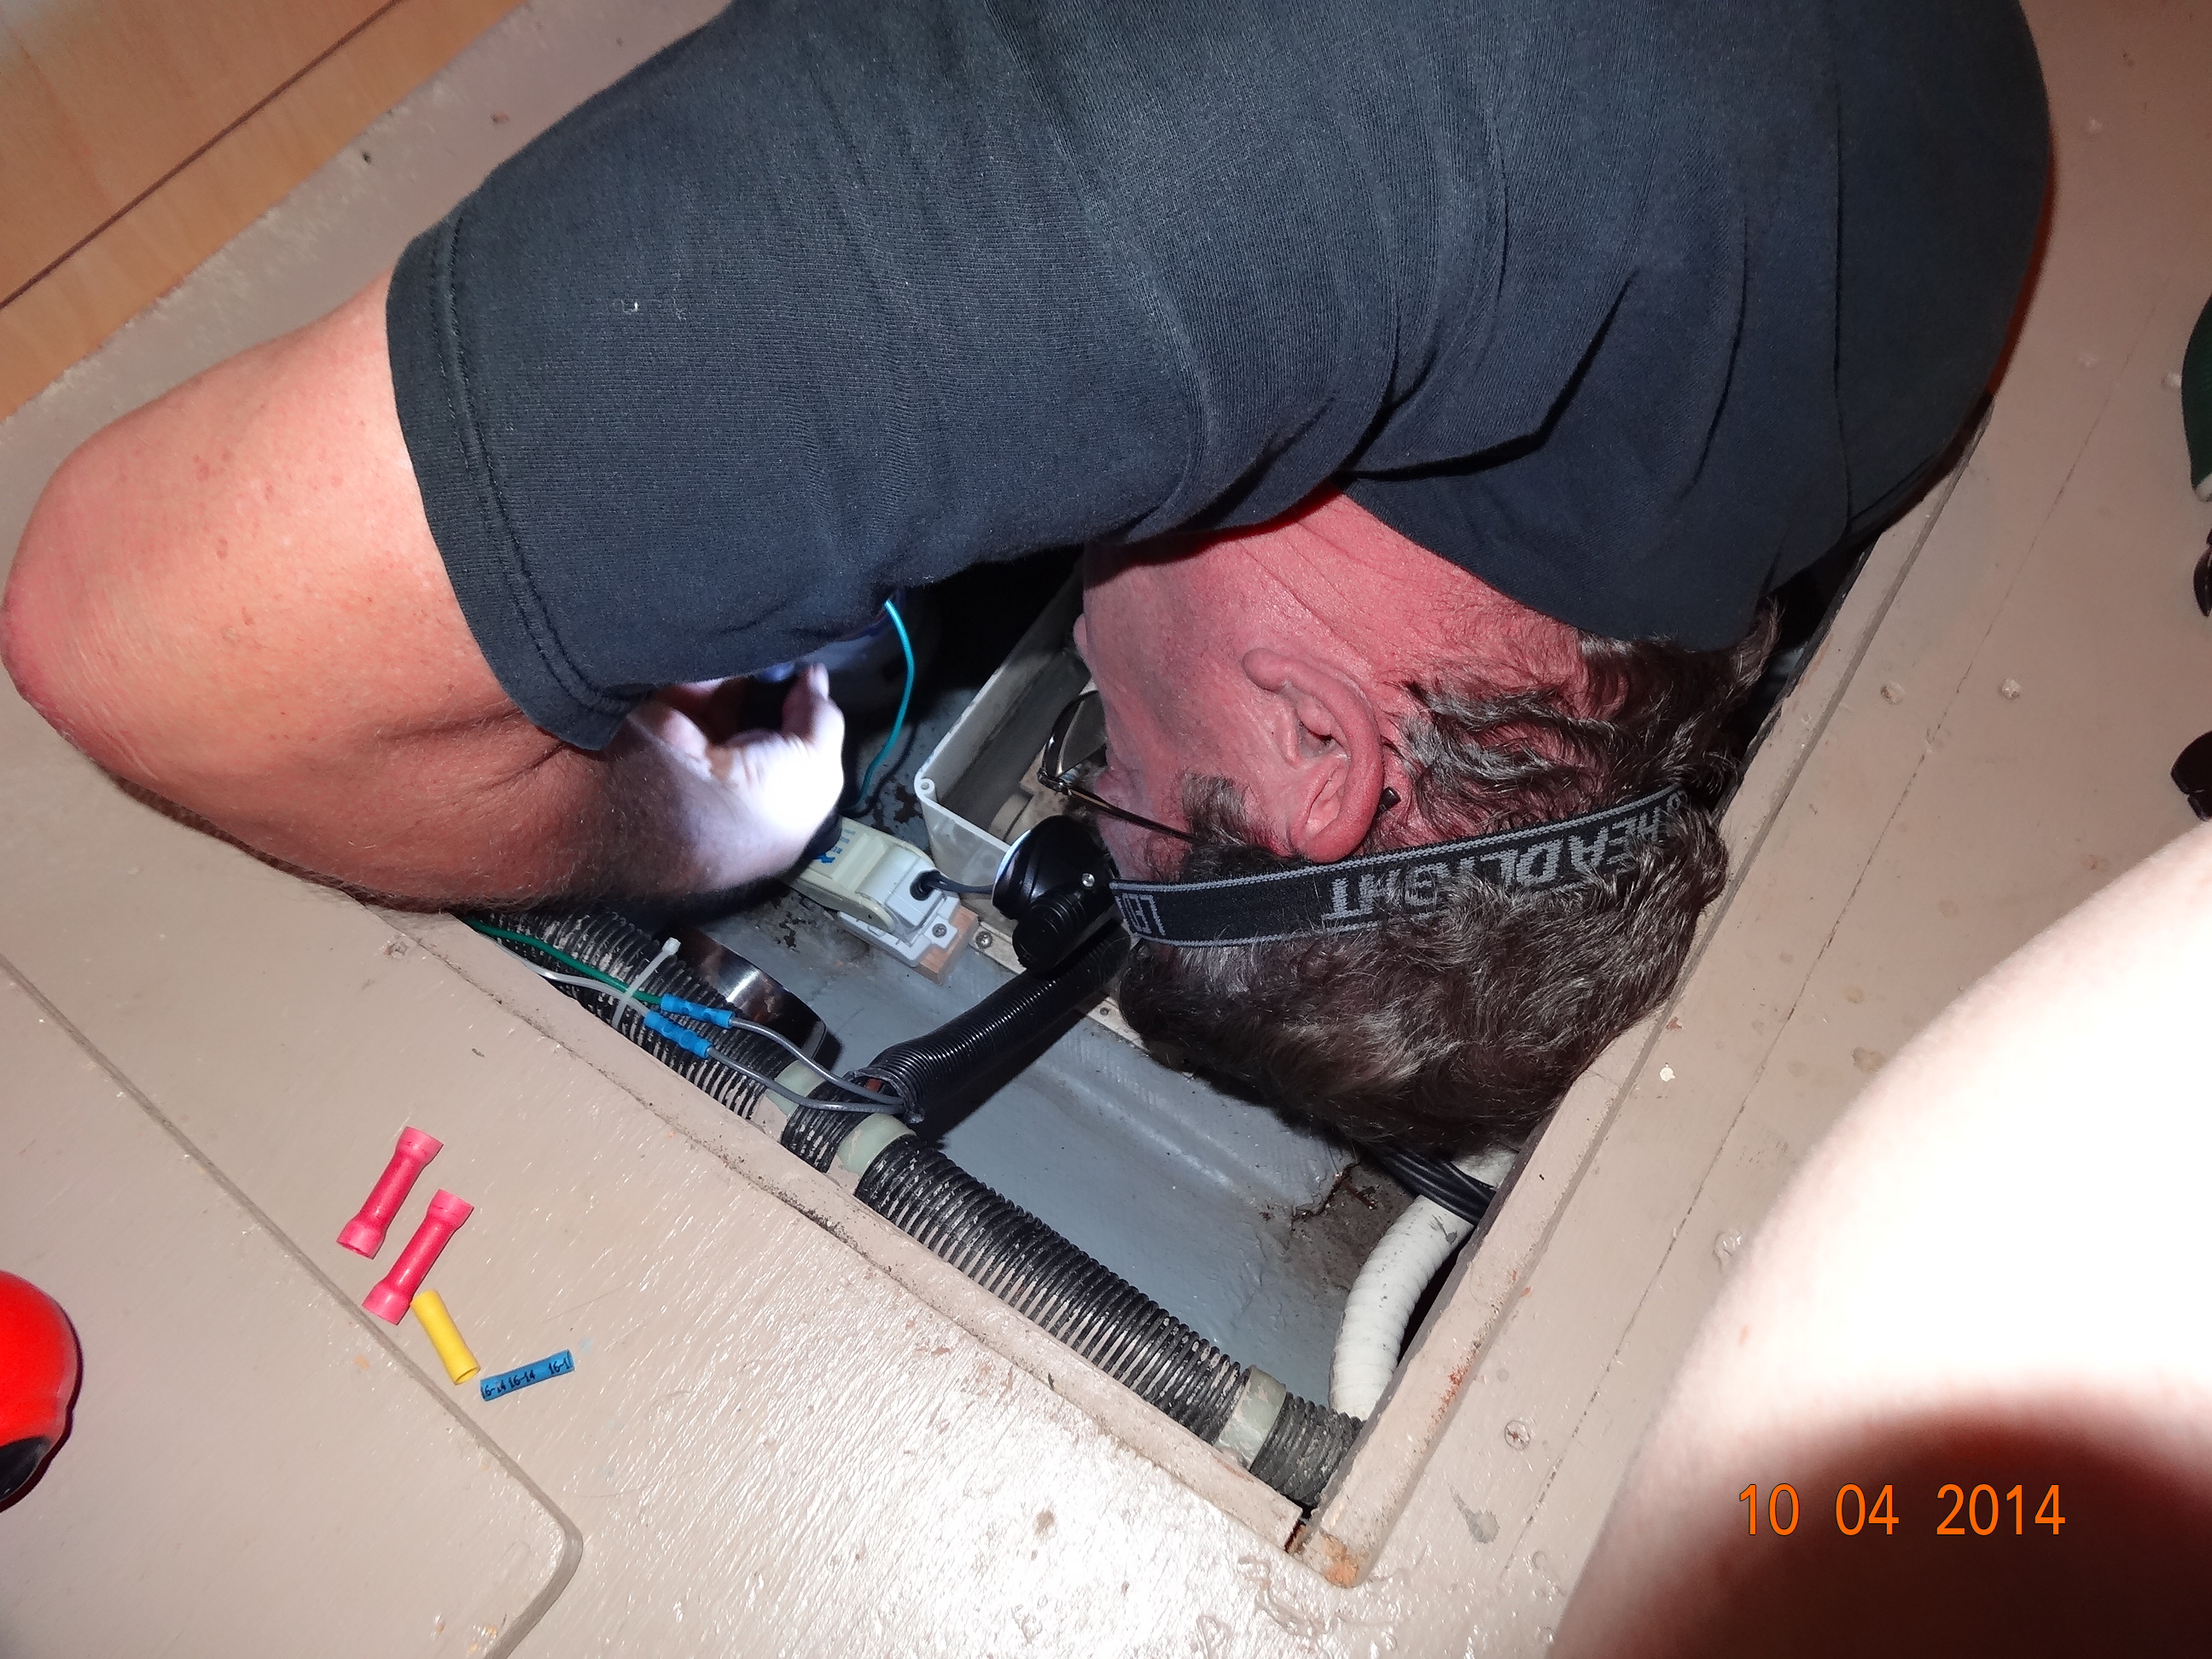
Gary has to pull out the microwave and the two panels. You can see where I have shoved down the wire snake so Gary can attach the cable so I can then pull it up.
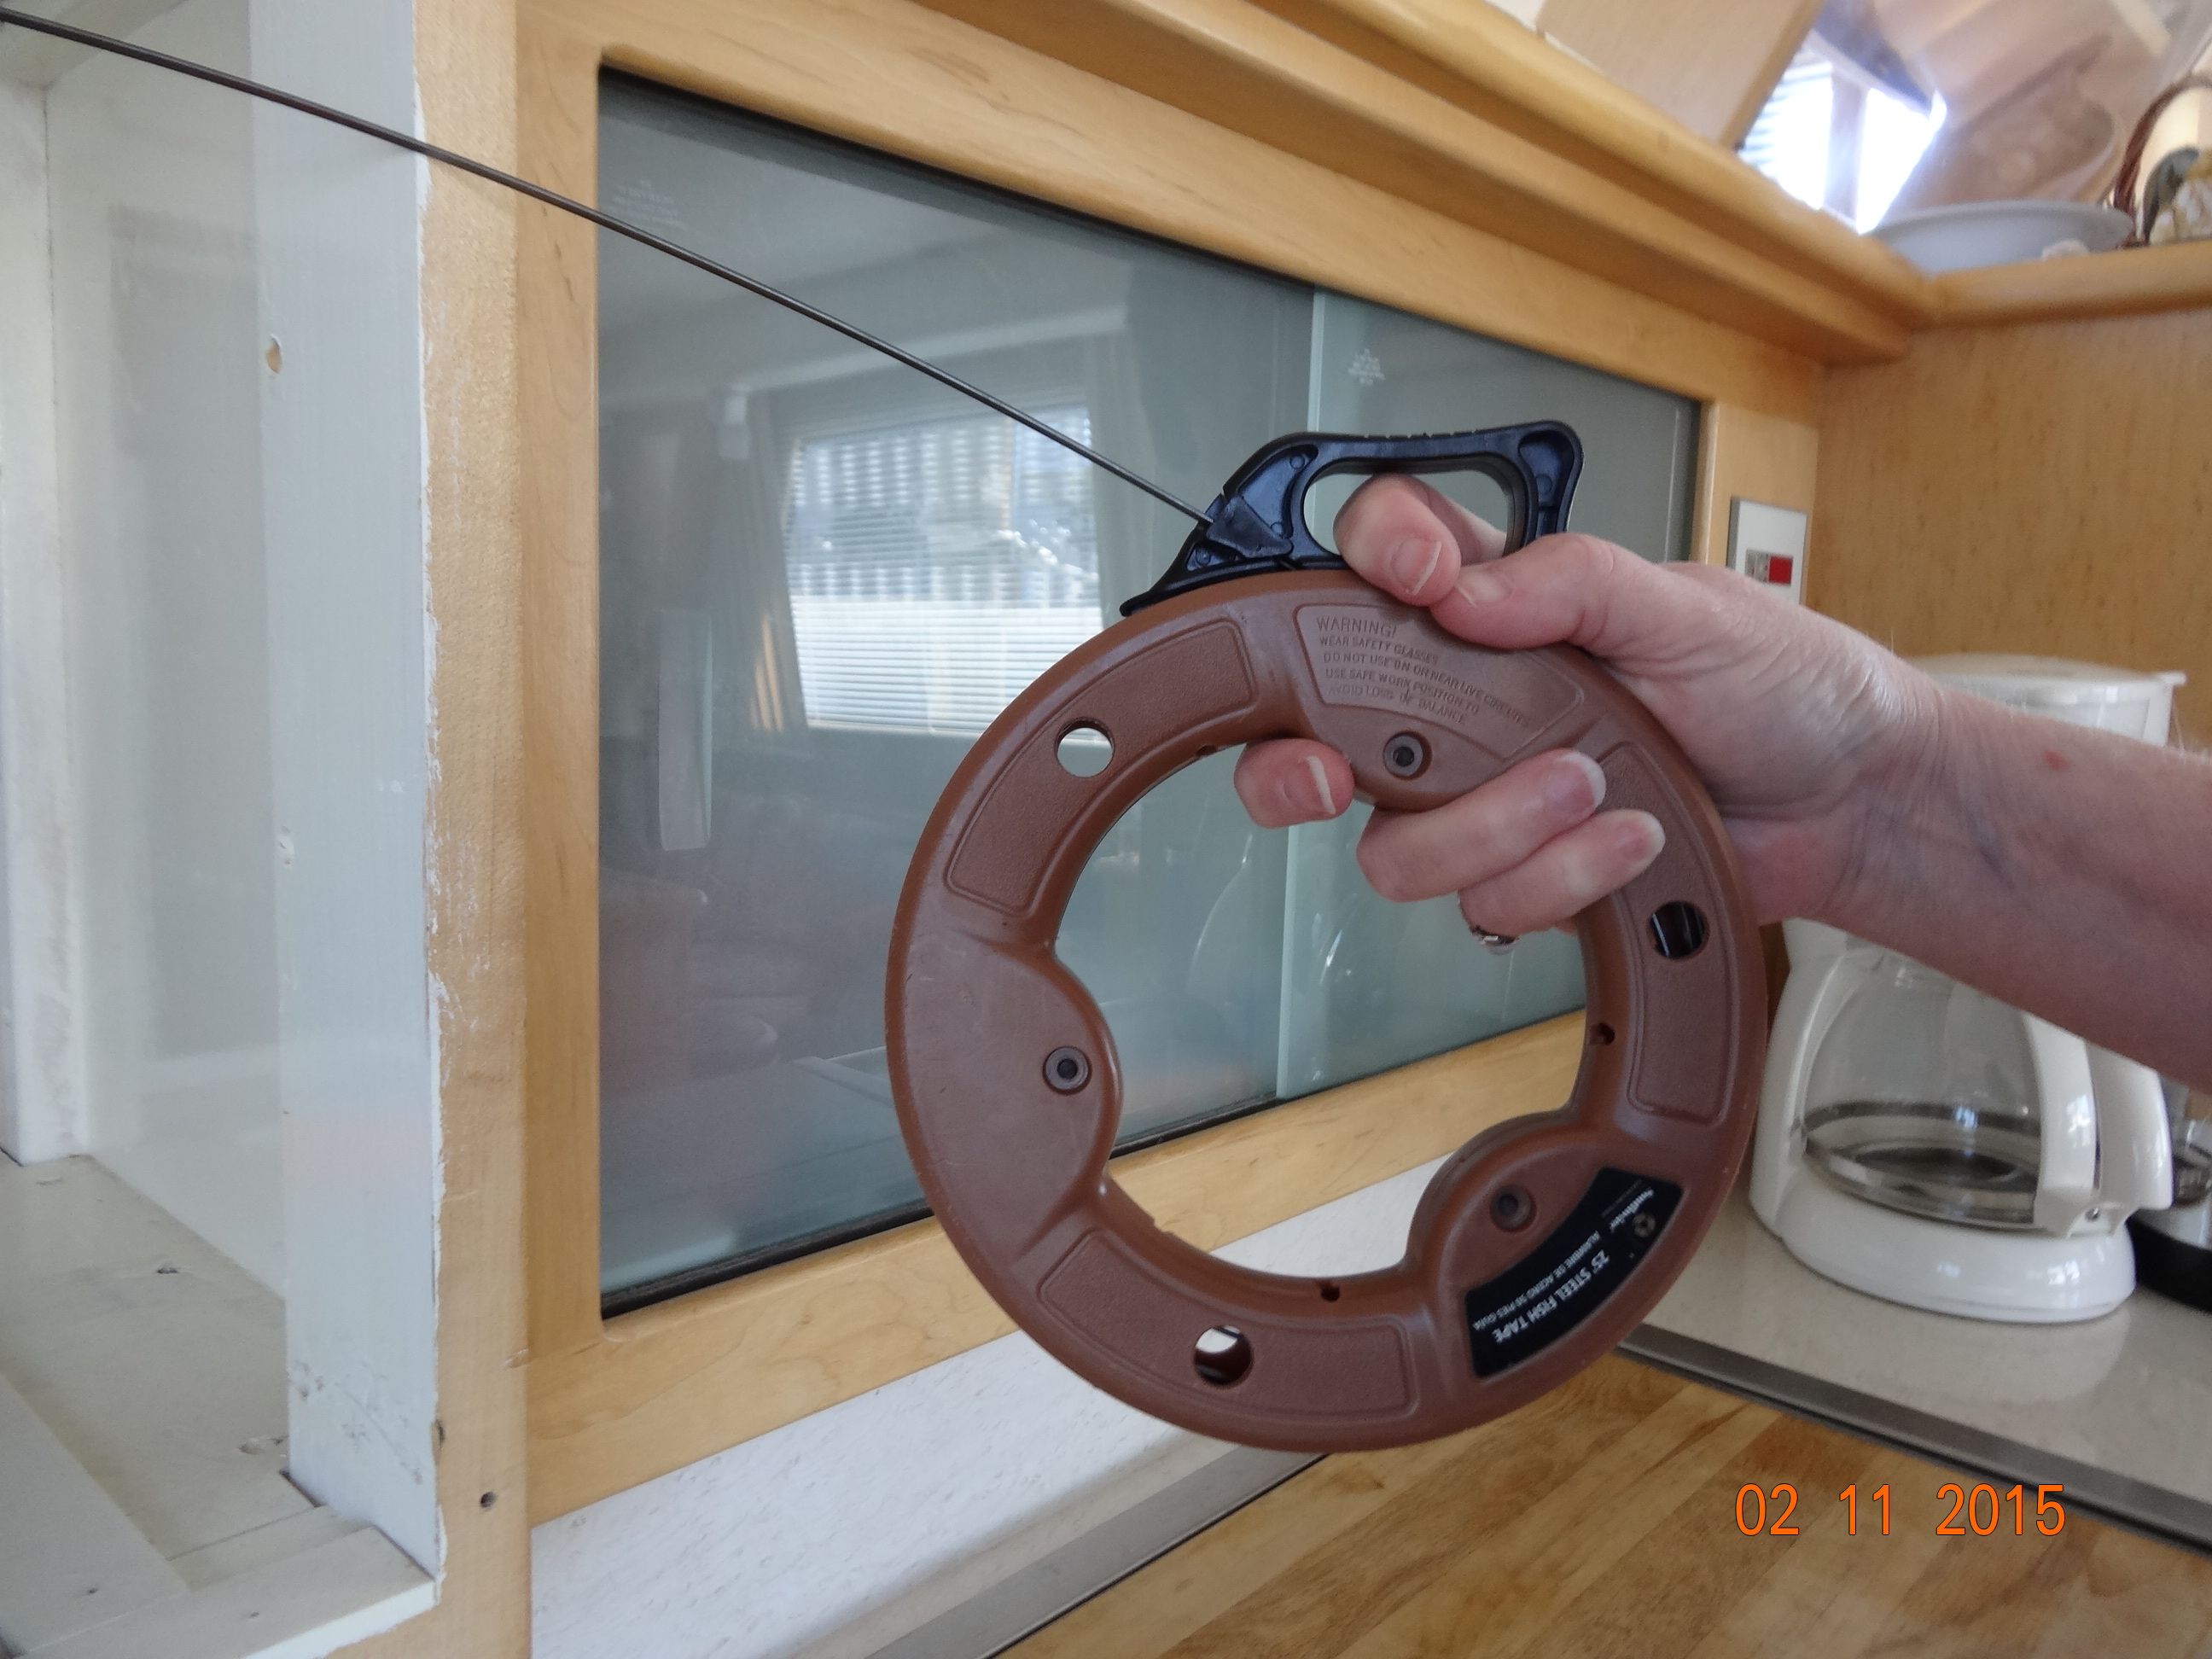
Me, shoving down the snake
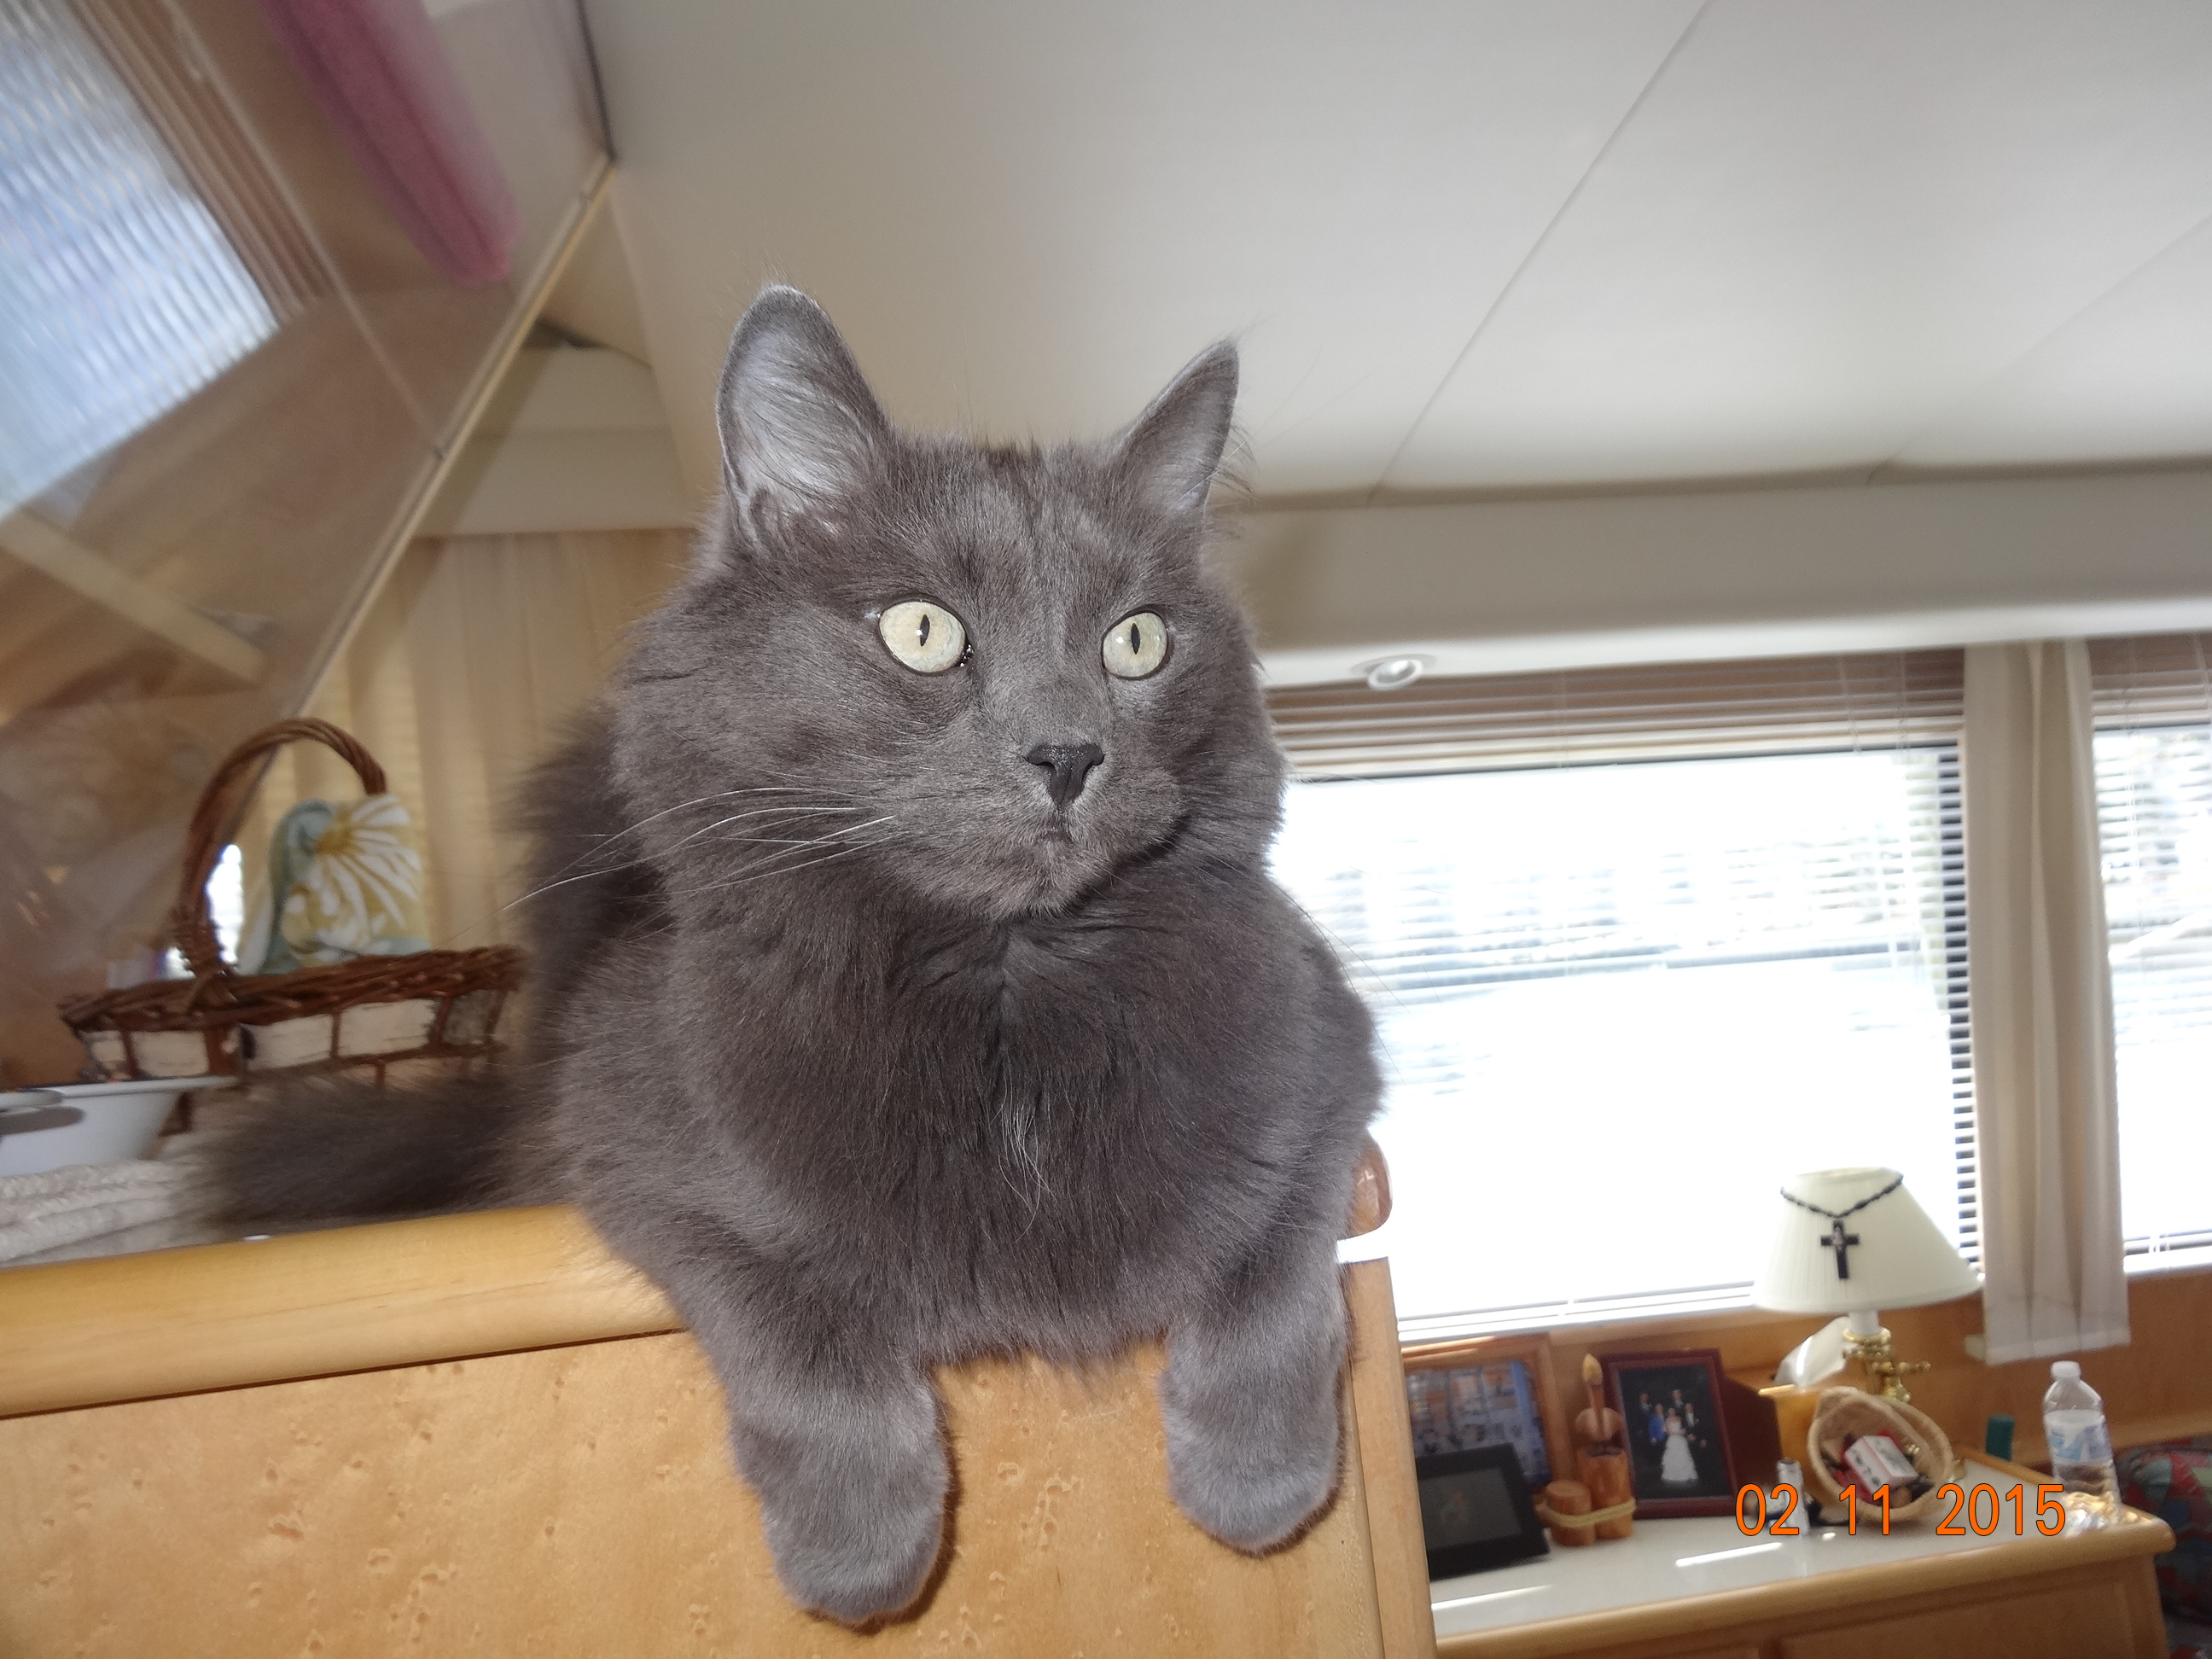
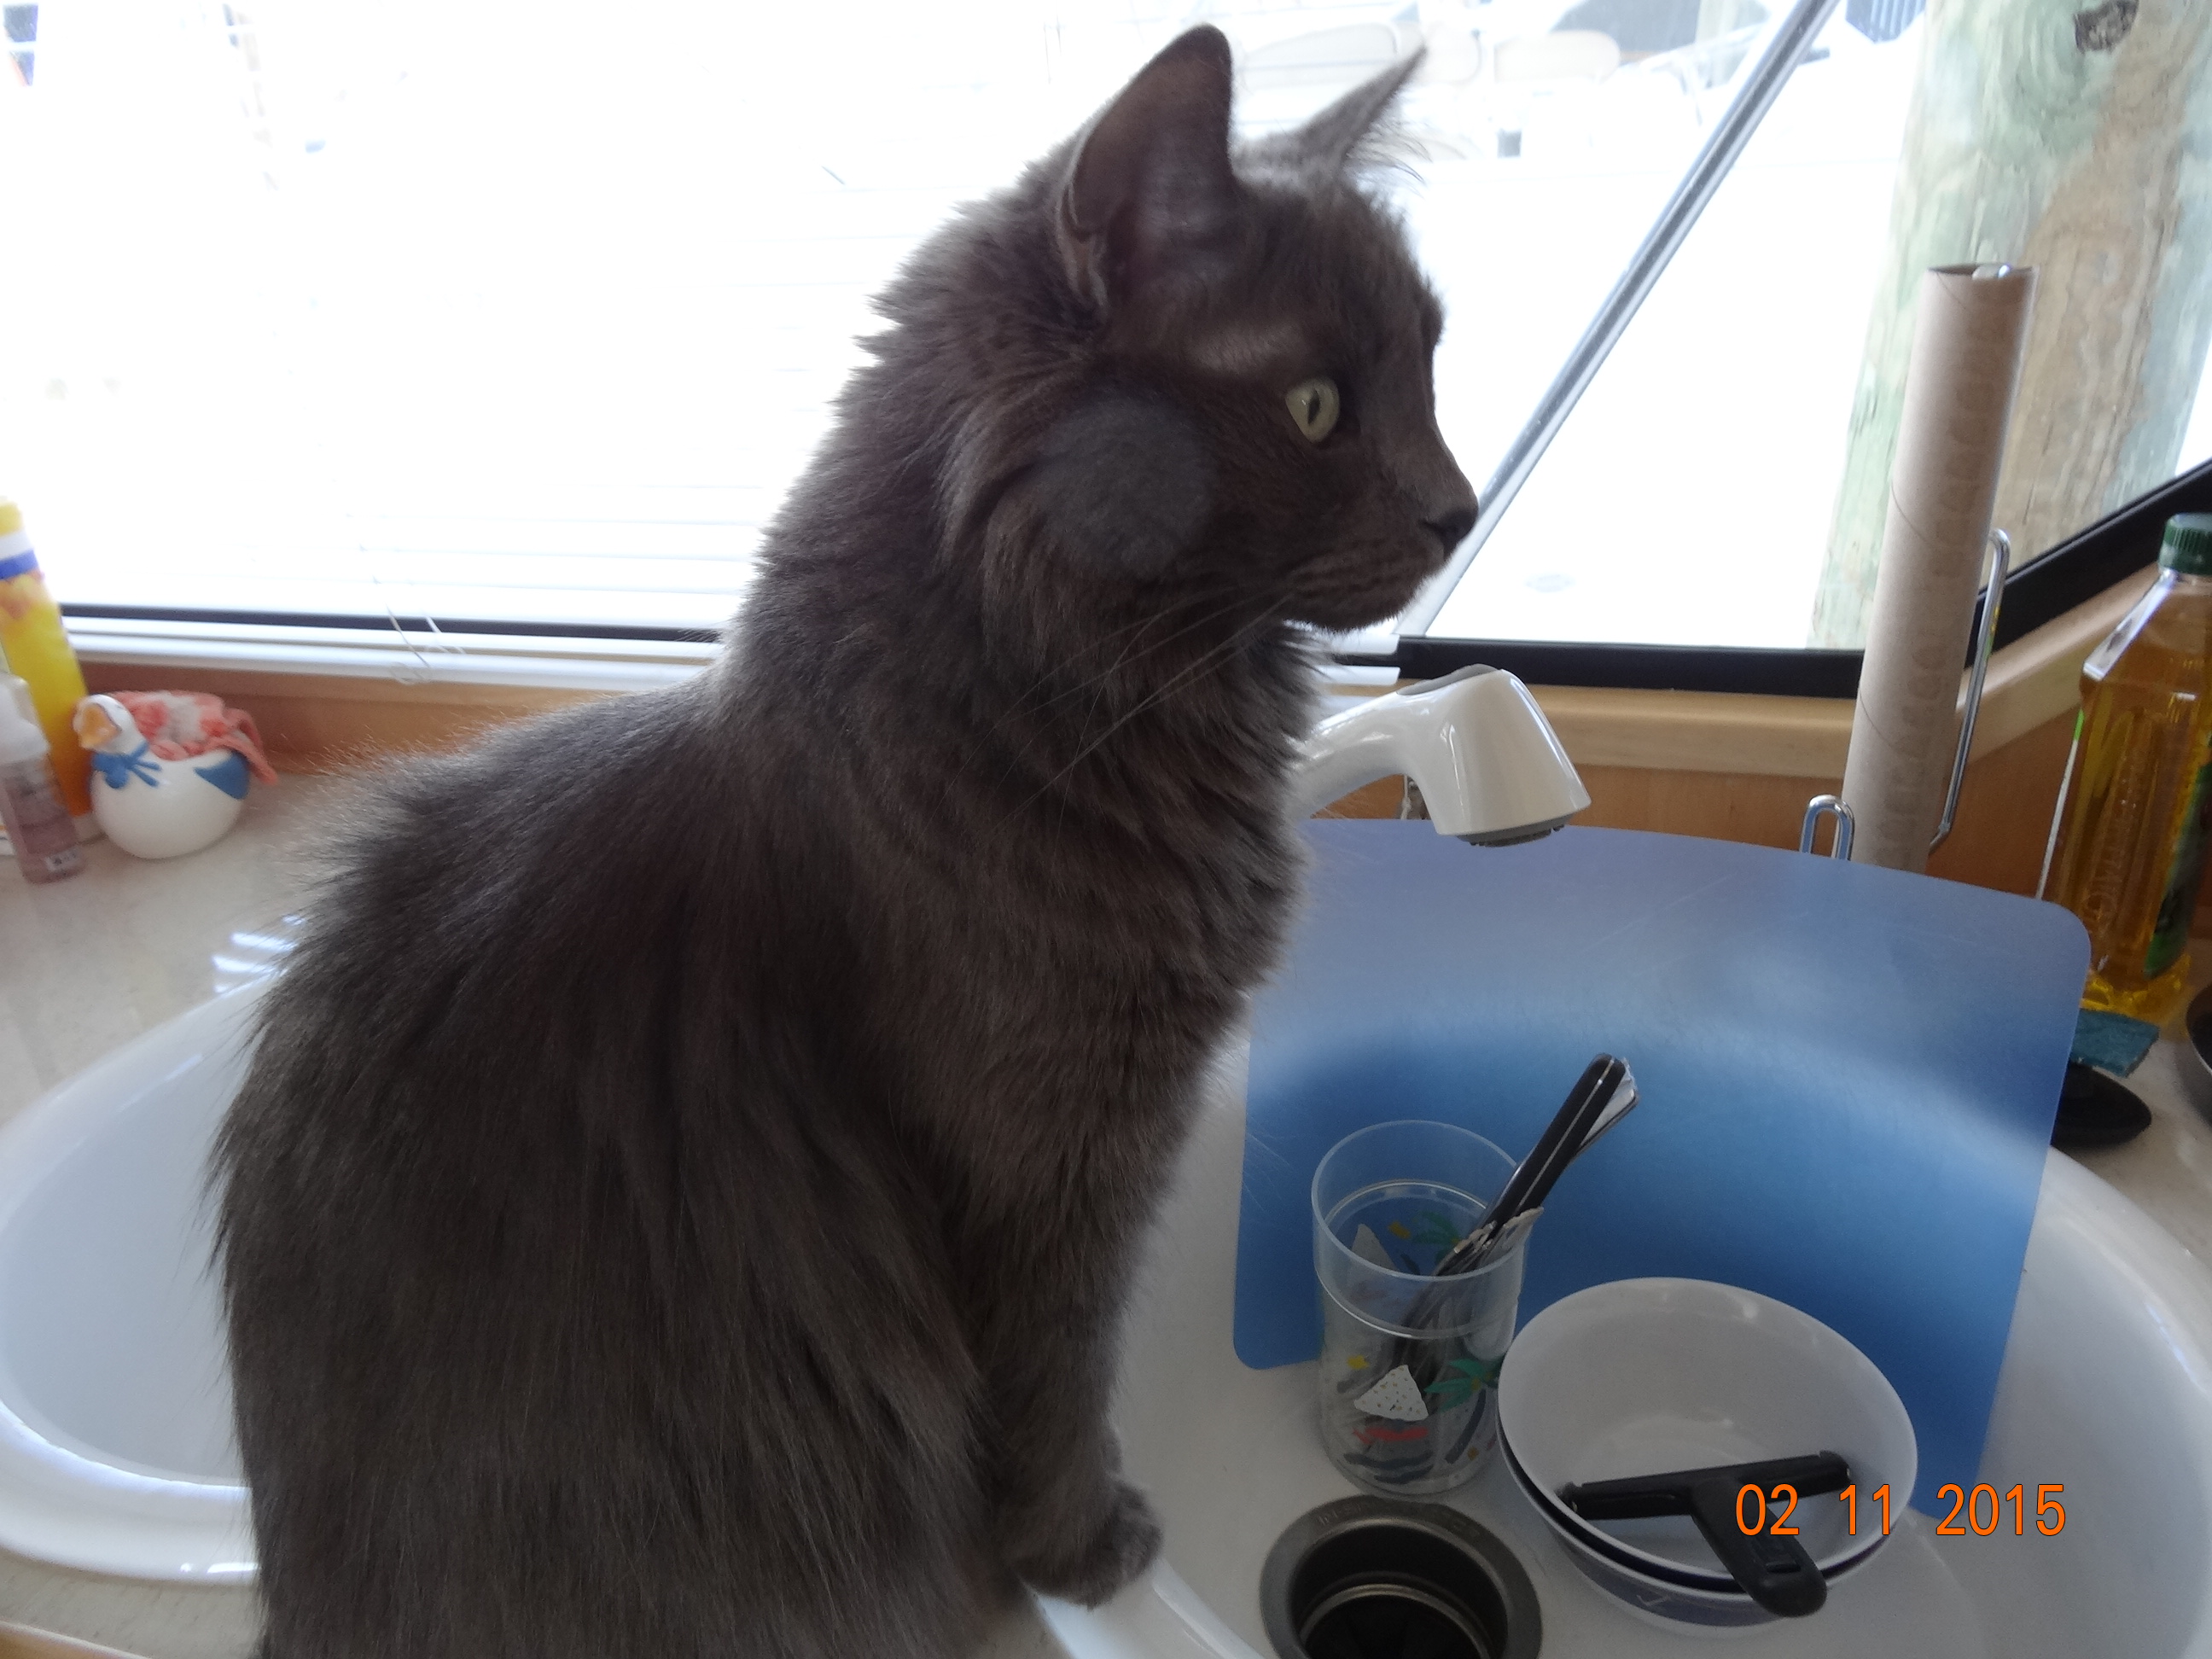
Smokie is fascinated by the whole affair
If I had thumbs I could help
If we turn our backs at all or leave the area, we have to put up this panel
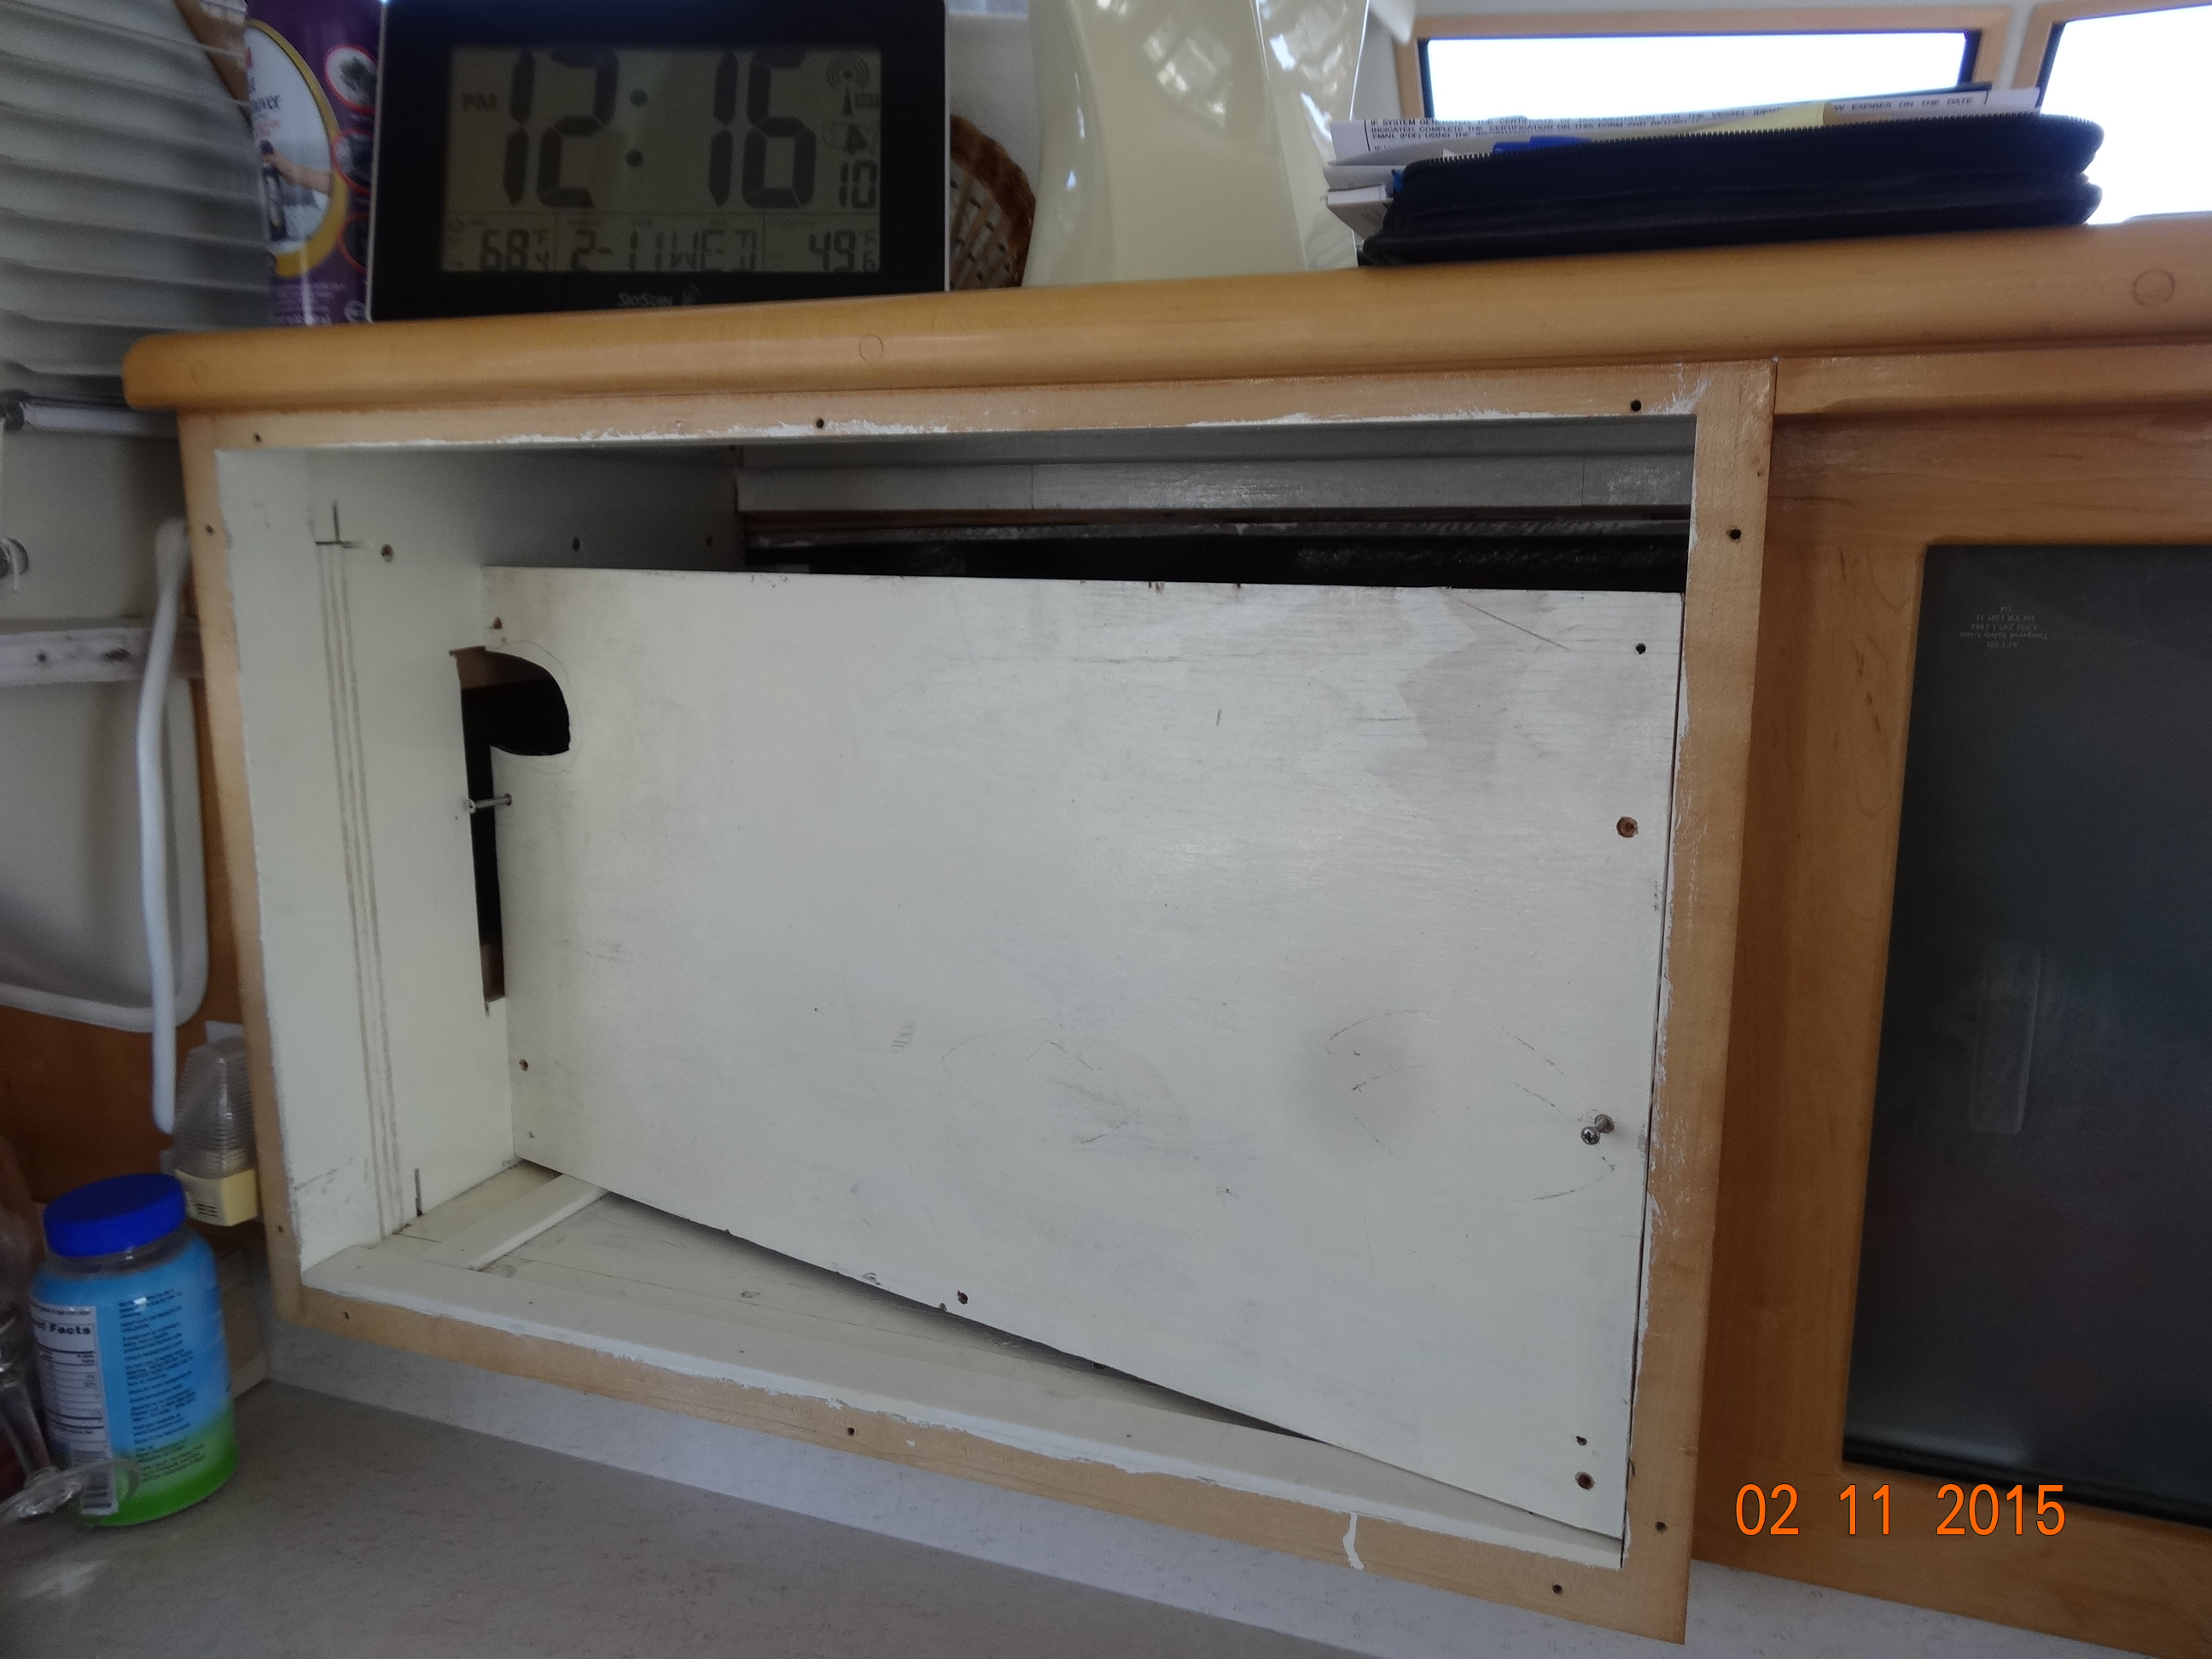
Doorway to Smokie’s secret pleasures
so Smokie doesn’t try to climb in there. He found out before when we were installing the other chart plotter what fun it is to climb under the seats in the pilot house. Unfortunately, if he gets in there he can get into a lot of trouble and he may even find himself in spots he can’t get out of. Needless to say, Gary doesn’t want to be cutting holes in the wall to get the little fluff ball out and we couldn’t very well let him rot in between the walls, that would be a very unpleasant smell, so we watch him like a hawk and make sure he doesn’t sneak into the hole.
Getting the cable from the bilge up to the microwave was a snap. Getting the cable from the microwave to the fly bridge was not so easy. Smokie was always at the ready, glad to help if we needed him to :).
Smokie at the ready
After several attempts and a few choice swear words, the wire cable was just not strong enough to push thru the tangle of other wires and cables. Finally the Captain had a light bulb idea. He had some plastic tubing that he got for another project. He cut the end off
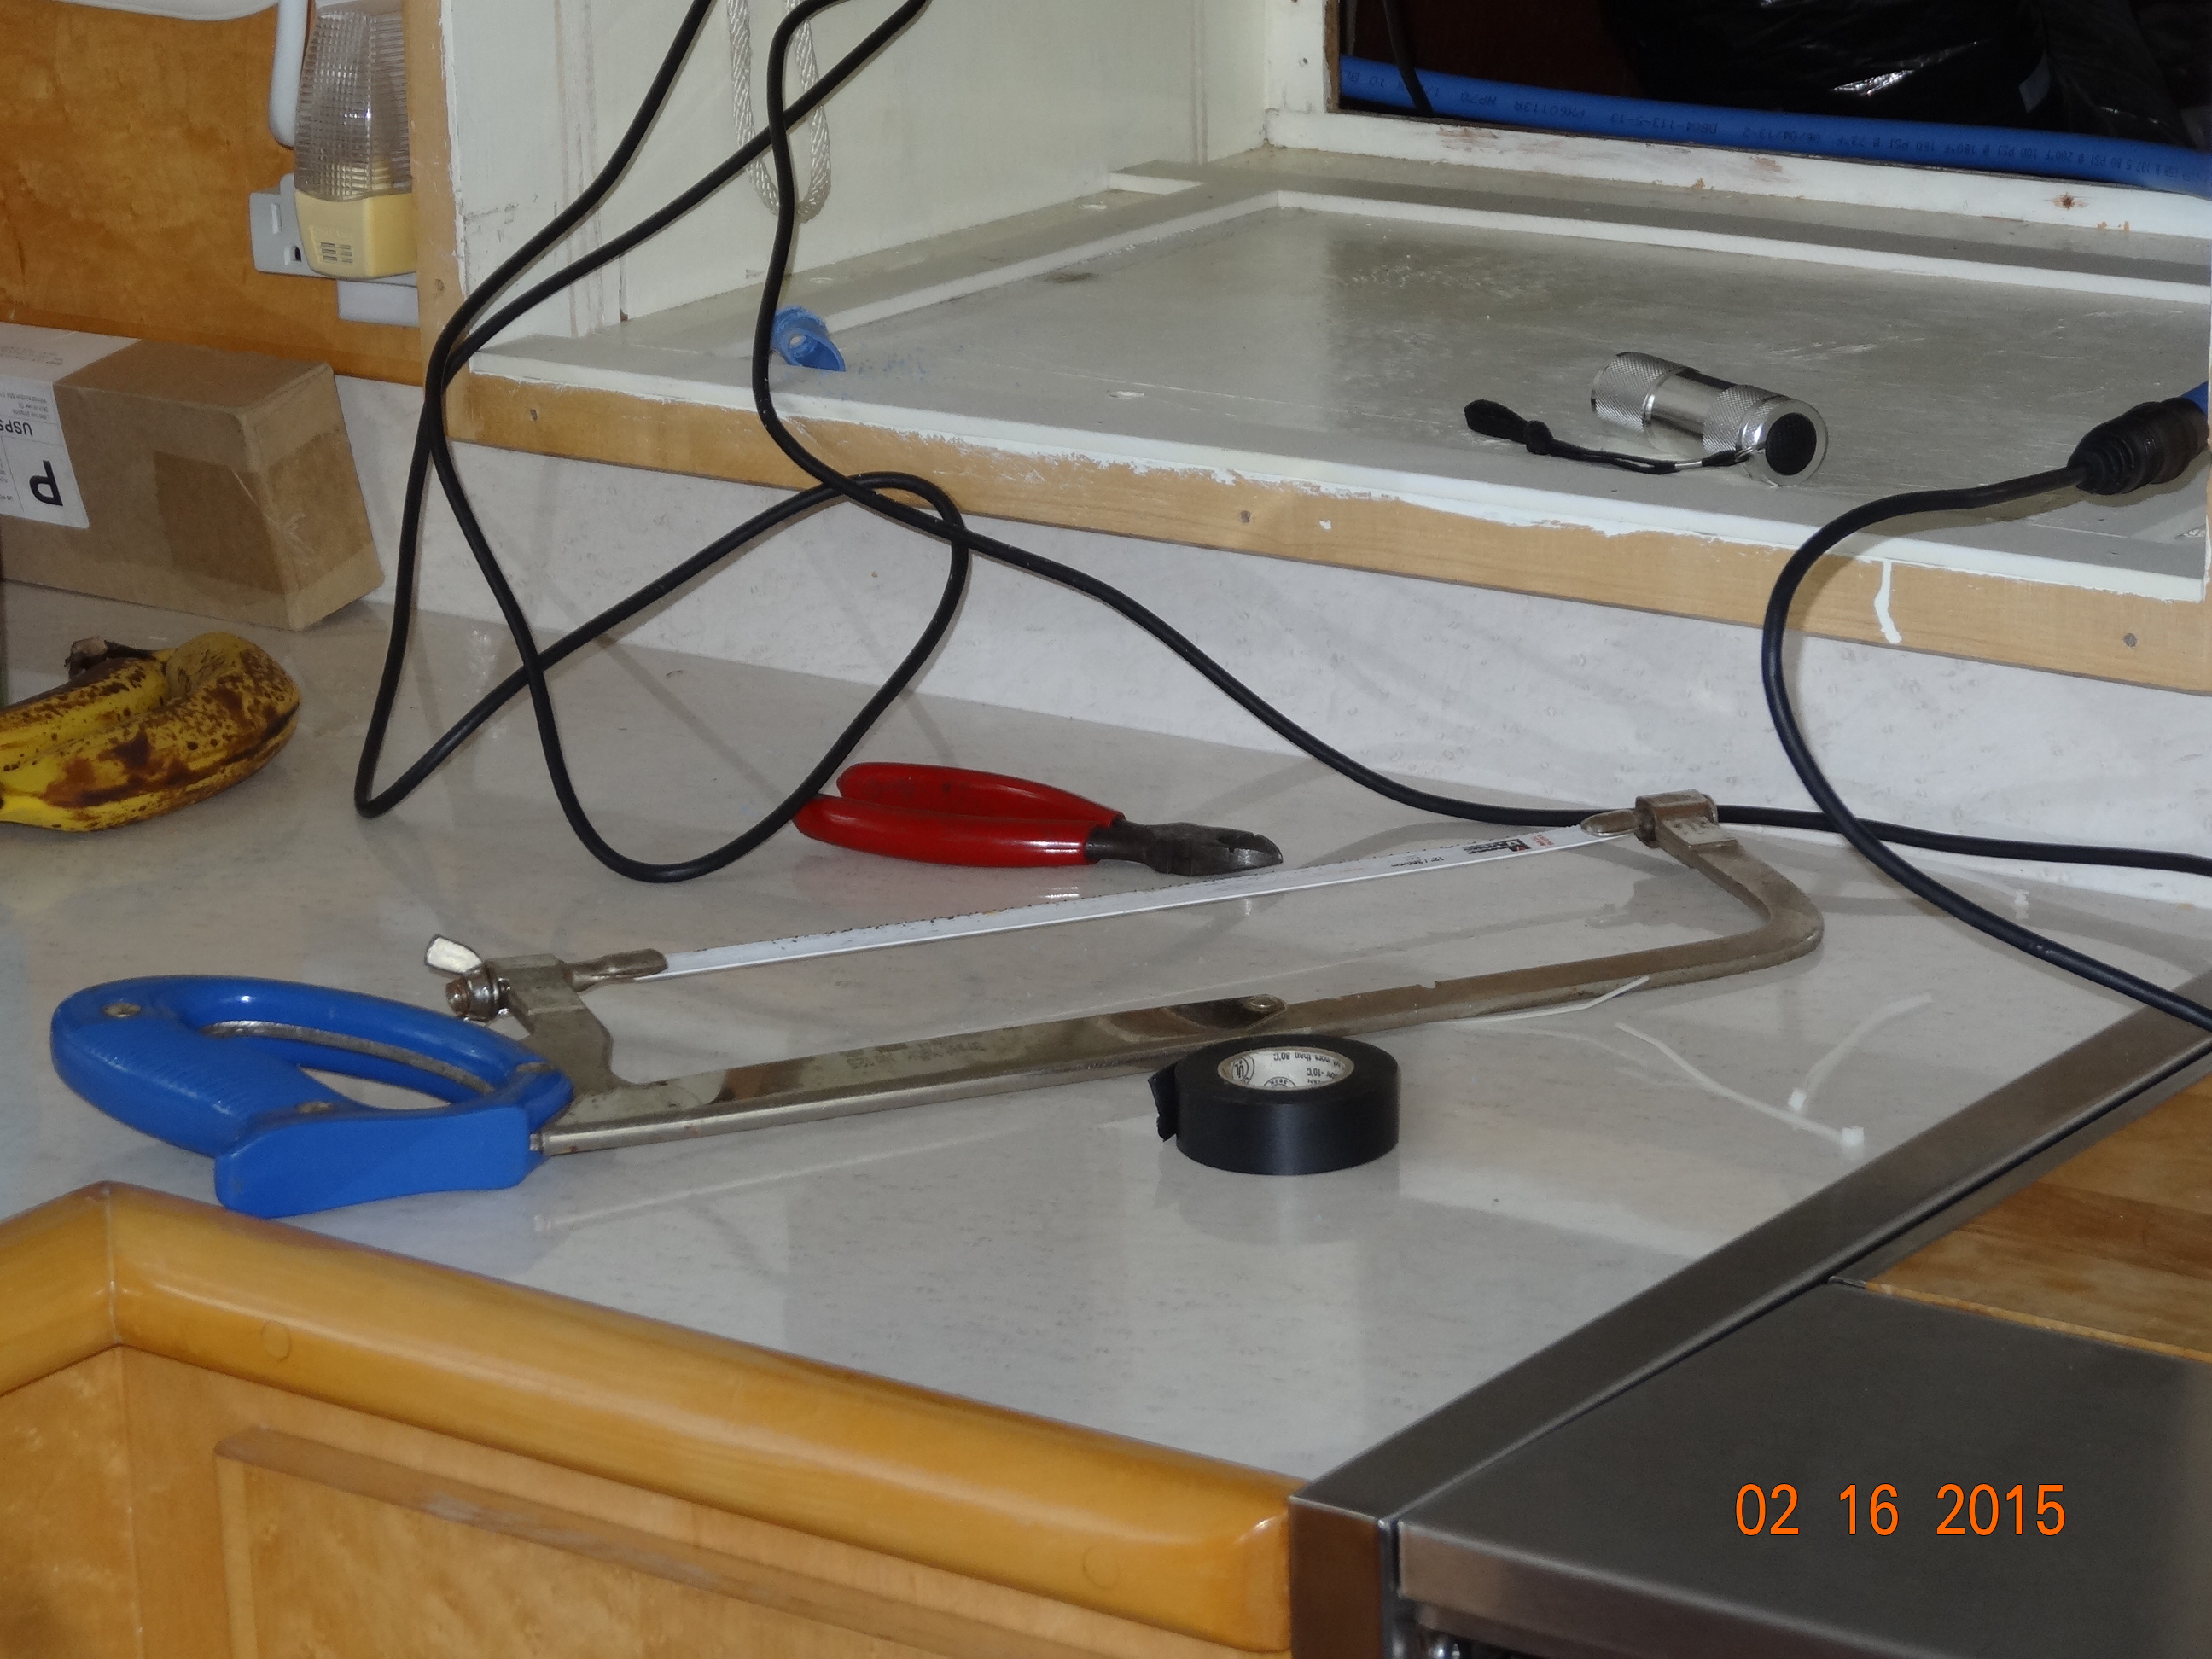
Here’s the saw
at an angle so it was pointy, then he went up to the fly bridge and shoved the tubing down. Wham Bam Thank You Madam, the tubing did the trick and it came right down where we needed it. Gary attached some lock ties to it
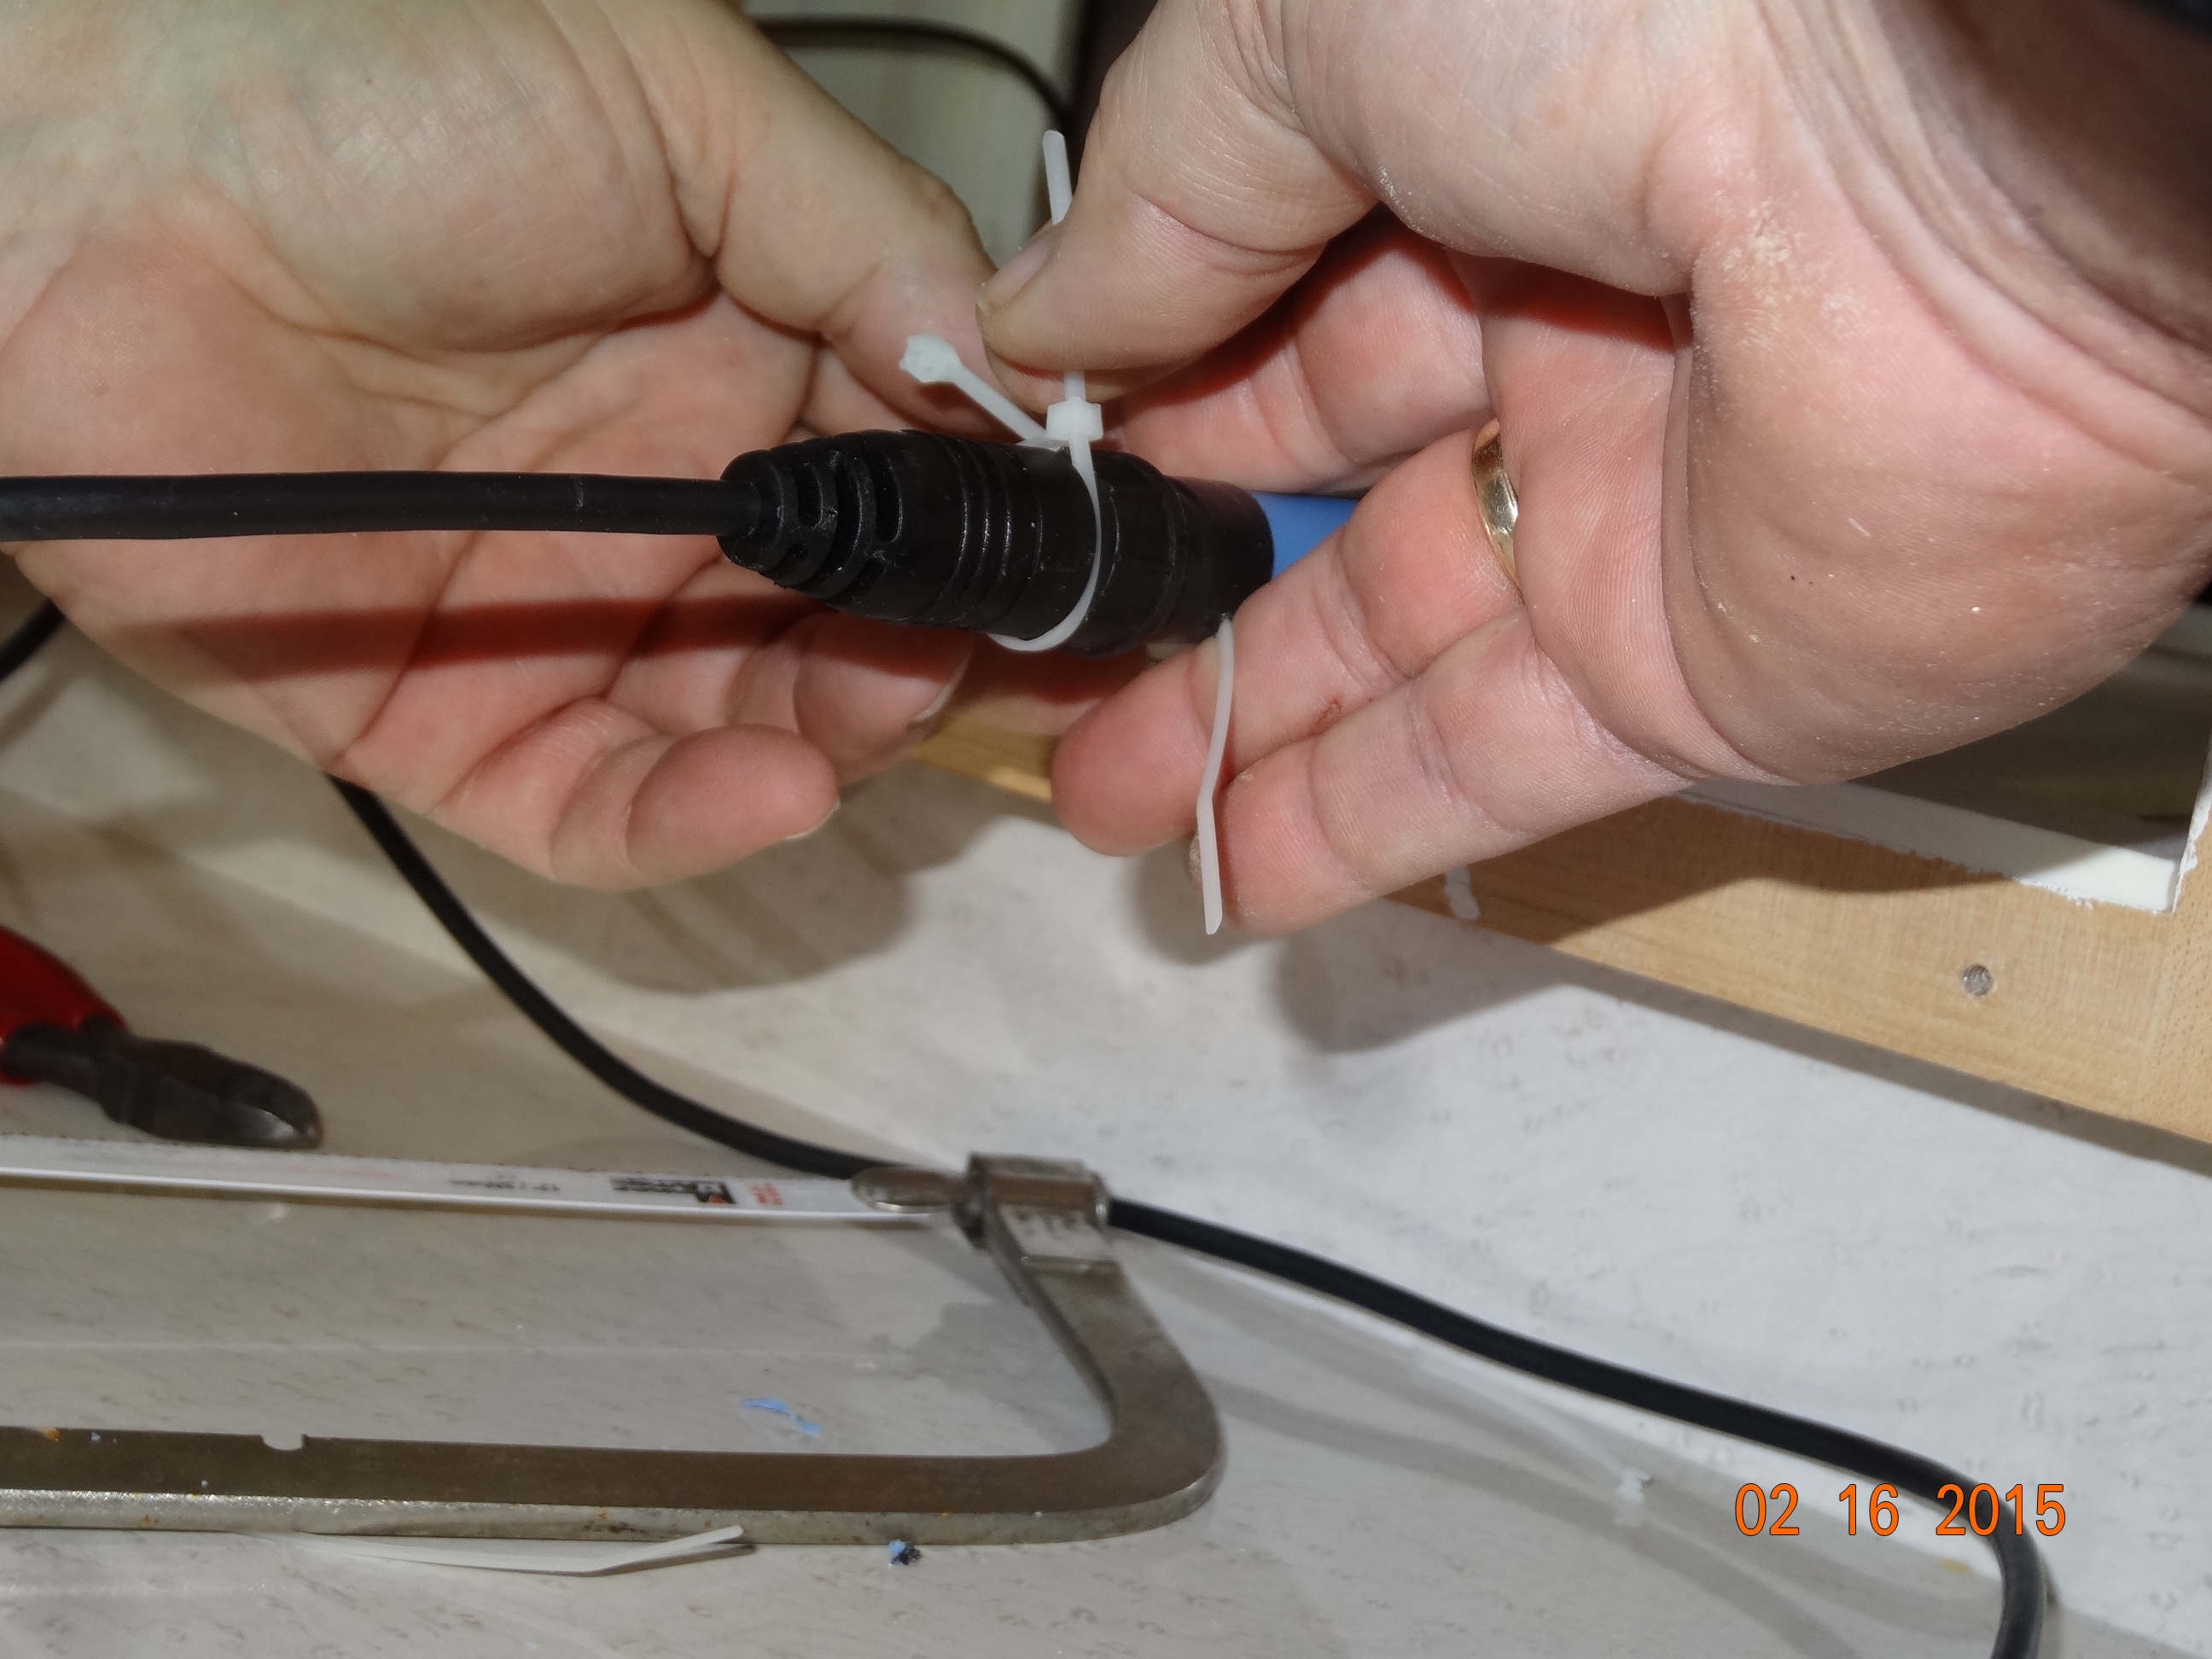
Tie on some lock ties
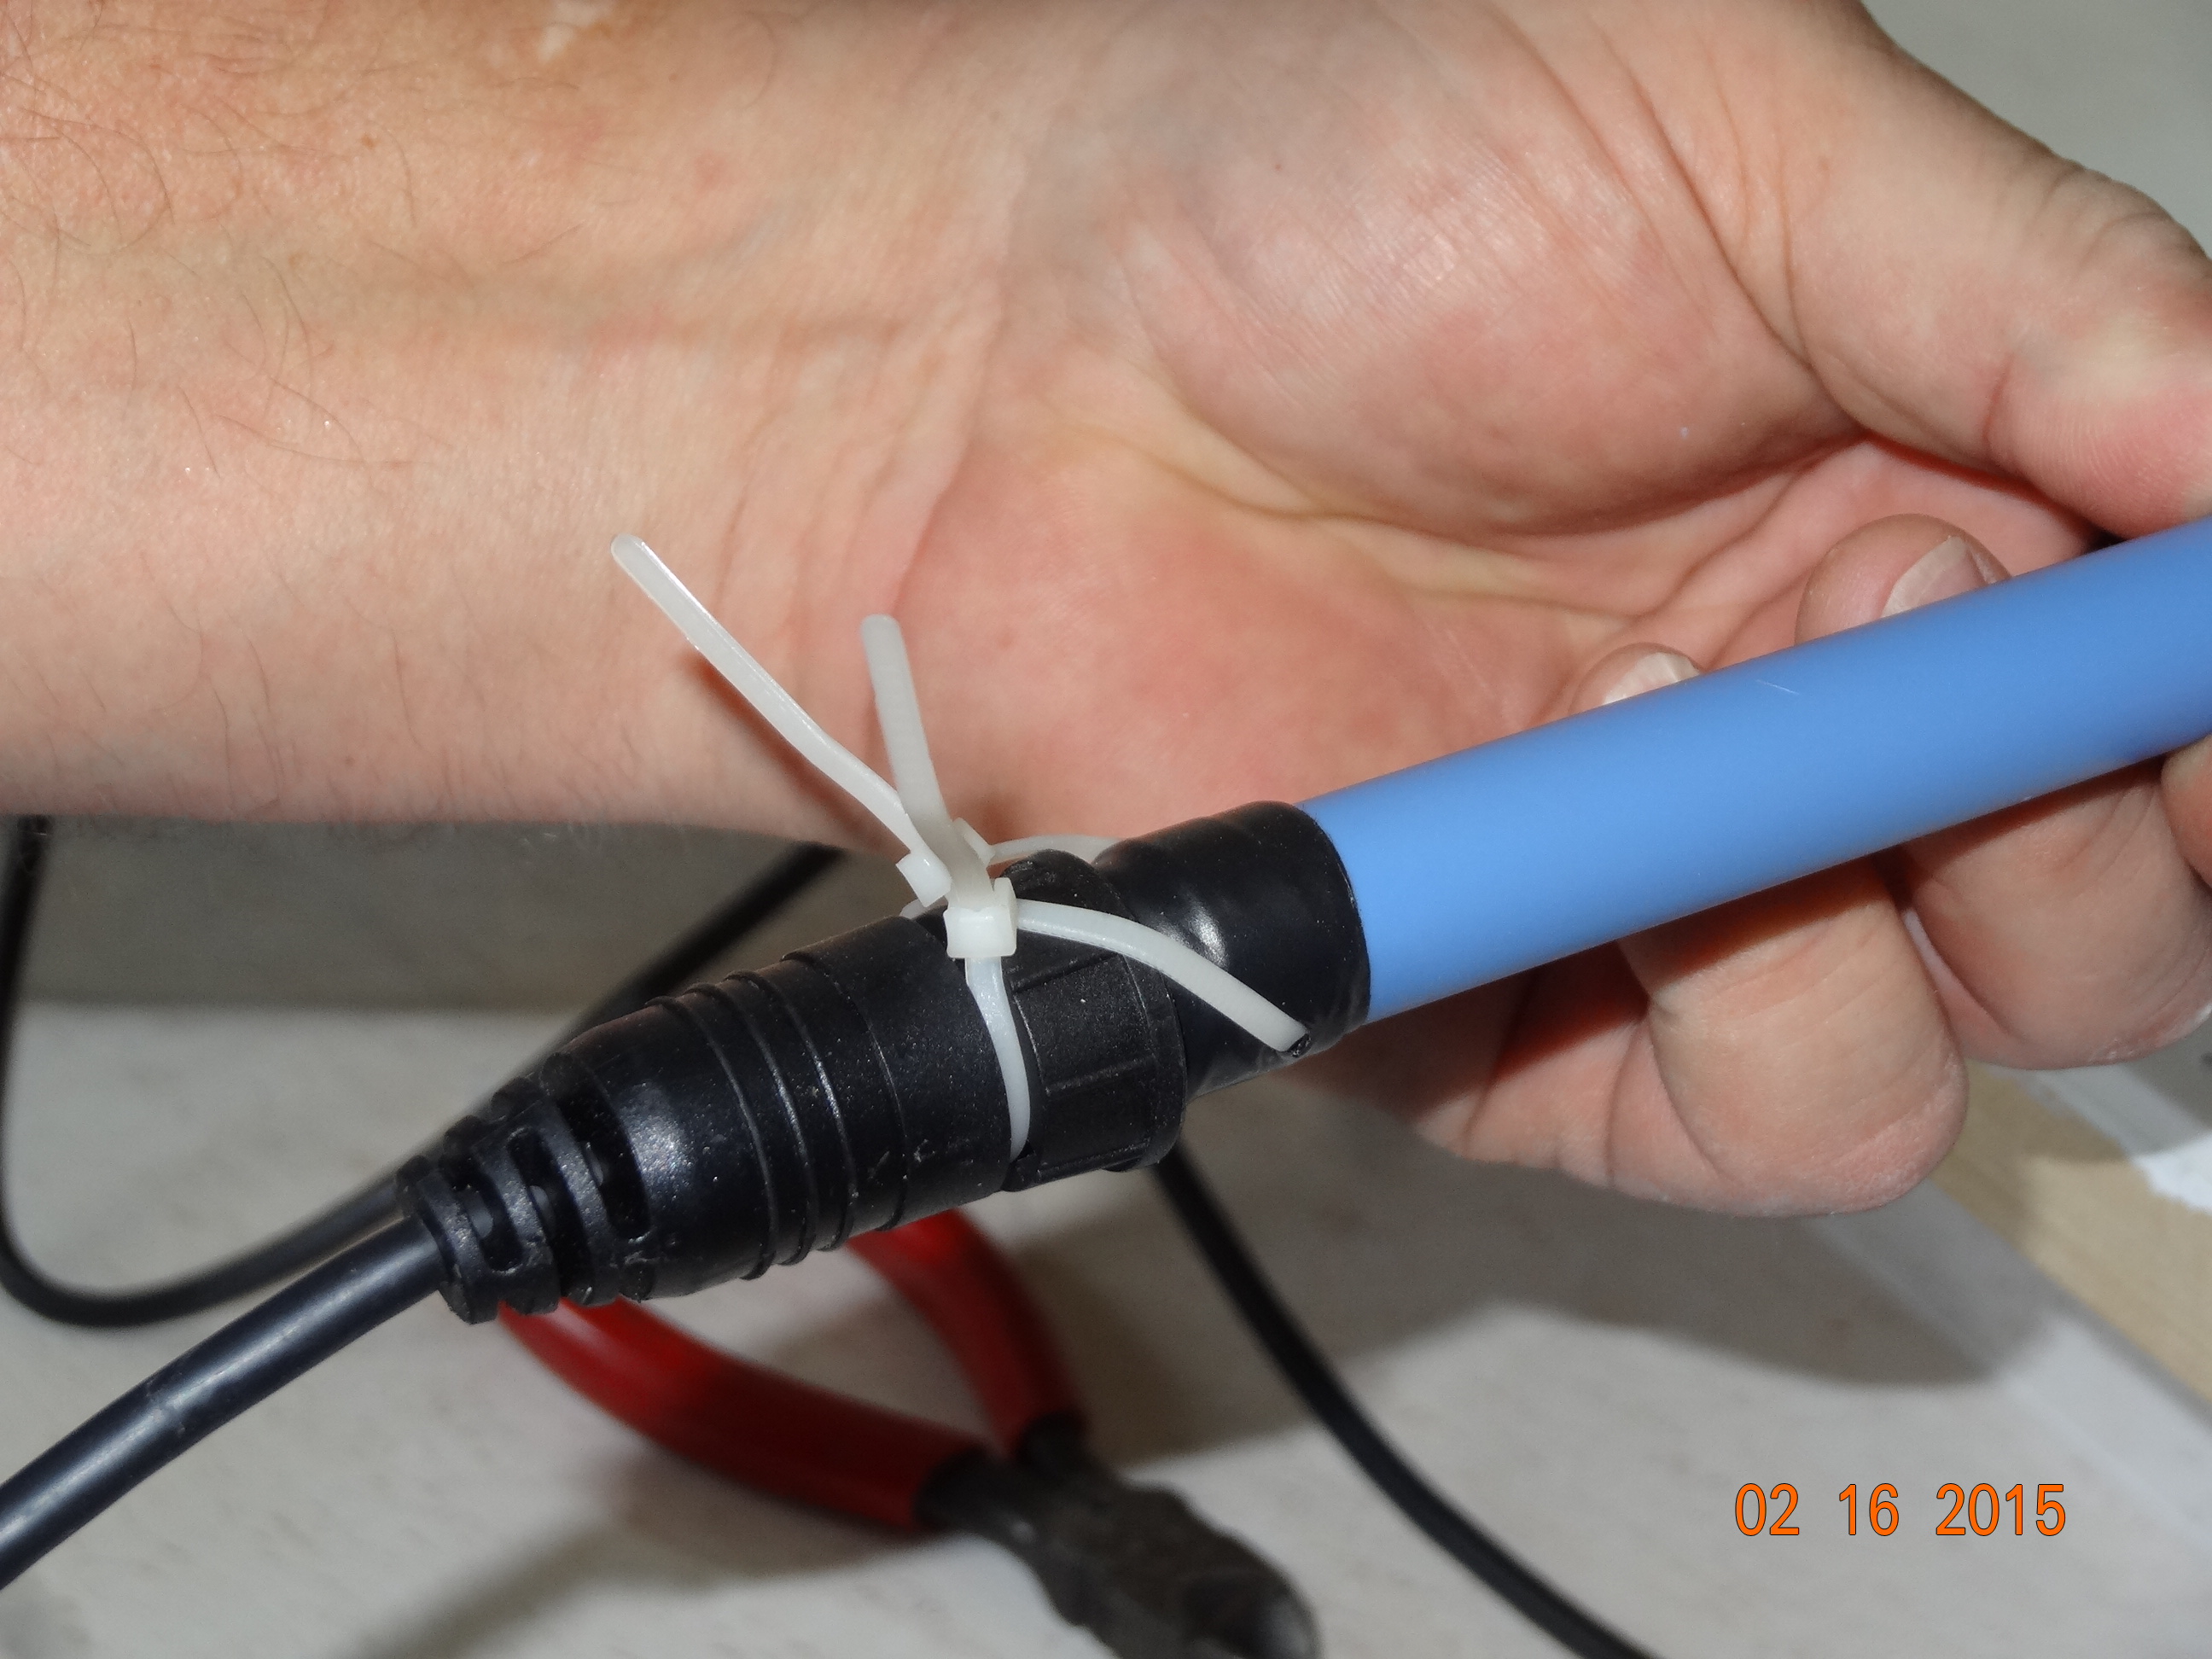
Good and strong

Ok, ready to pull thru
And we were ready to go. He went up to the fly bridge and just pulled that cable right up. Whew, the hard part was over.
The next step was cutting a bigger hole for the new chart plotter. First you tape down your template
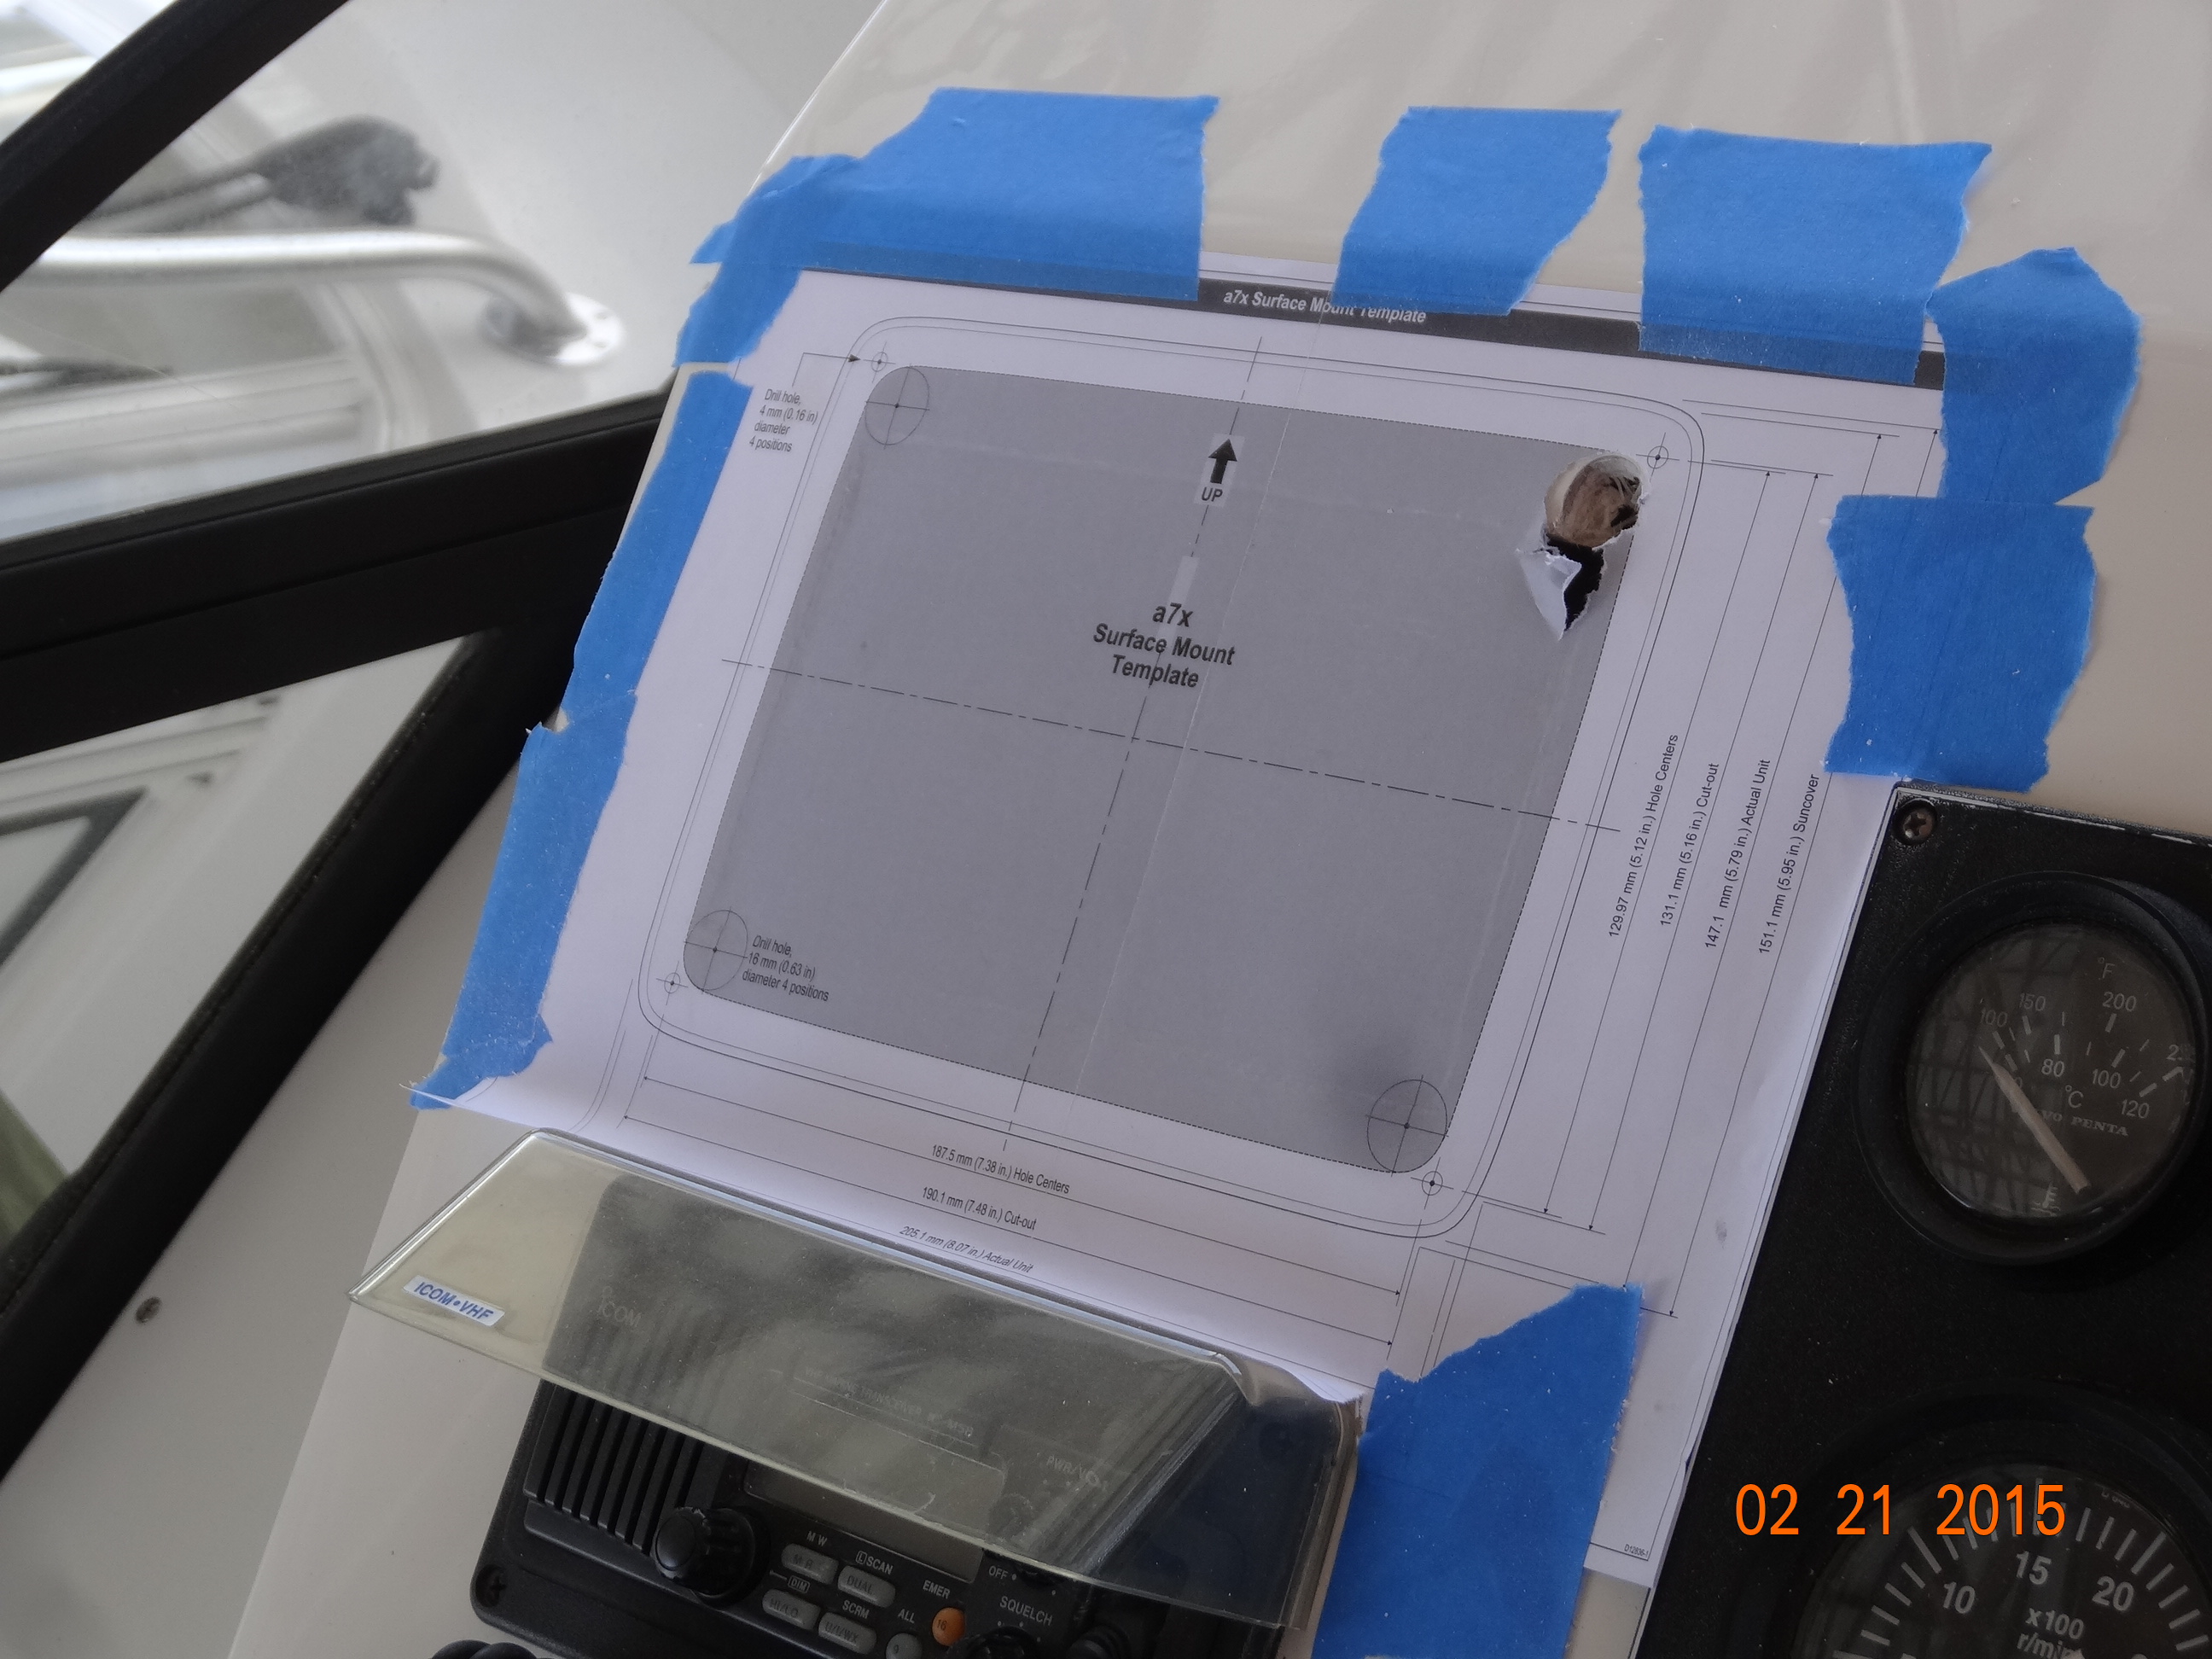
Tape down your template
Then you drill holes in the corners so you skill saw can have some place to start
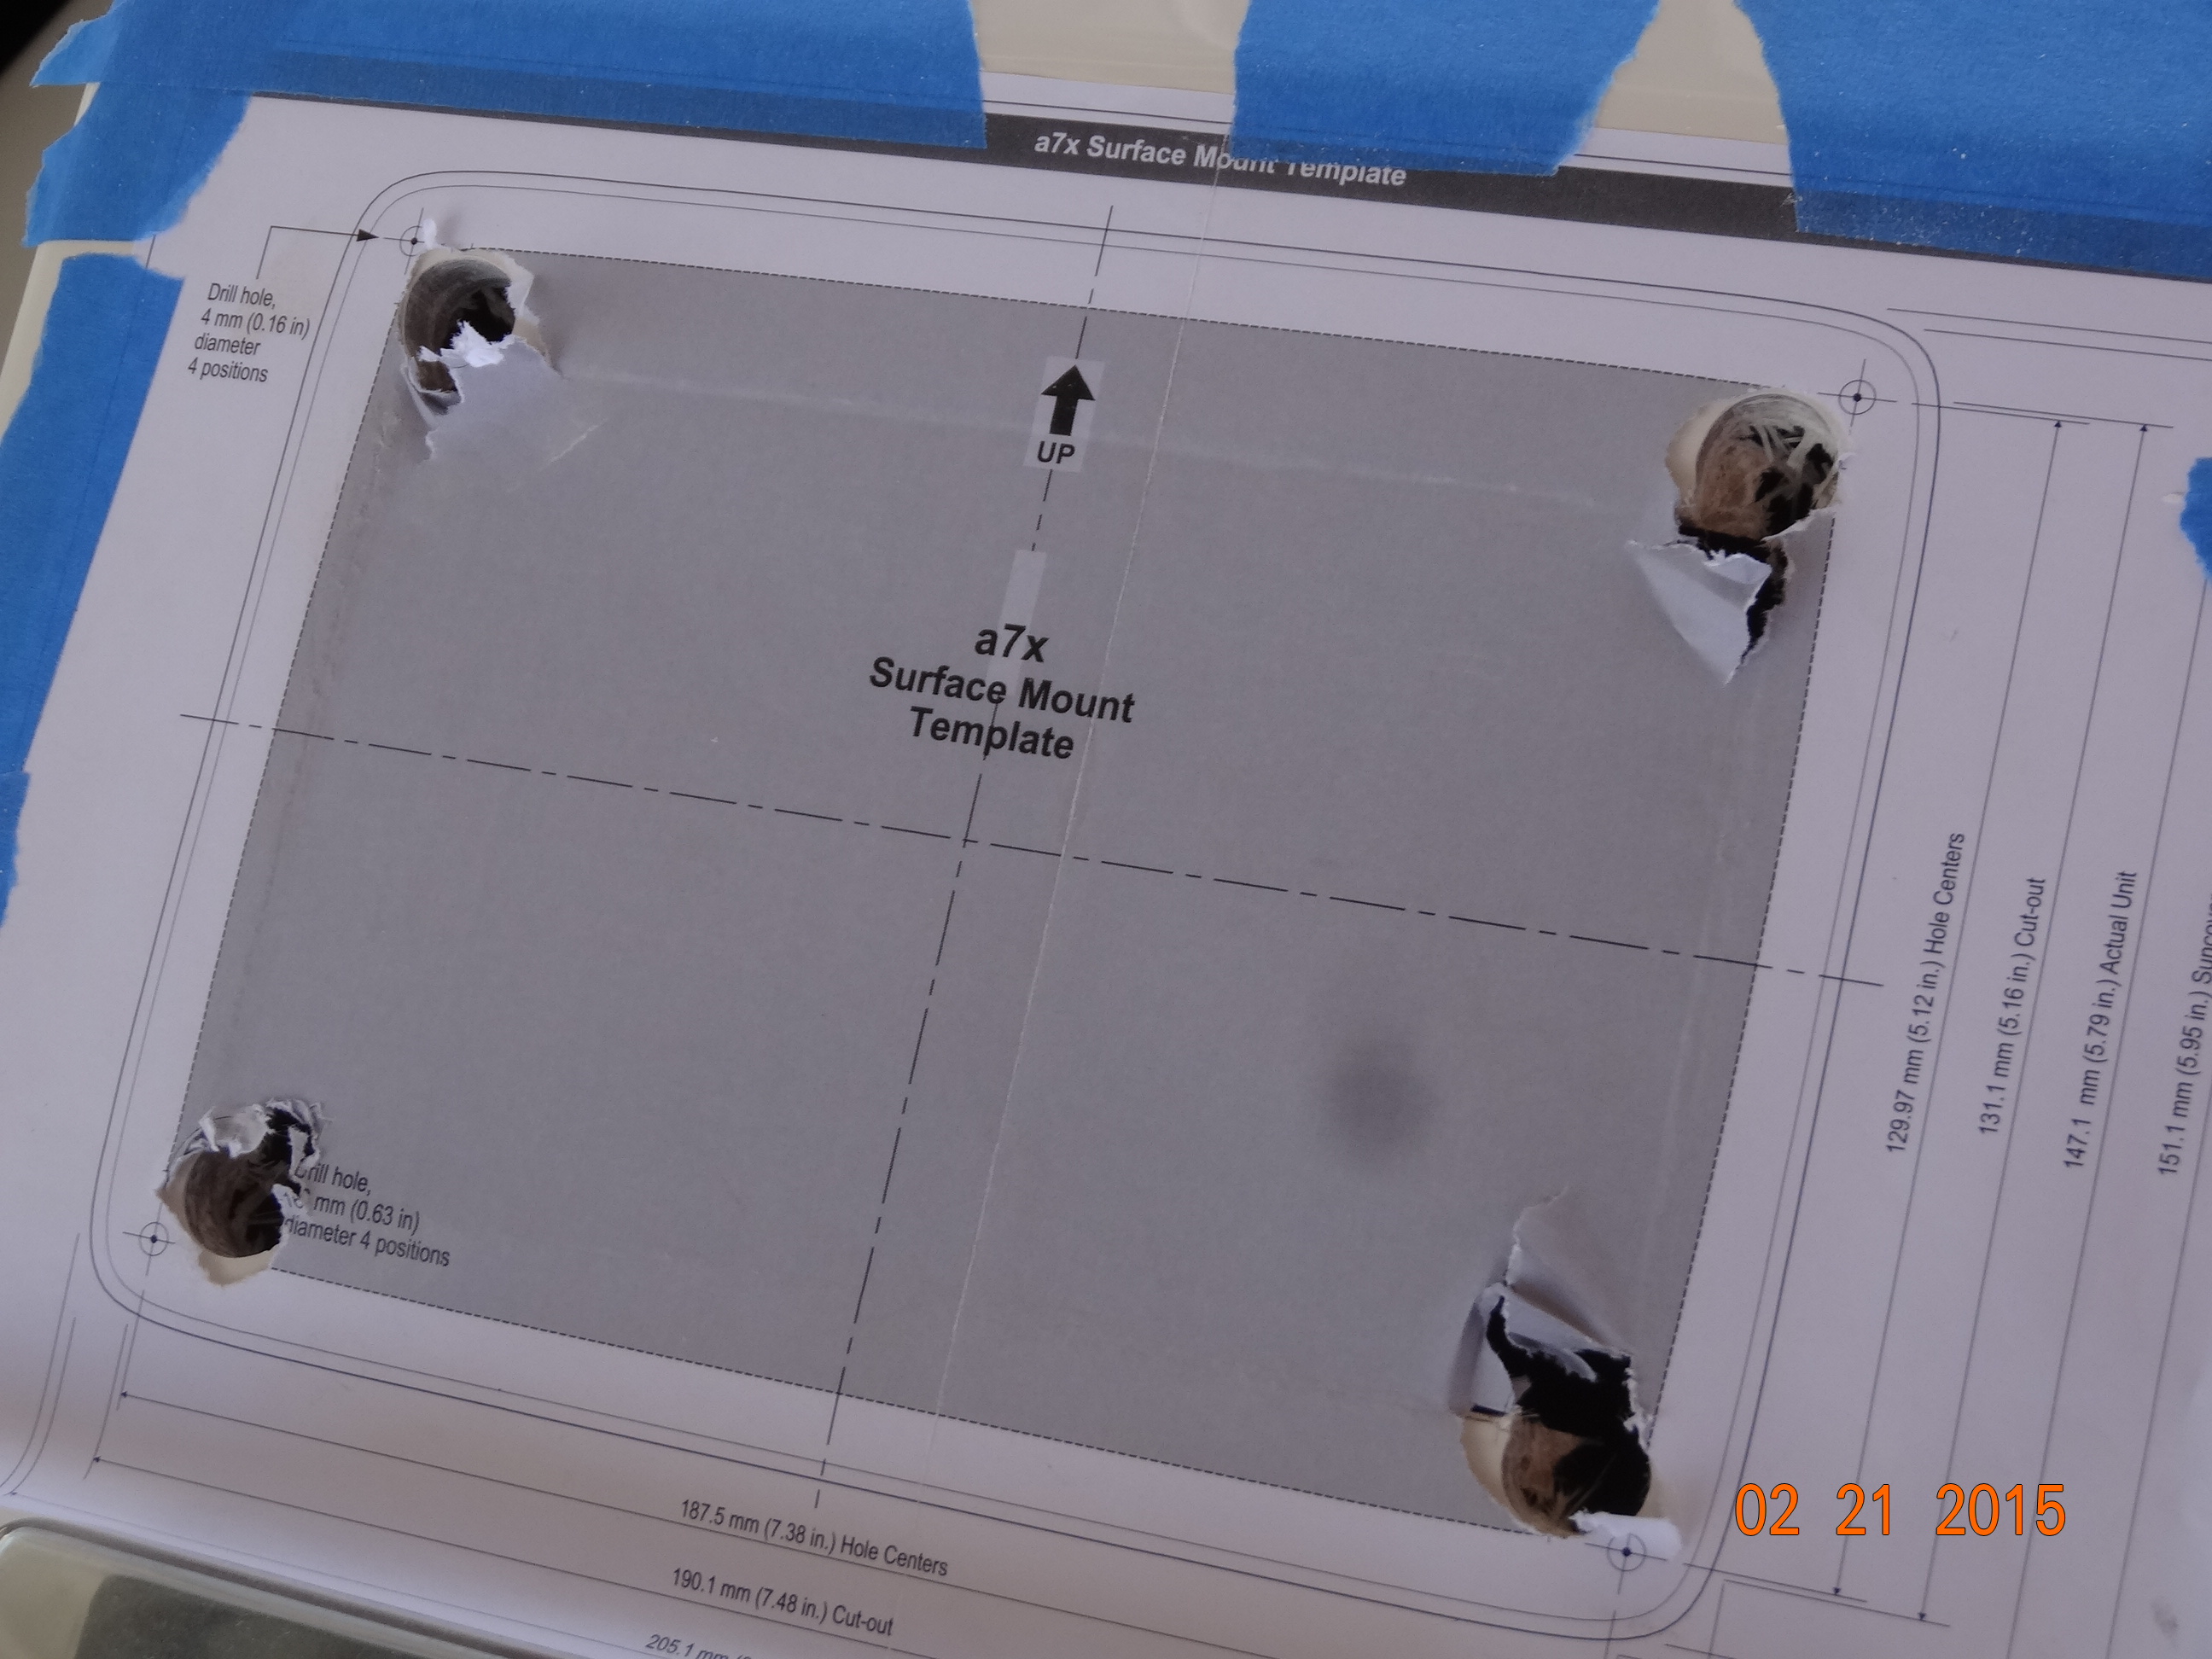
Drill holes in the corners
Then you just follow the lines with your skill saw and cut out the hole.
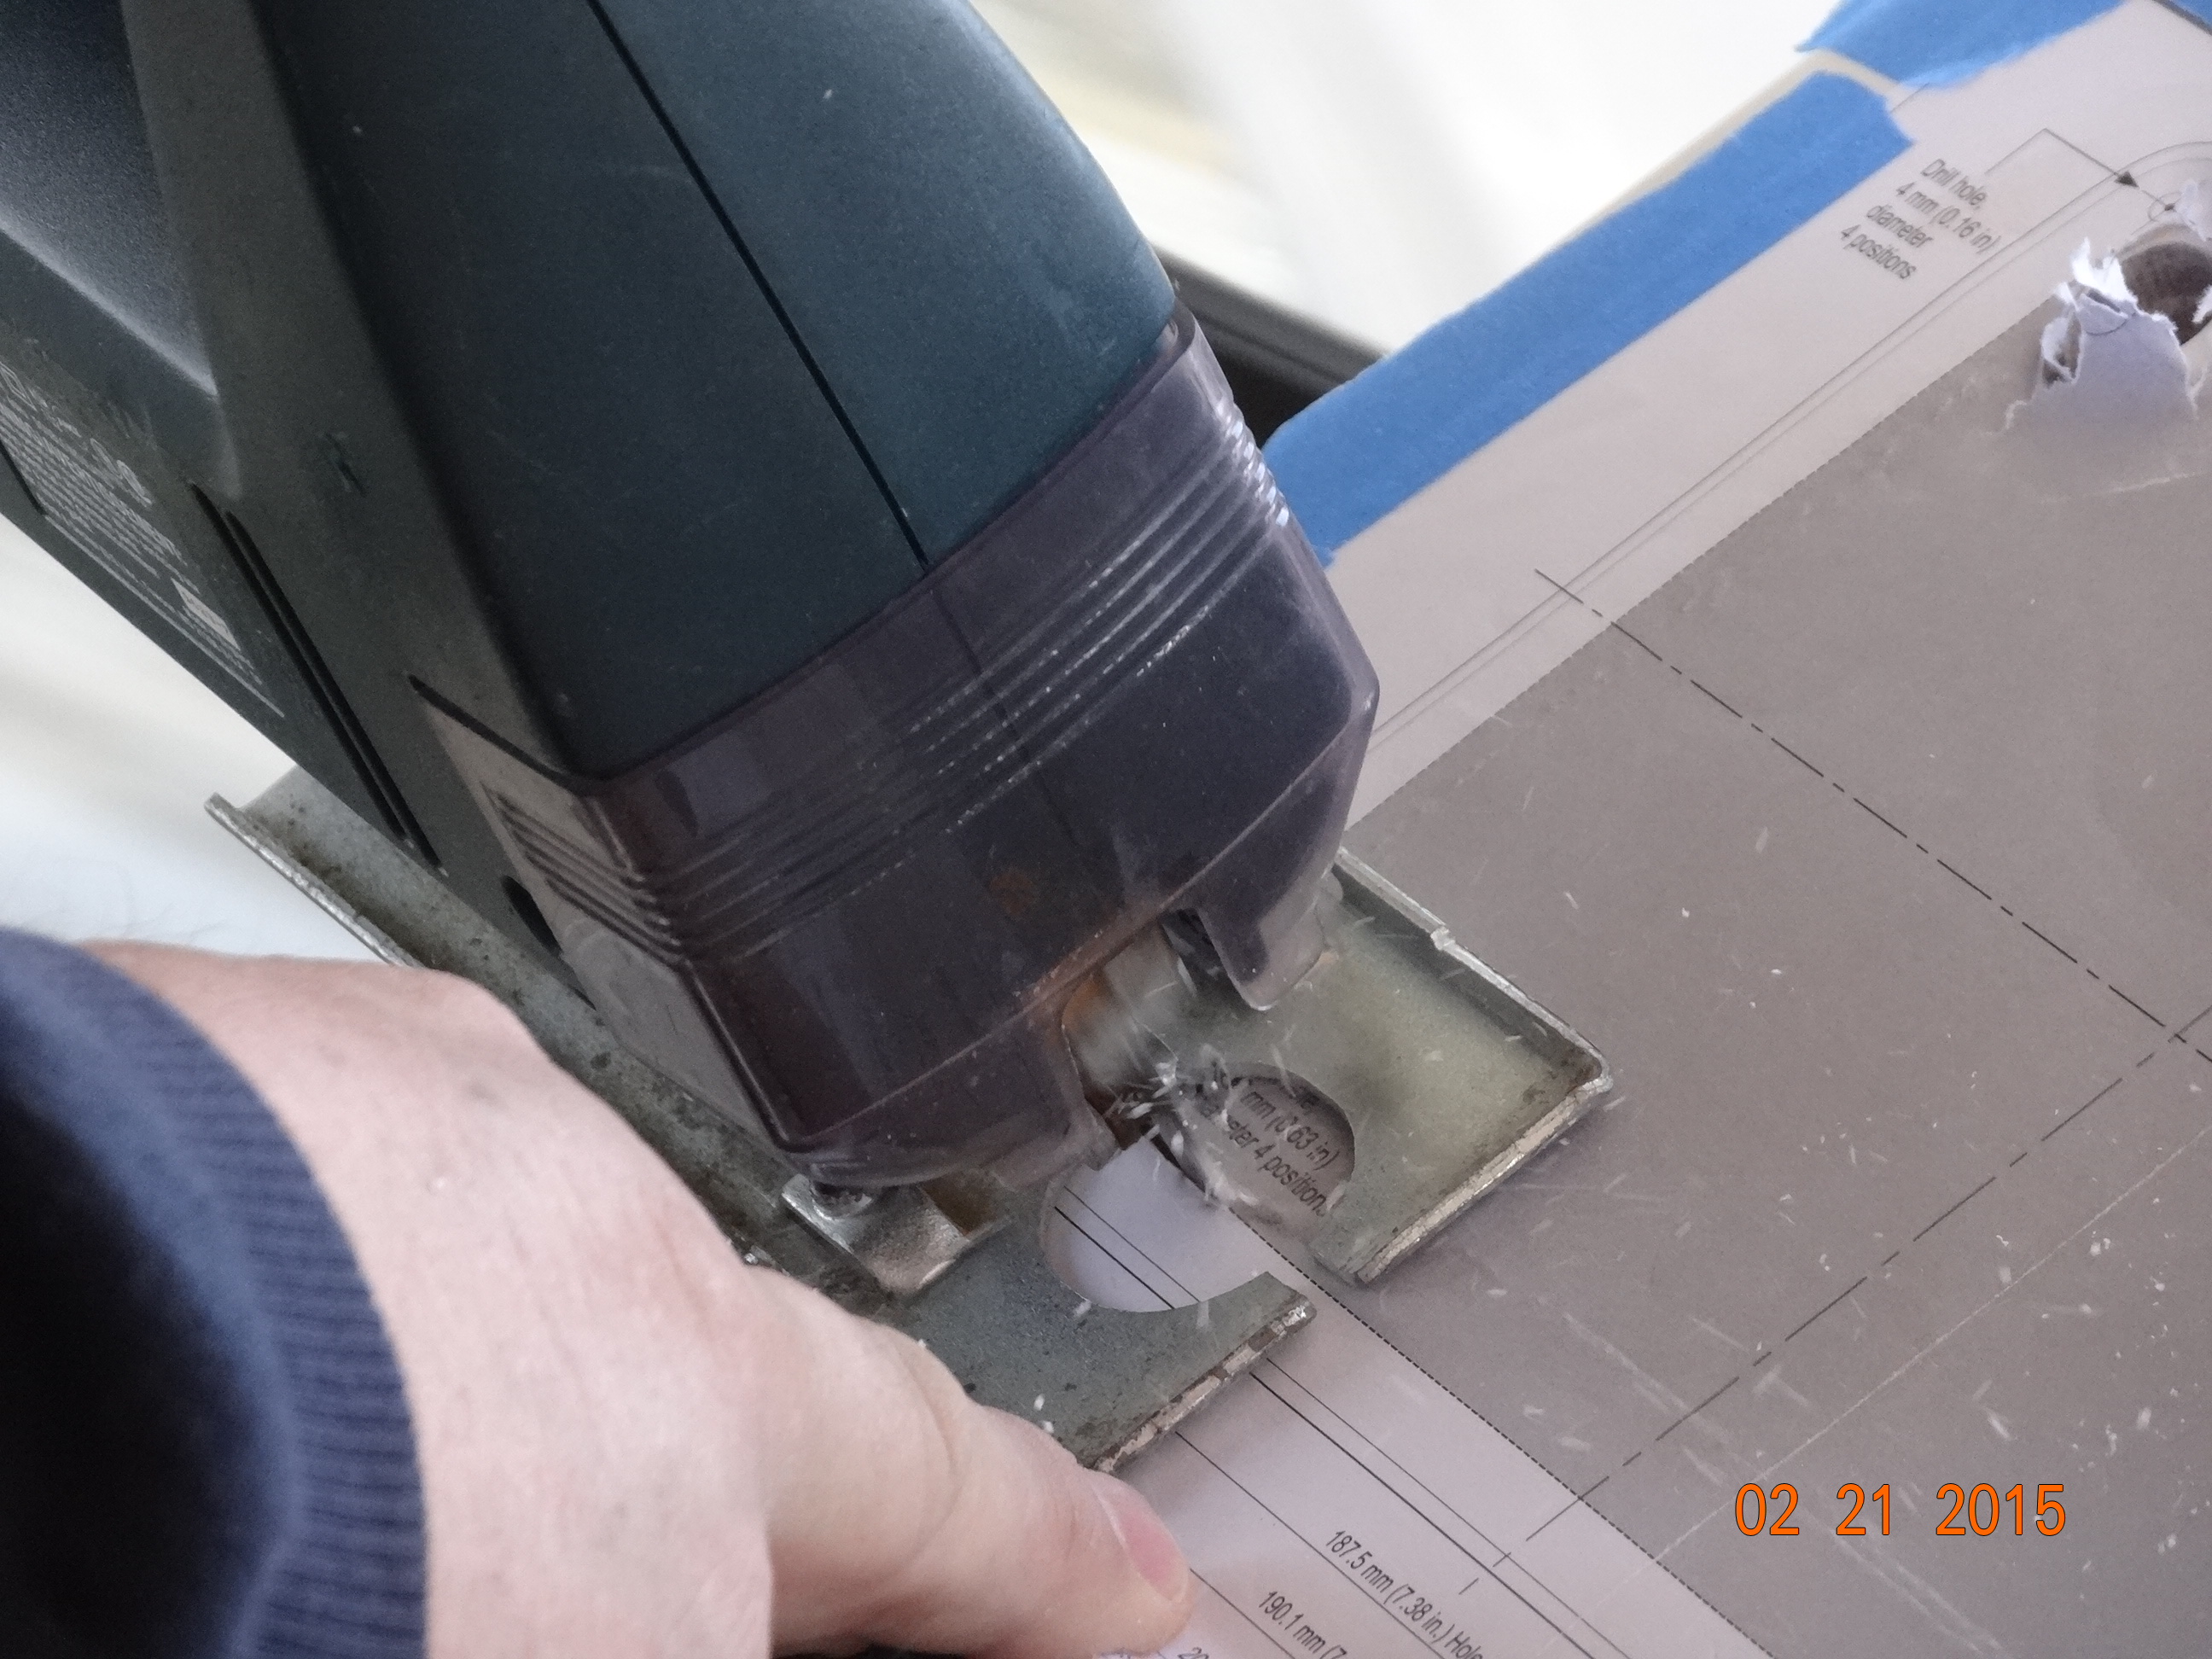
Be sure to follow the lines
Then, wa-la! You have a hole
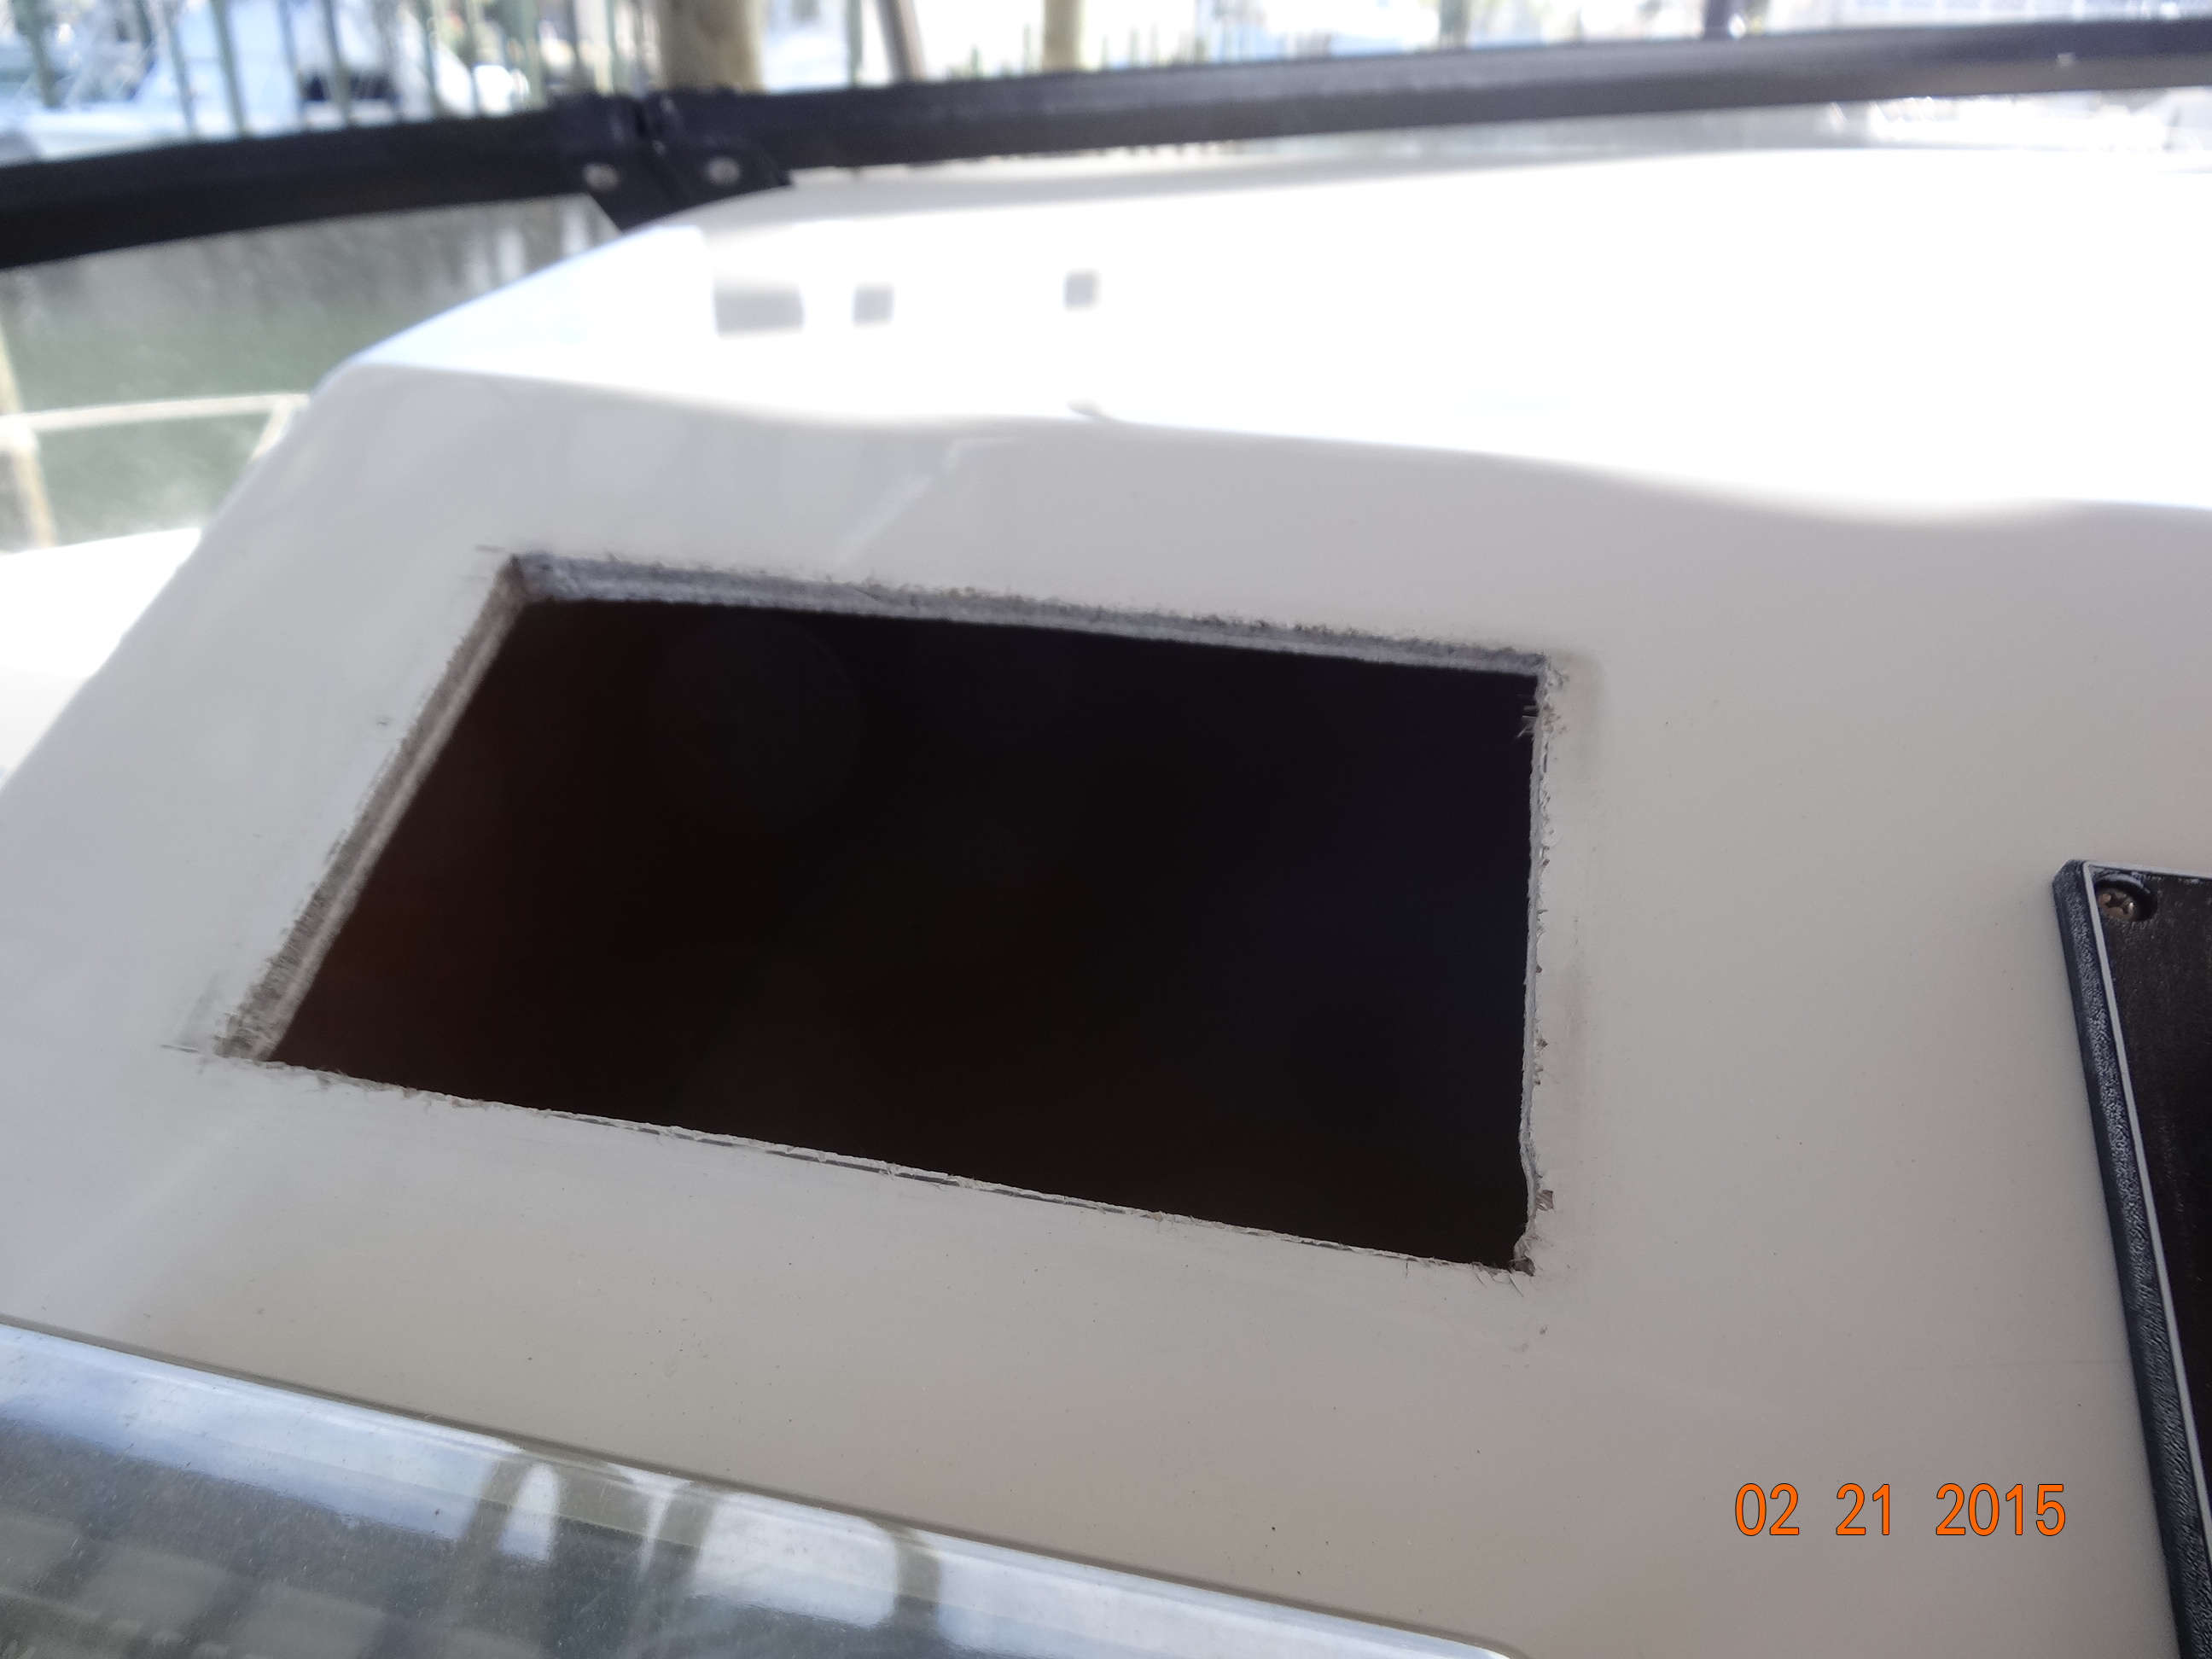
Hope it is the right size 🙂
Then you carefully set the chart plotter in the hole and pray it doesn’t fall thru 🙂
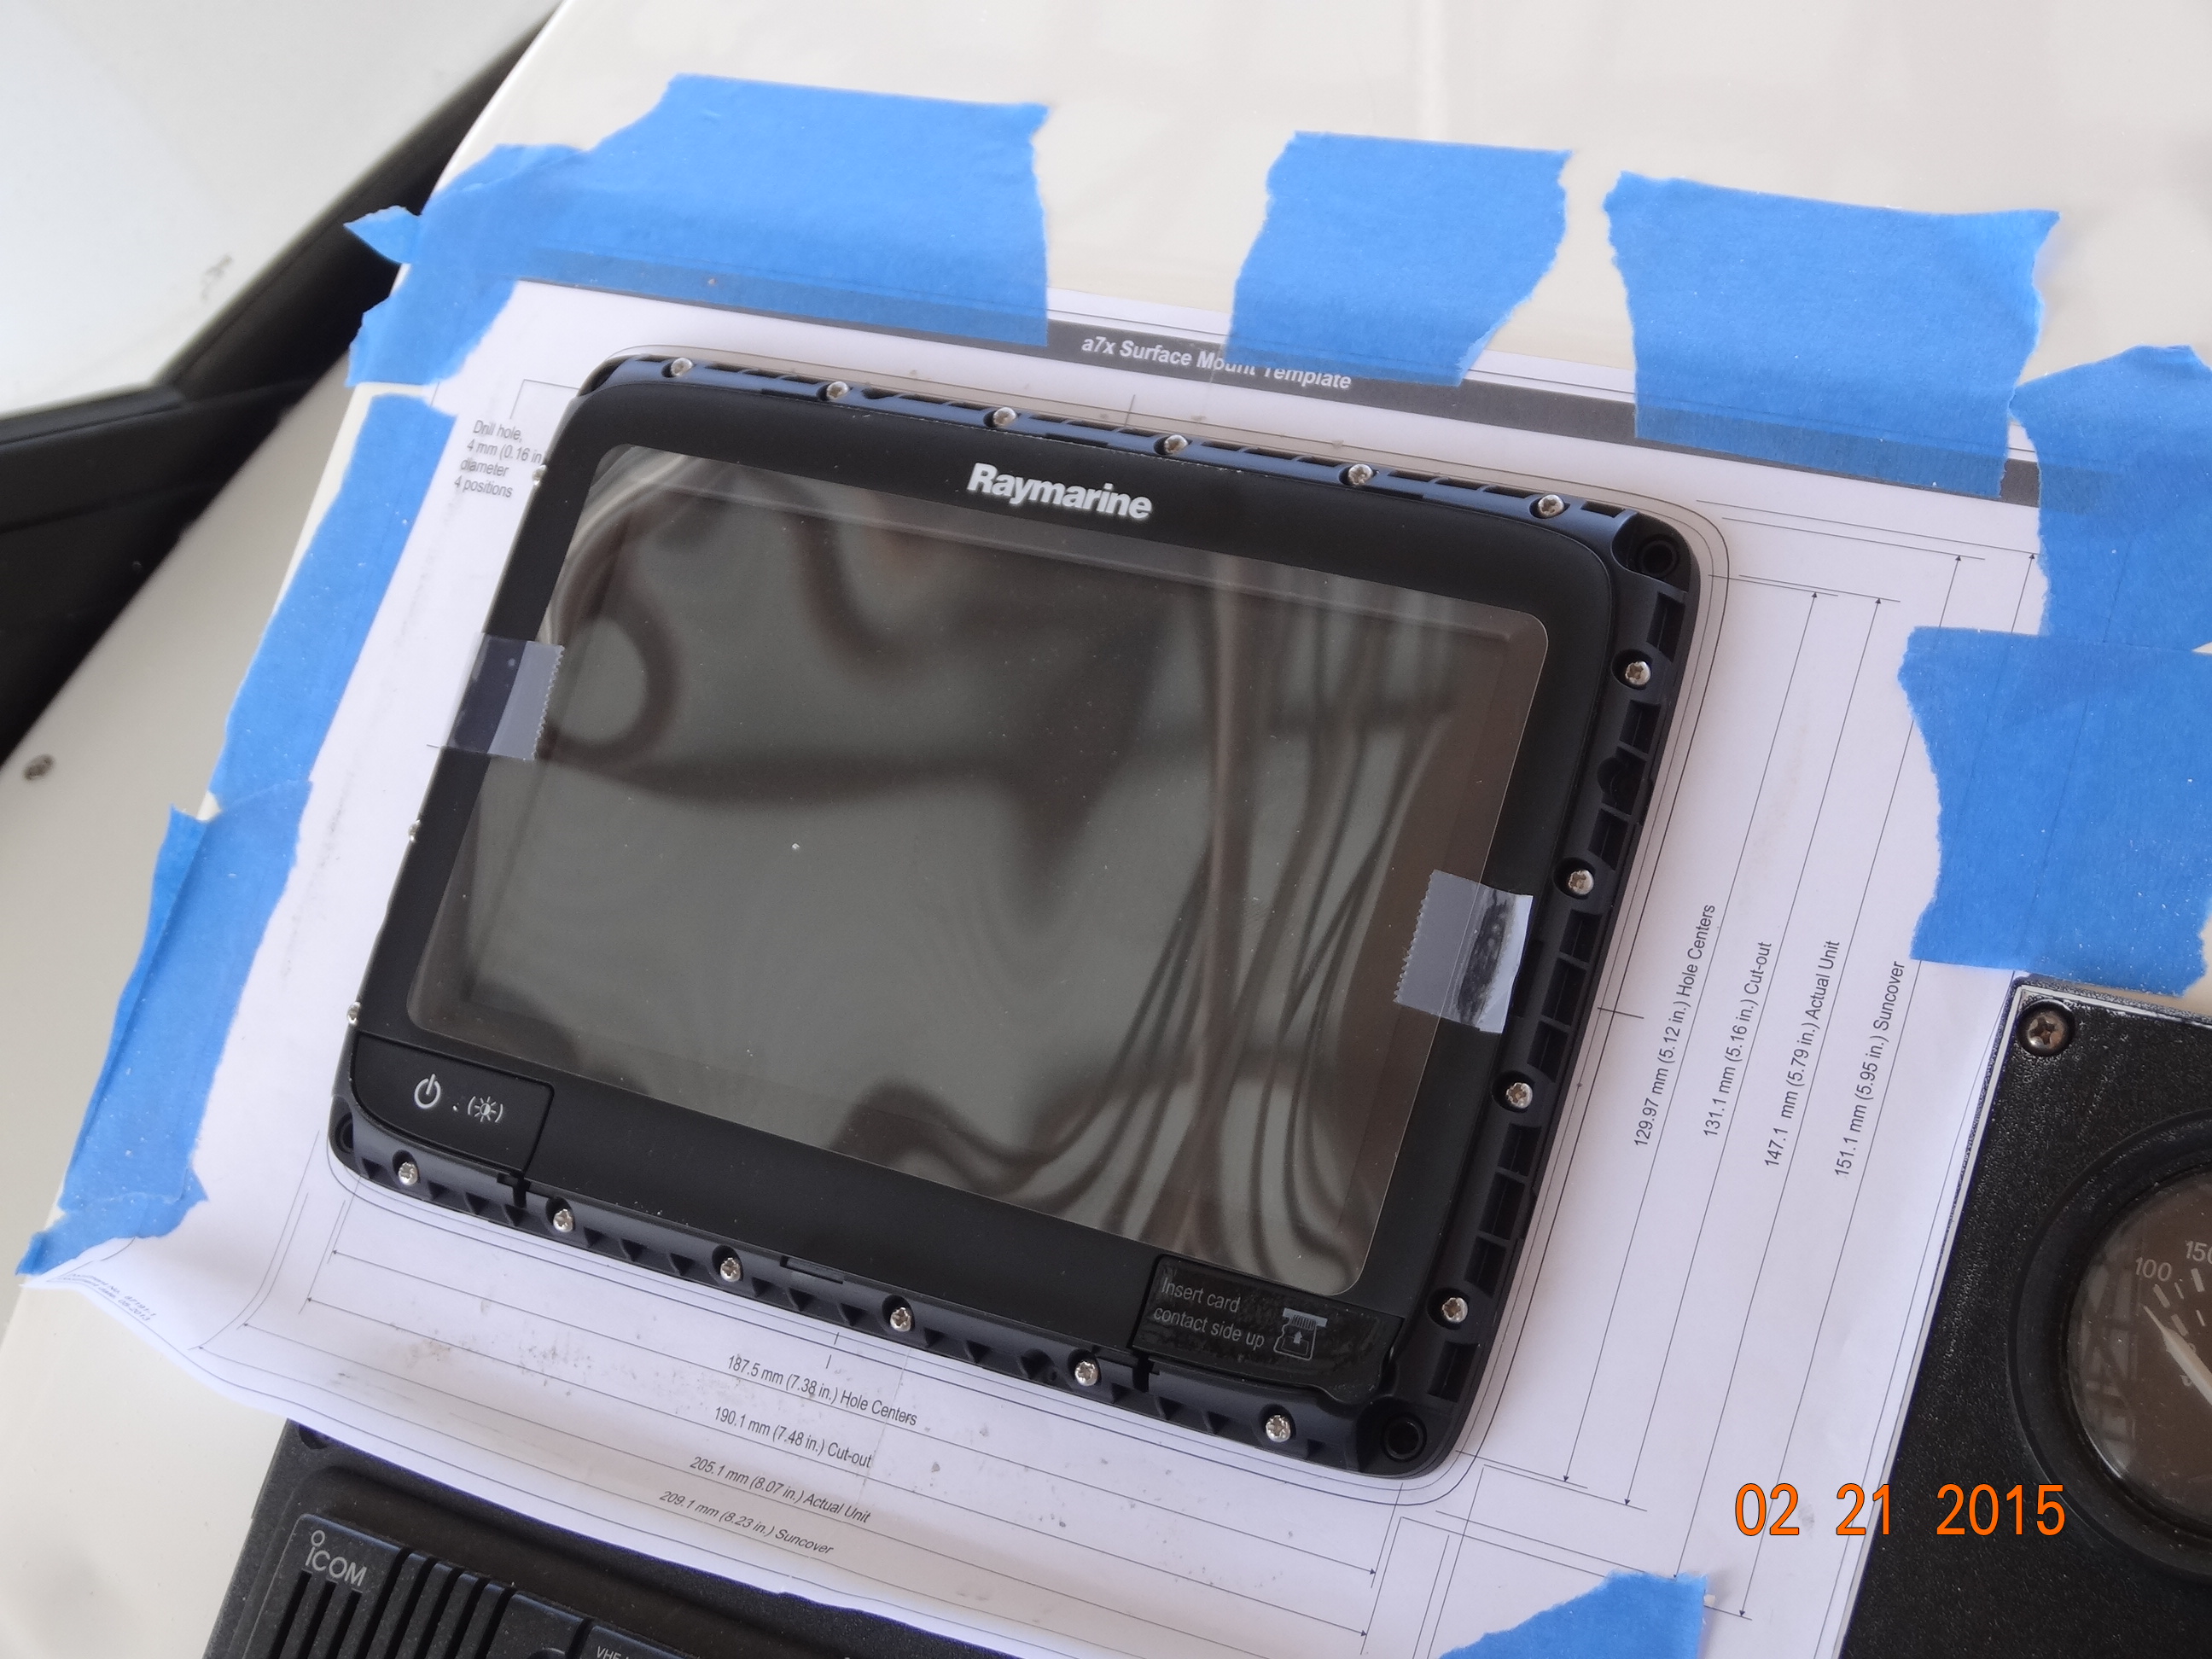
Whoopie!
Good! It fits, and looks so professional 😉
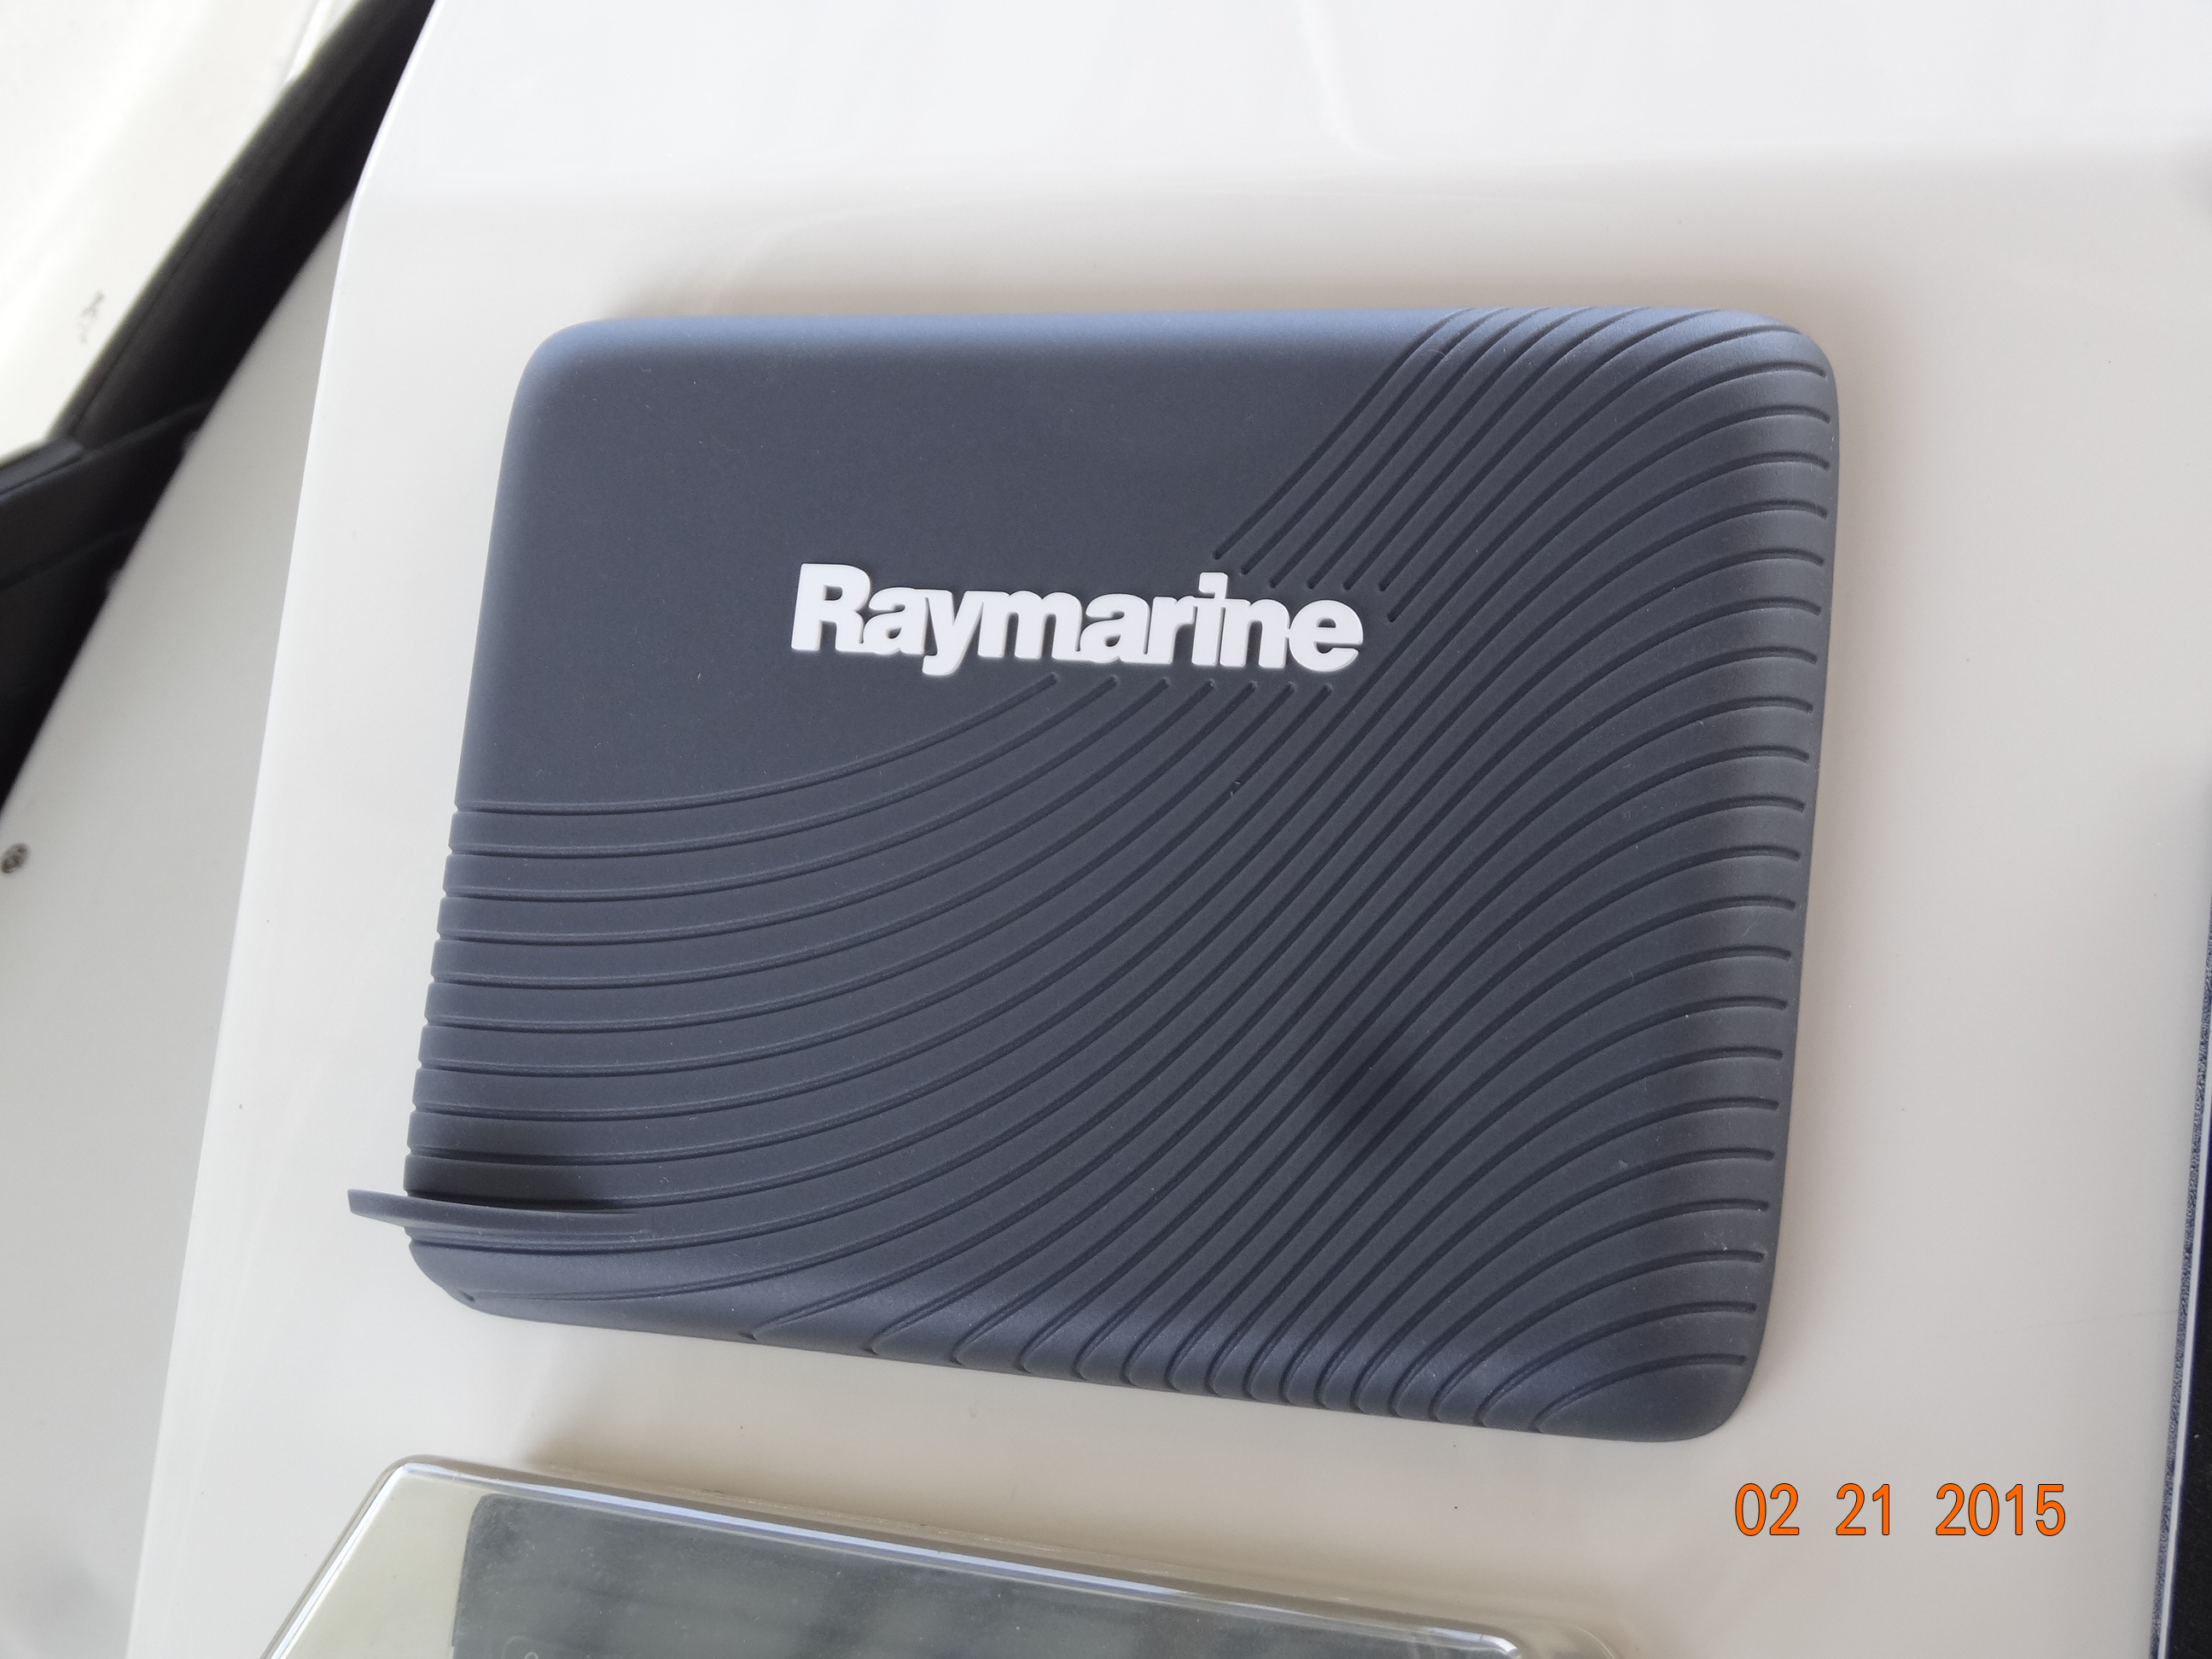
cover
Nice cover
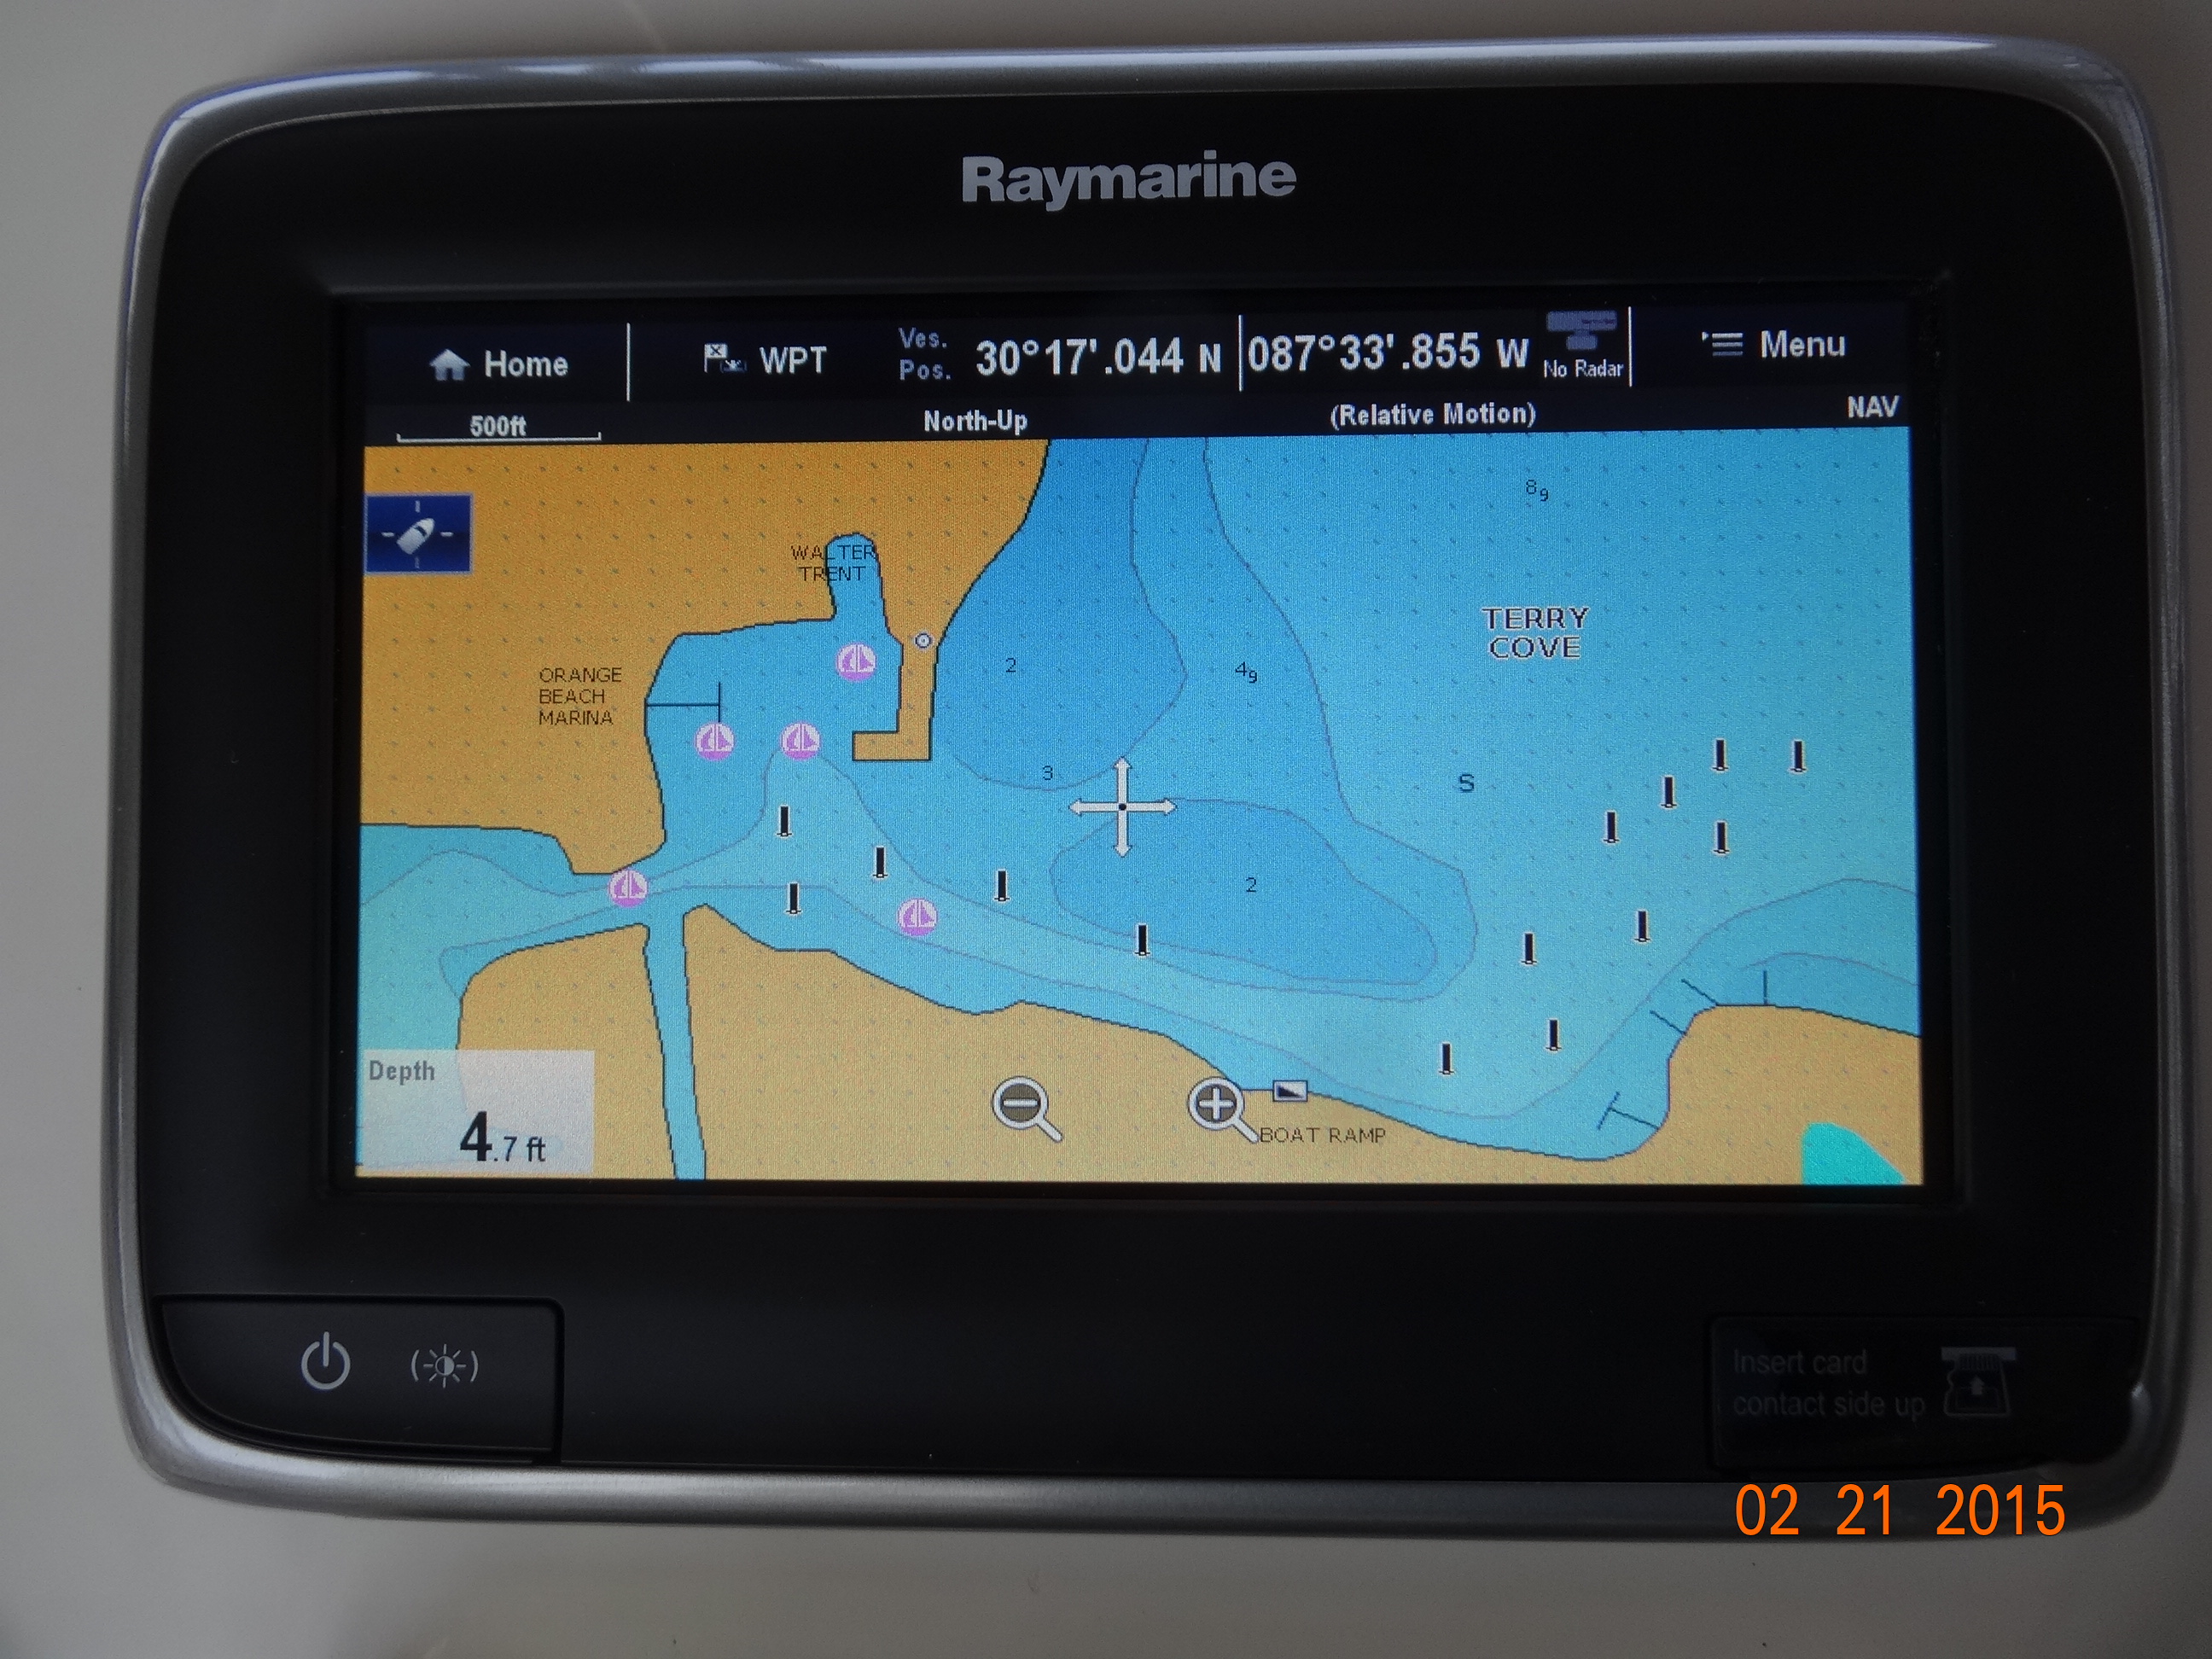
It works!
Plug it in…..and it works. Nice job!
Some more money saved by having Captain Gary install and fix things, thanks Captain!
Pulling and Replacing Zincs
Zincs? There are zincs in my engine? What the heck are they for and where are they located? A zinc is like a sacrificial lamb. Instead of the metal in your heat exchanger or your transmission oil cooler being eaten away by electrolysis, the zinc gets eaten. What is electrolysis you ask? Electrolysis is the result of electricity flowing through your cooling system and causing an electrochemical charge across the aluminum. This results in rapid corrosion and severe damage to the components in your cooling system including discoloration, pitting, flaking, and pinholes. Pretty smart huh? Hee hee, I got that from the internet :).
I am sure you know about the zincs you might have on your boat’s shafts, trim tabs, the back of boat and/or on the bow thruster. If you don’t, maybe you should check for them next time your boat is pulled :). We are having our external ones checked and changed as soon as we have the boat pulled for repairs in the next day or so. We have some leakage at the trim tabs and at the hydraulic steering cylinder they are going to fix. Leaks on a boat are a bad thing. One should get them fixed right away. Makes for more carefree boating.
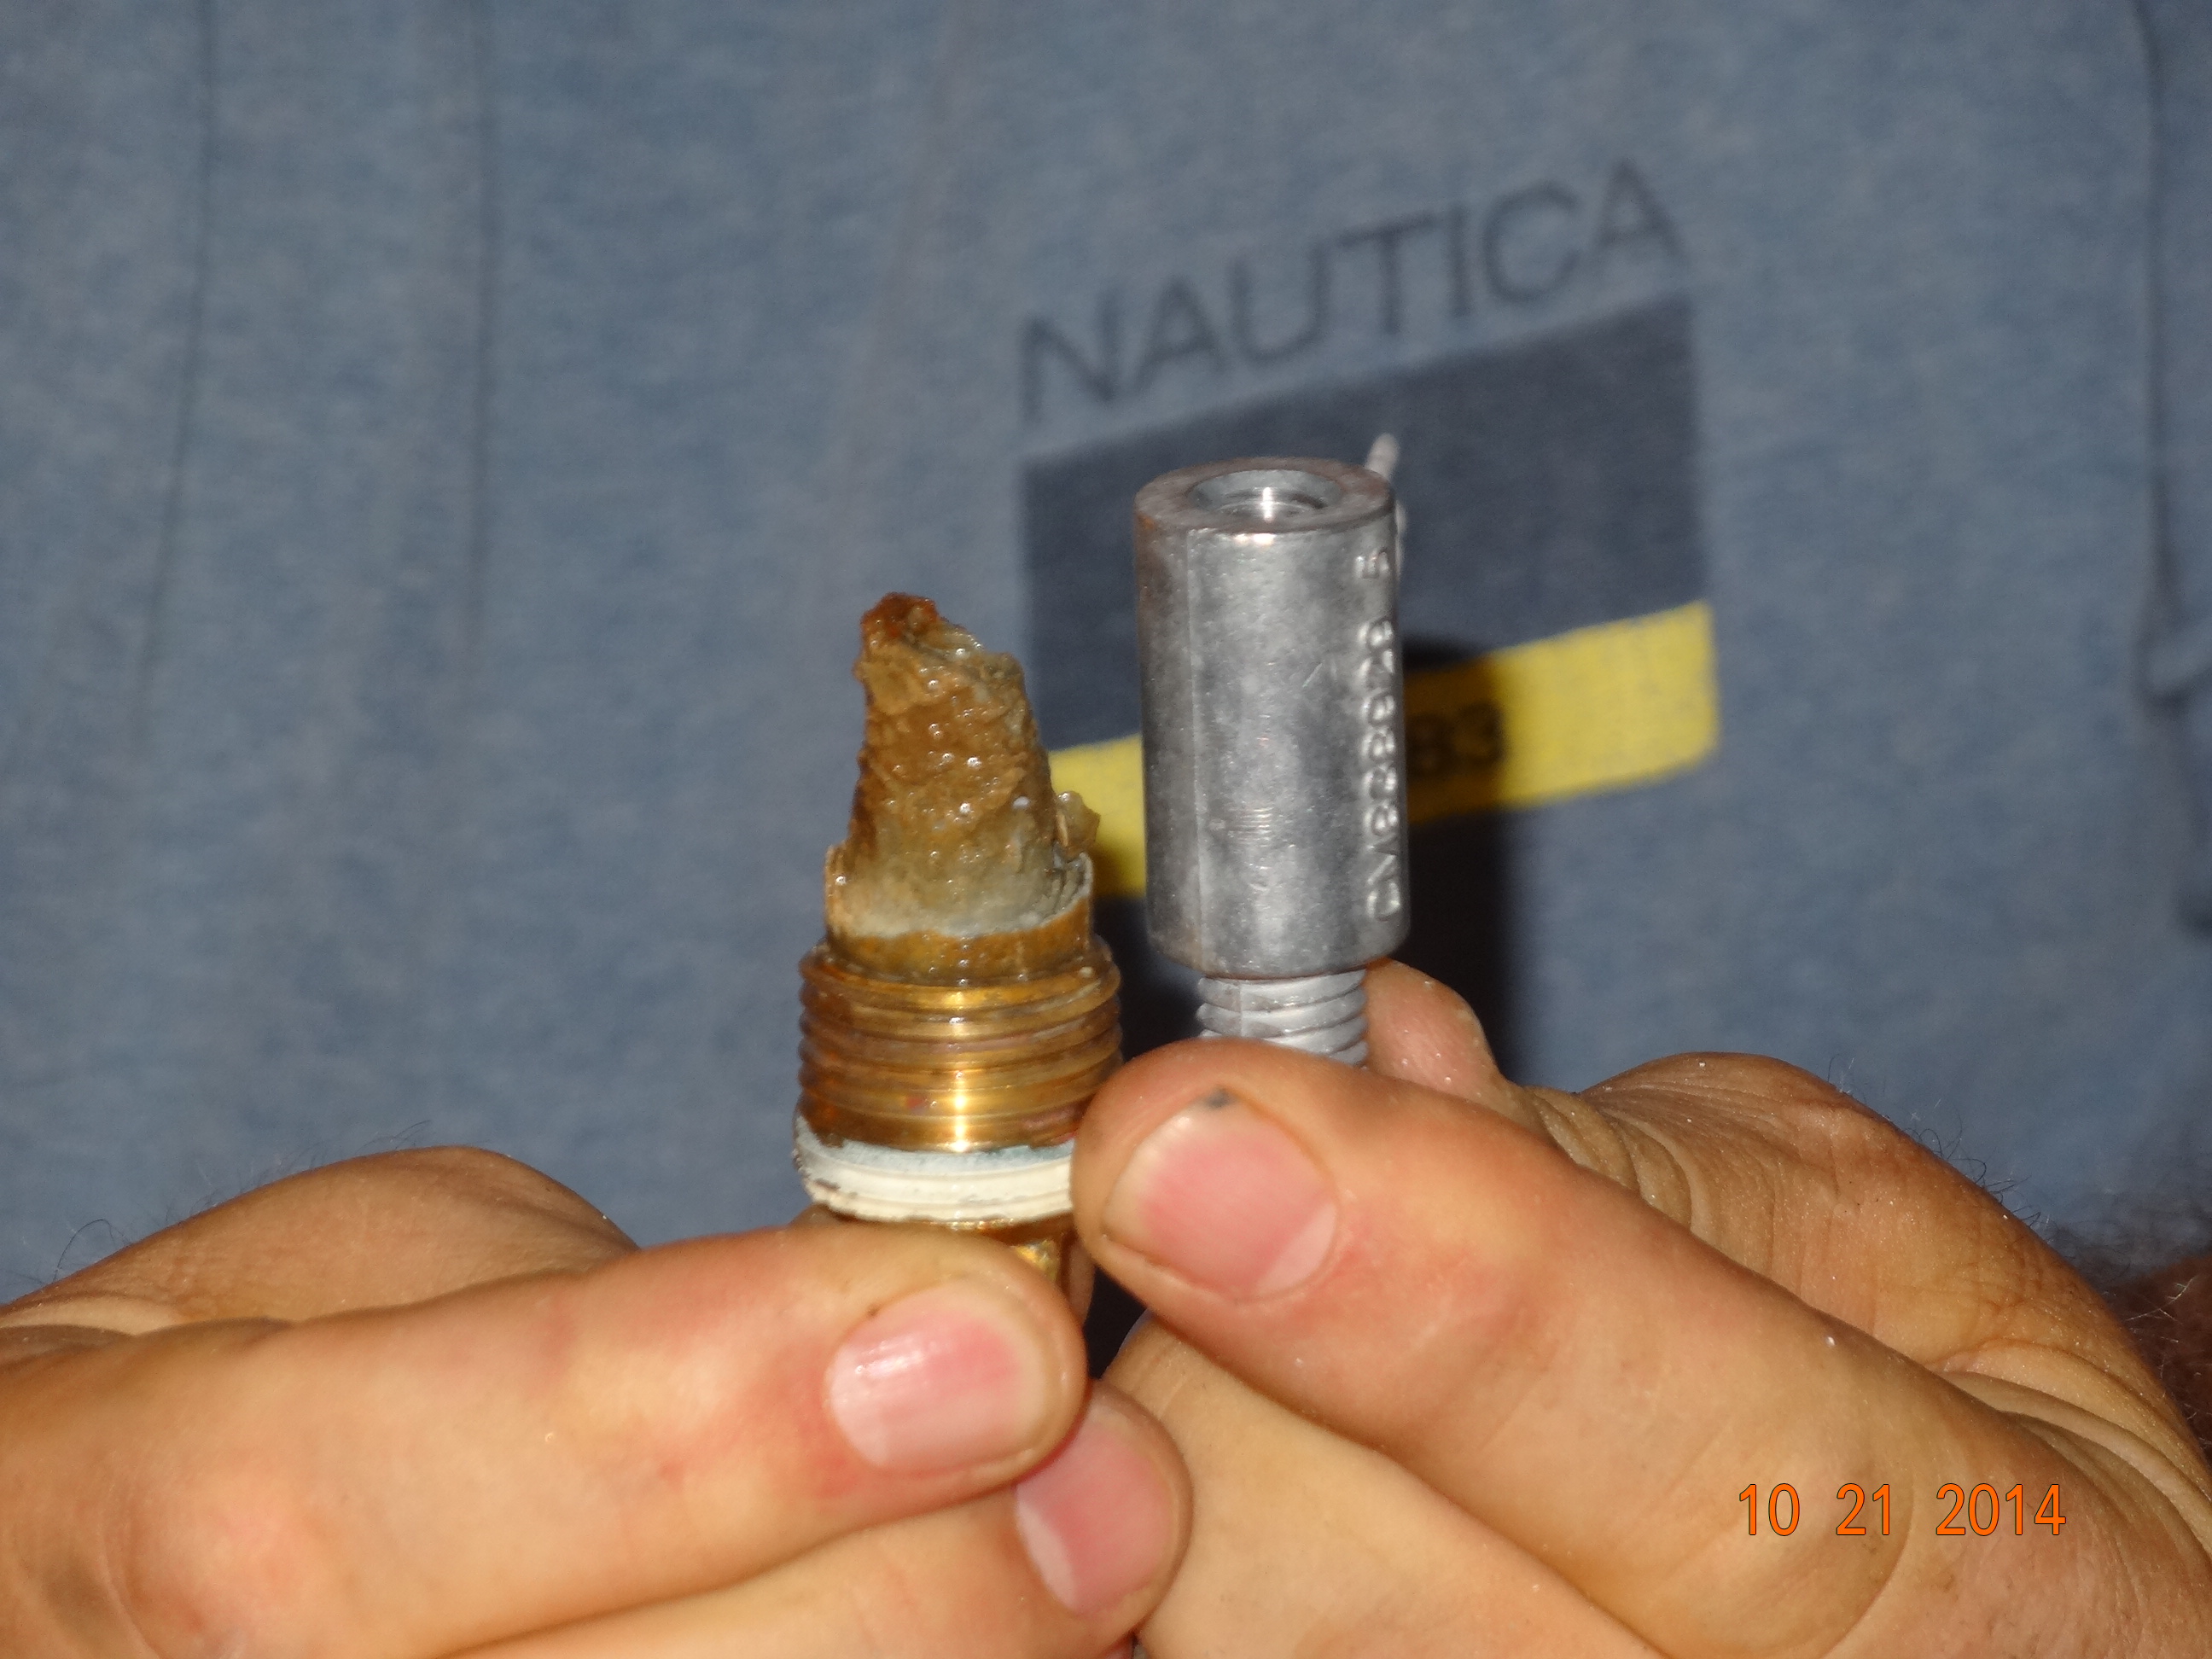
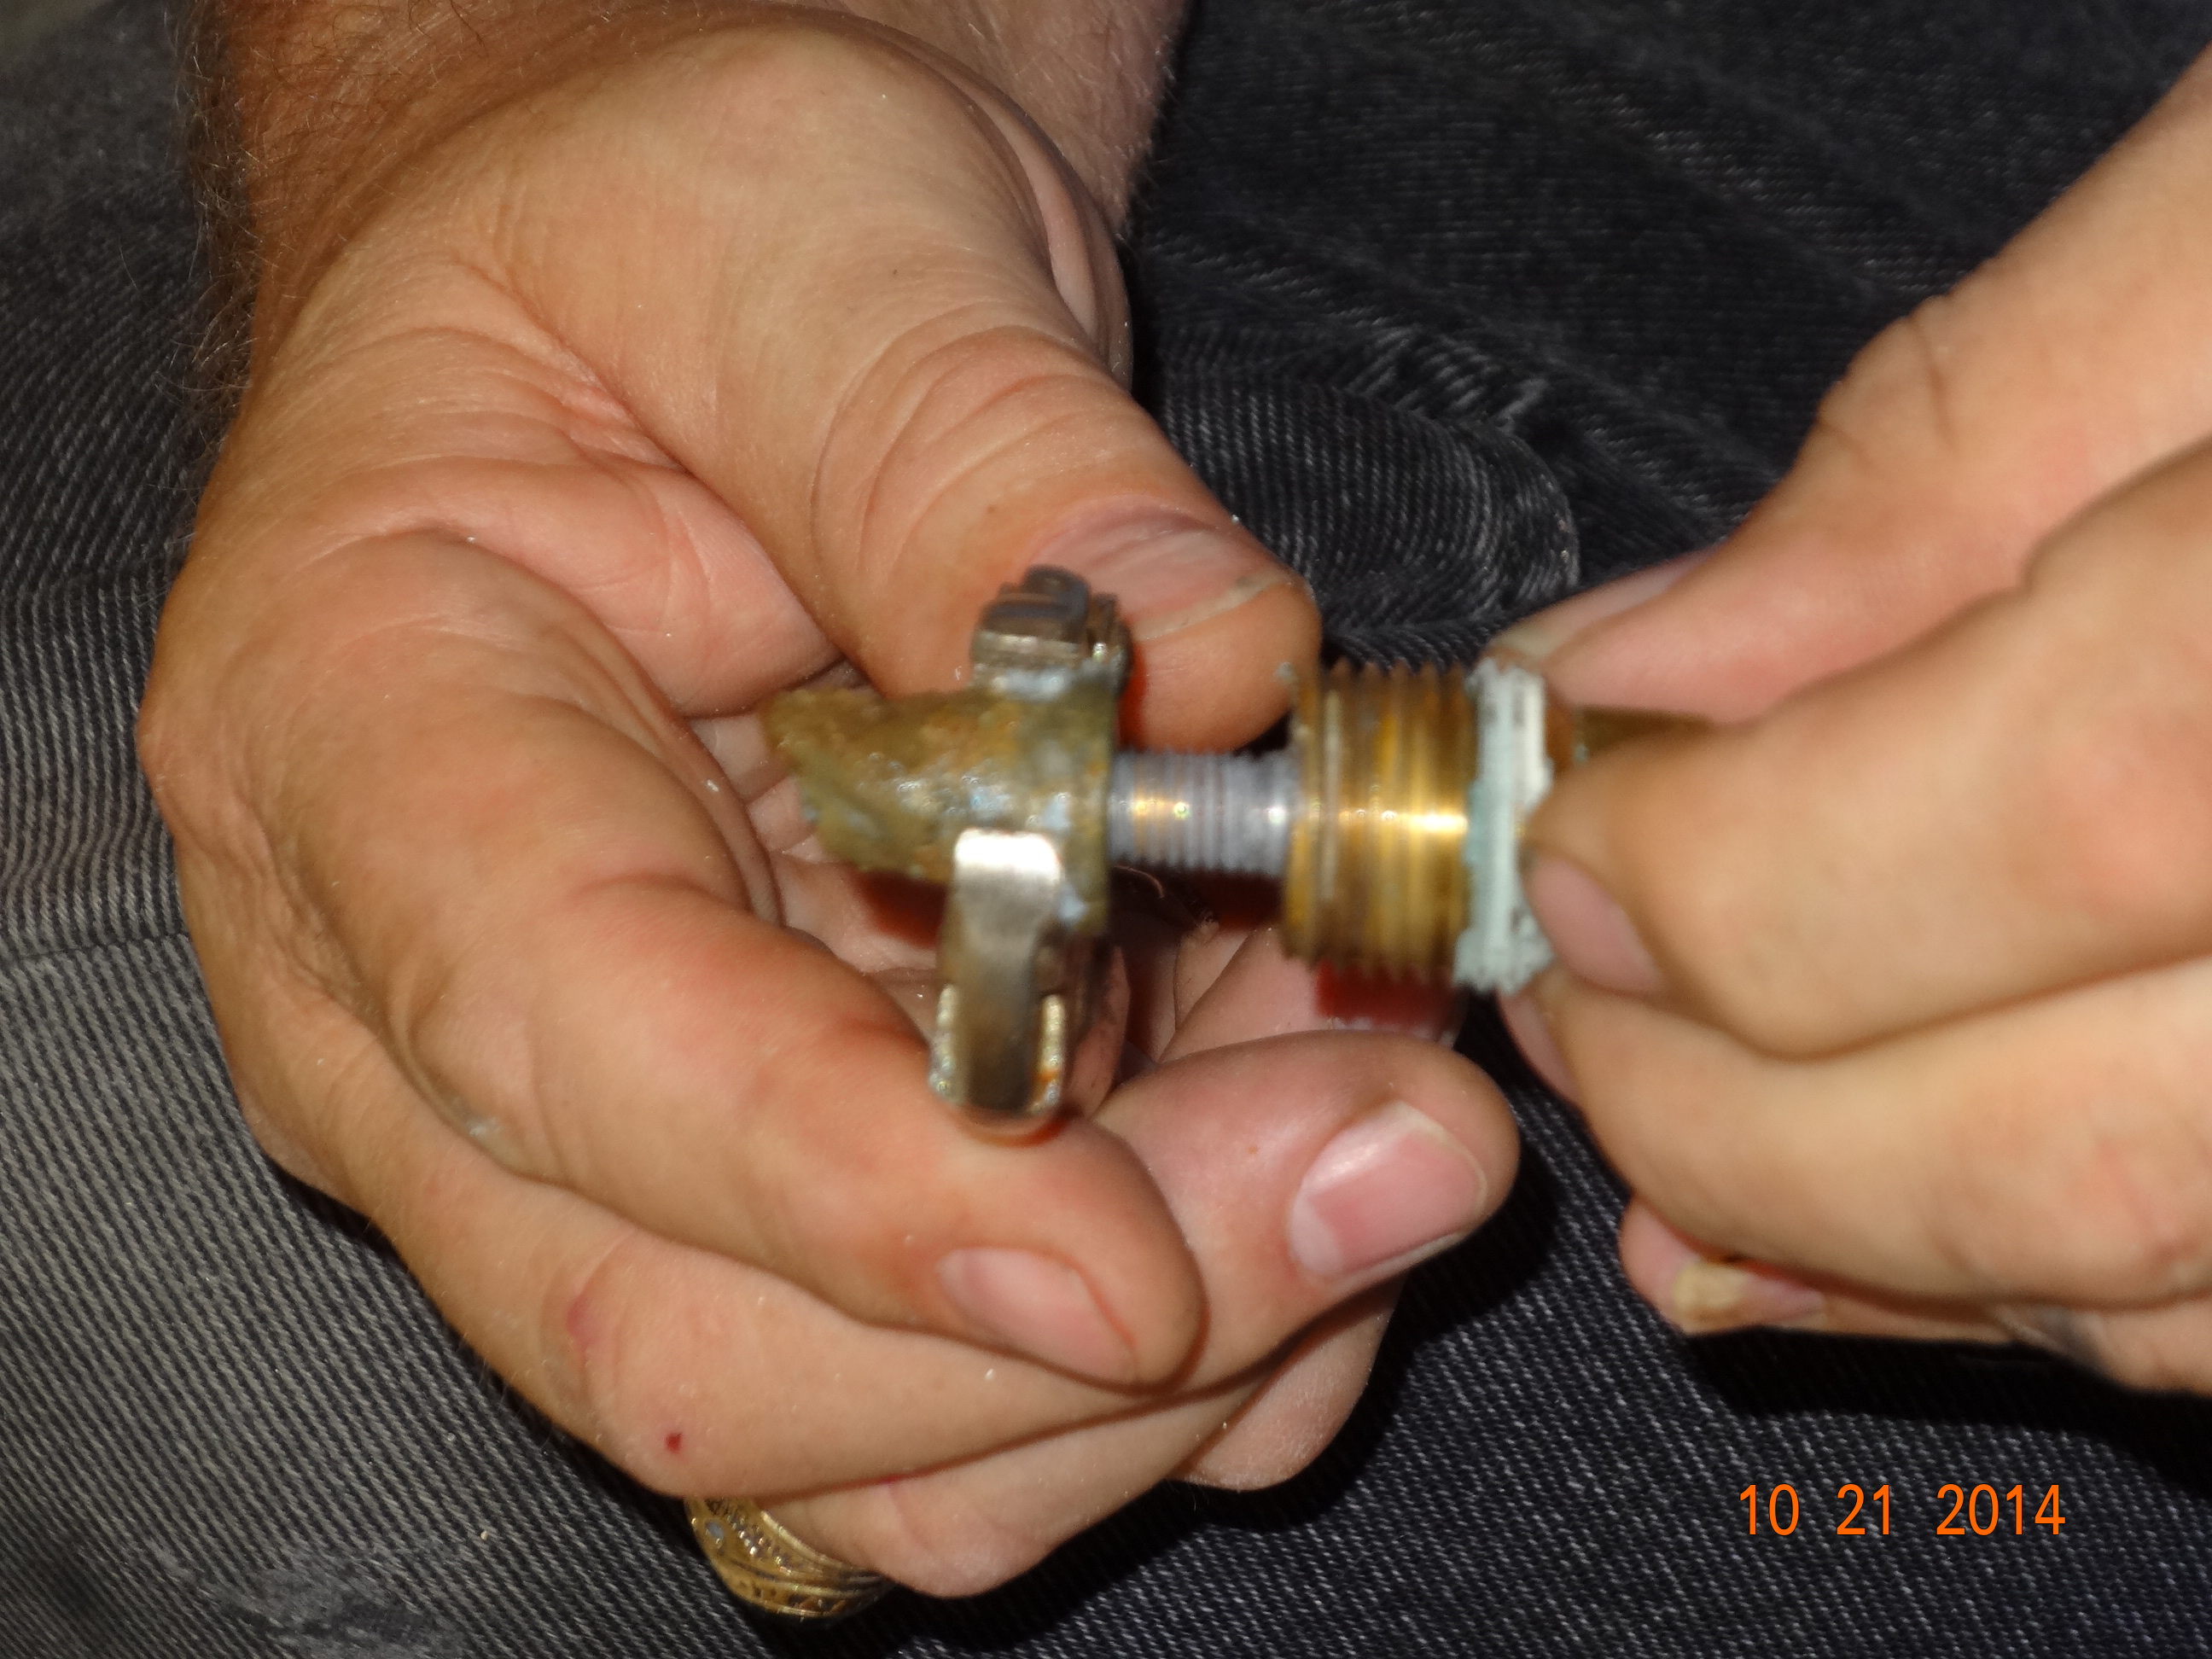
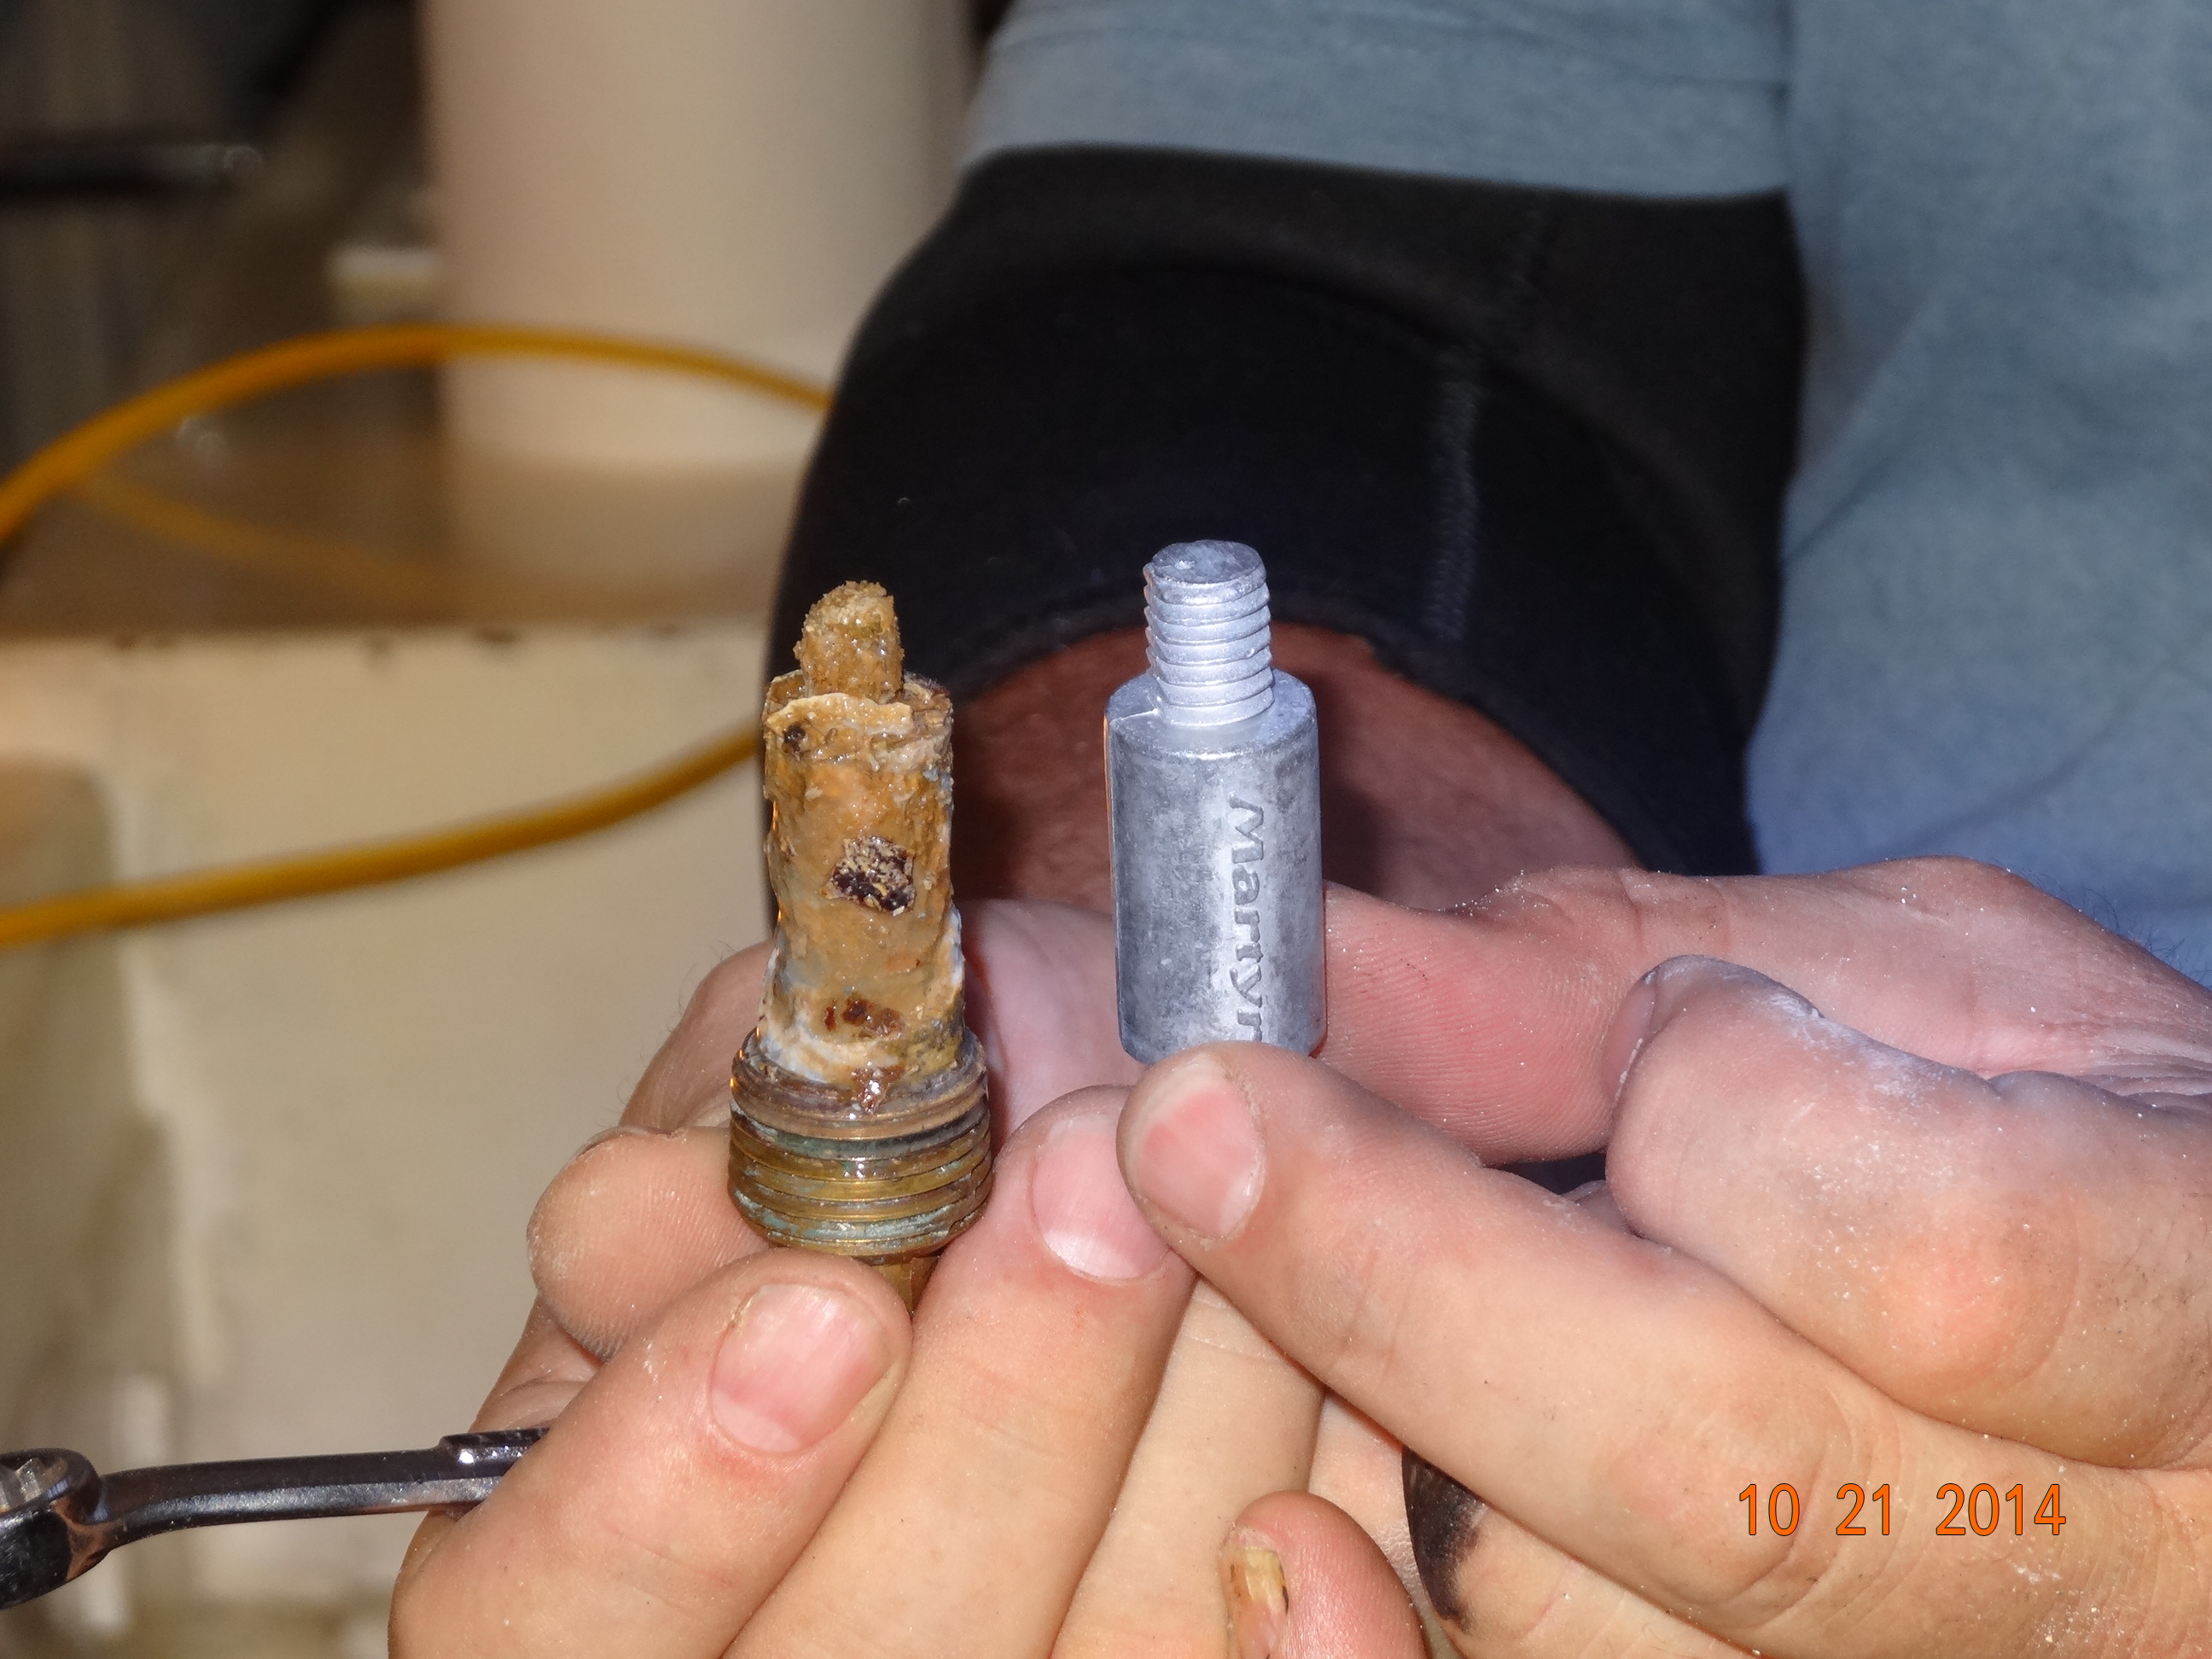
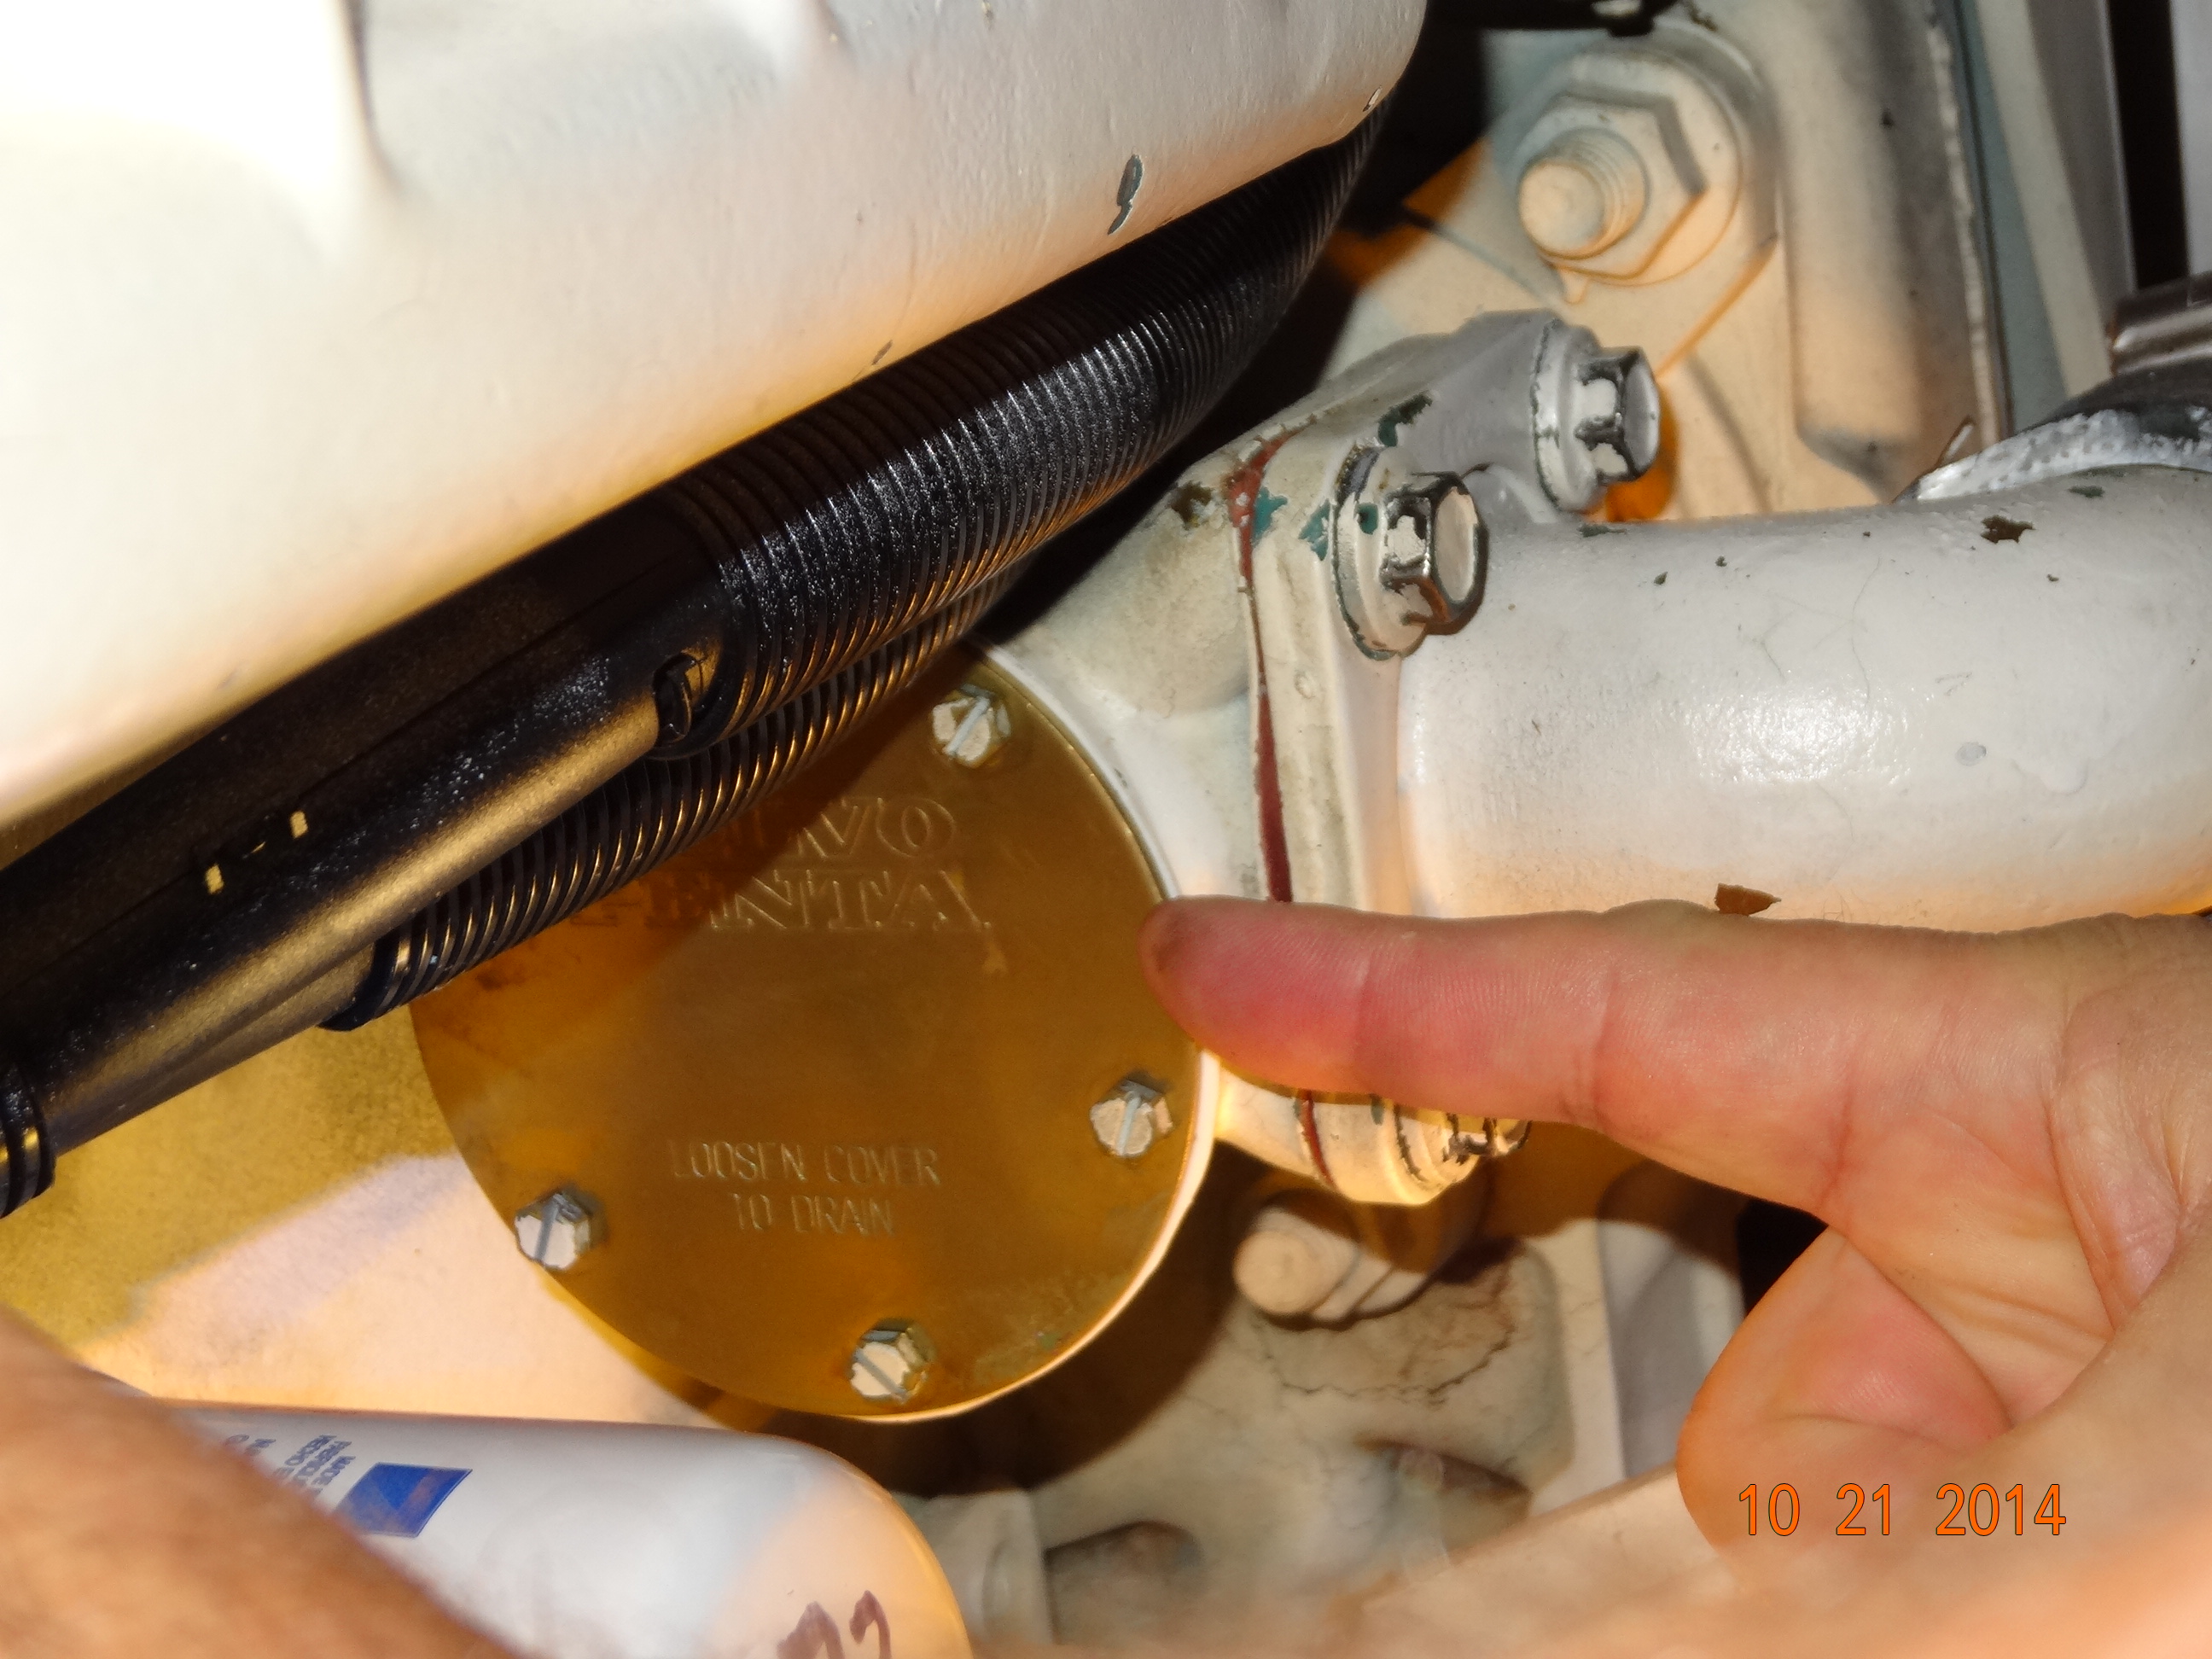
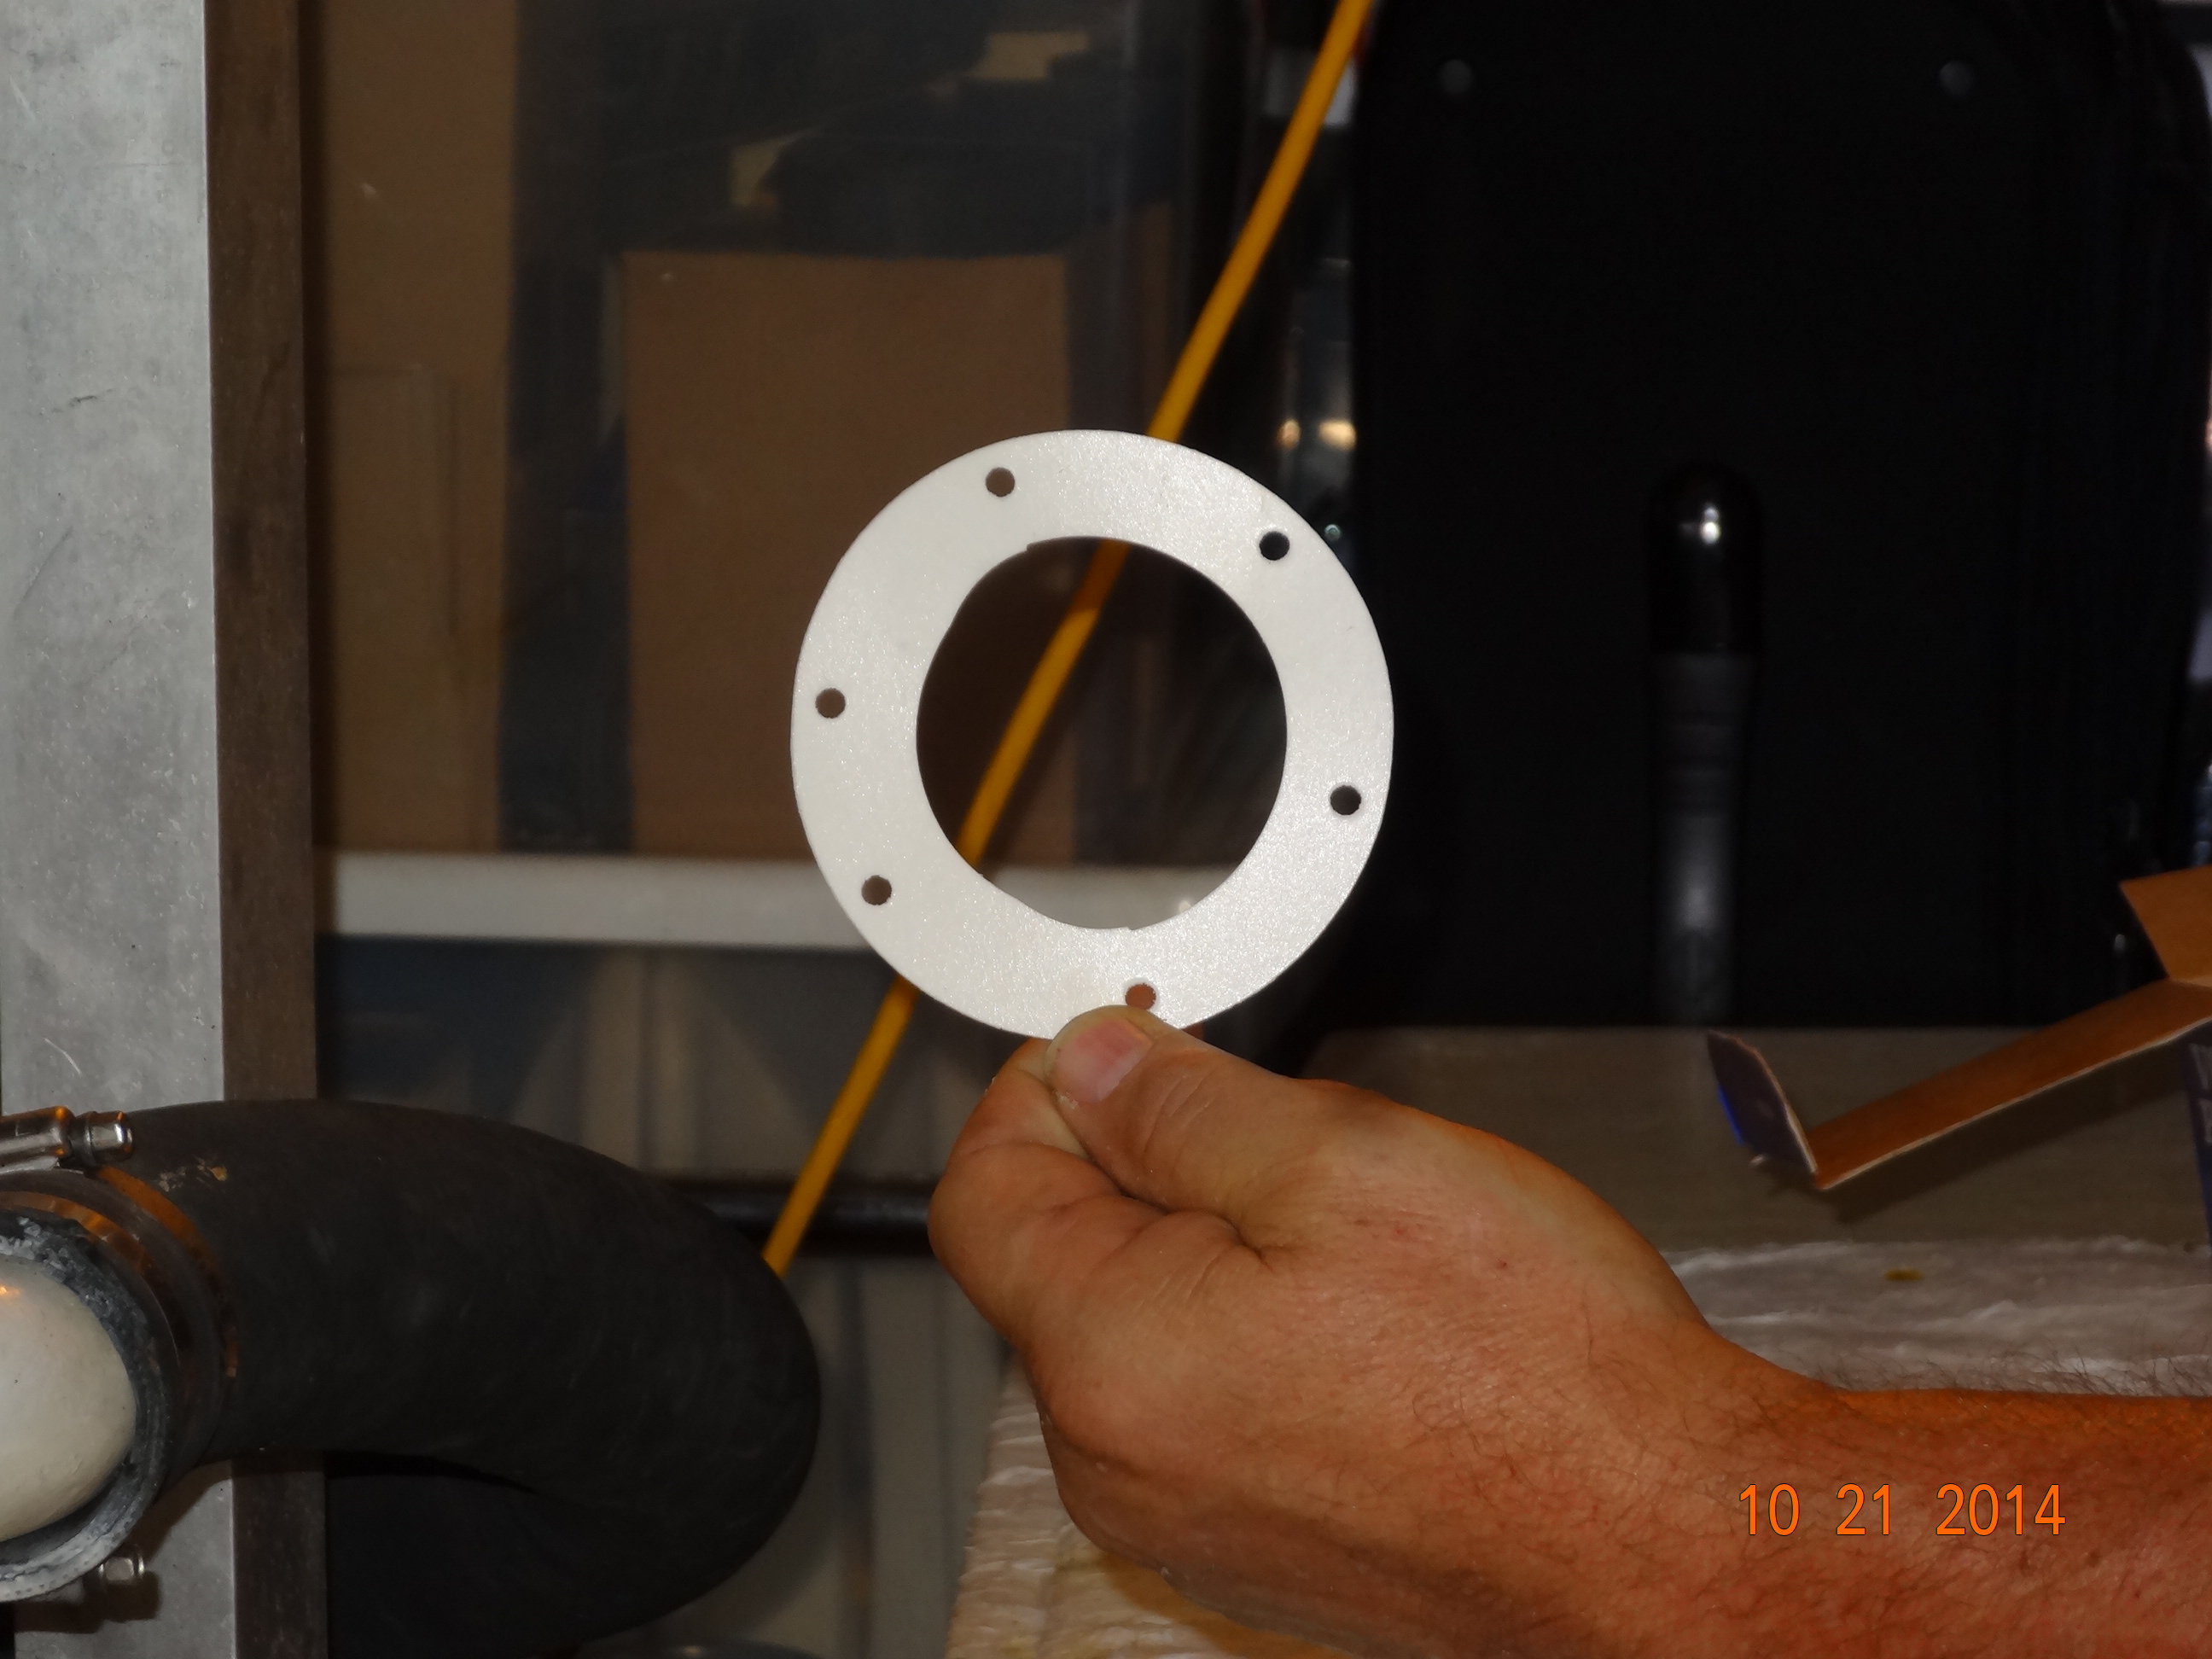
Our engine zincs are easy to get at and easy to change and relatively inexpensive. Of course each engine is different so you’ll have to get out the owners manual if you don’t know where yours are located. The zincs we are changing, called pencil zincs and look like this,
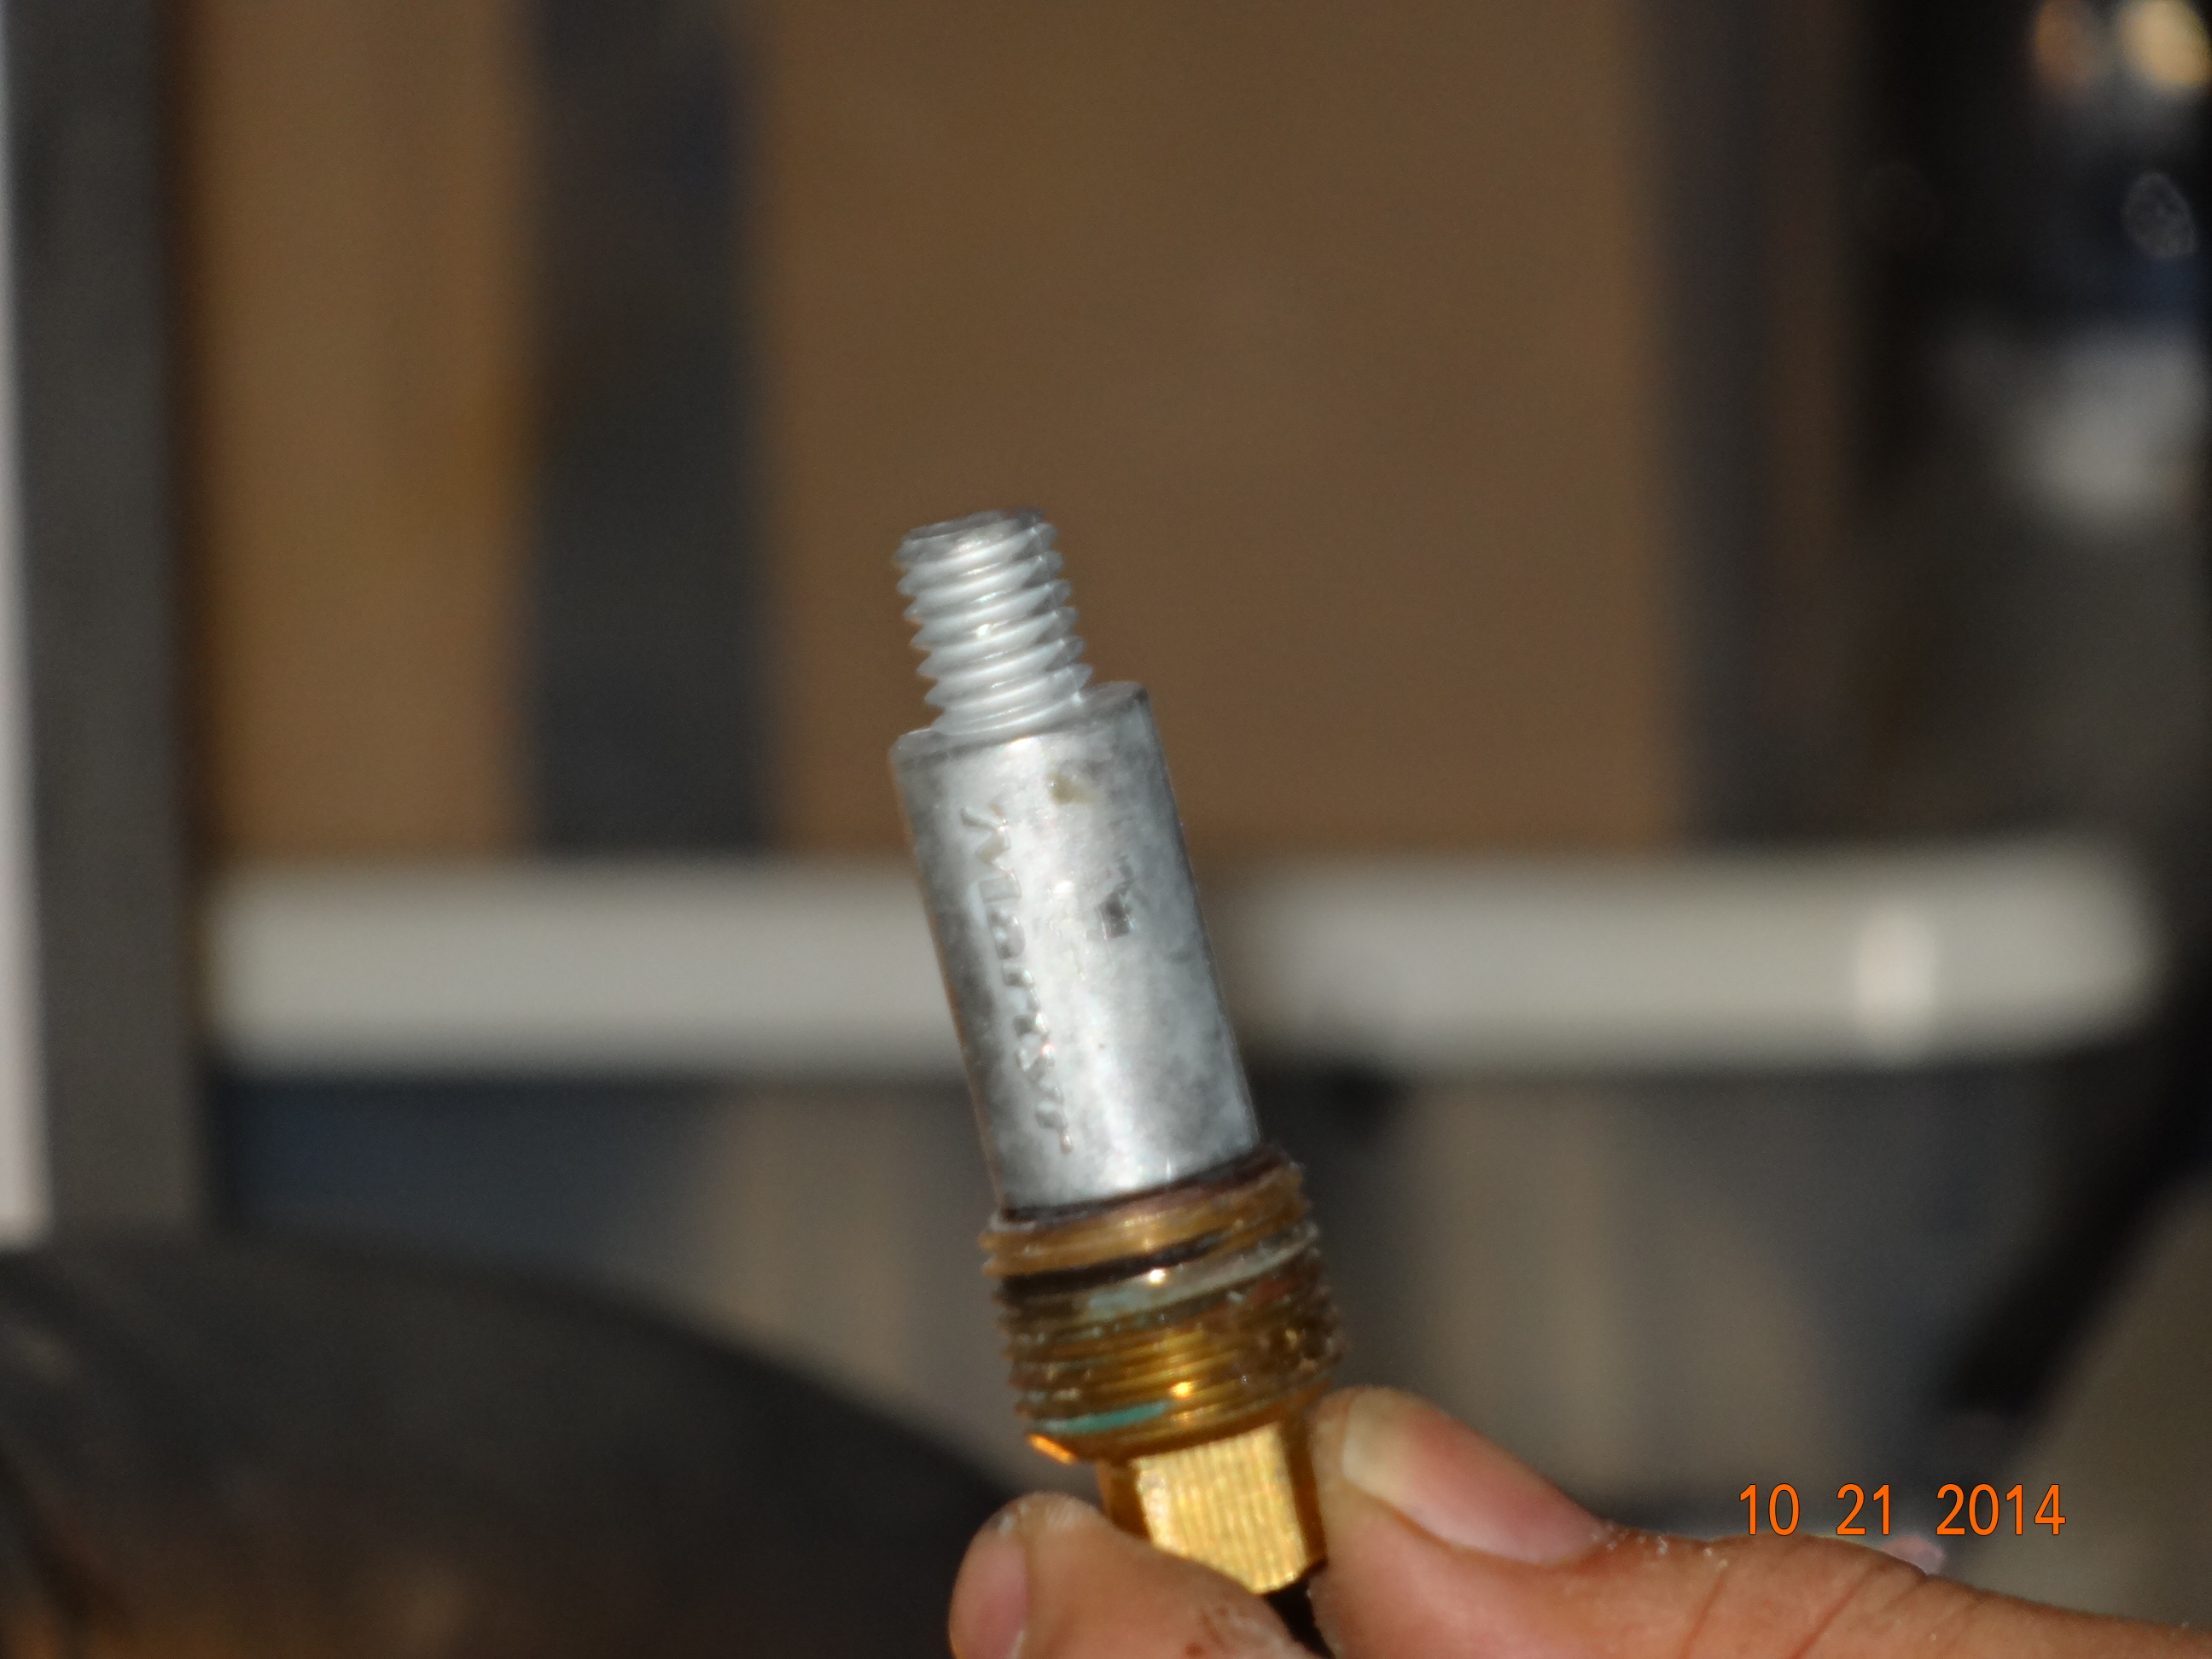
Zinc on bolt
they are about $5 to $6 a piece…..not too expensive, but I suppose that adds up when there are 3 on each engine. Oh well, cheap insurance.
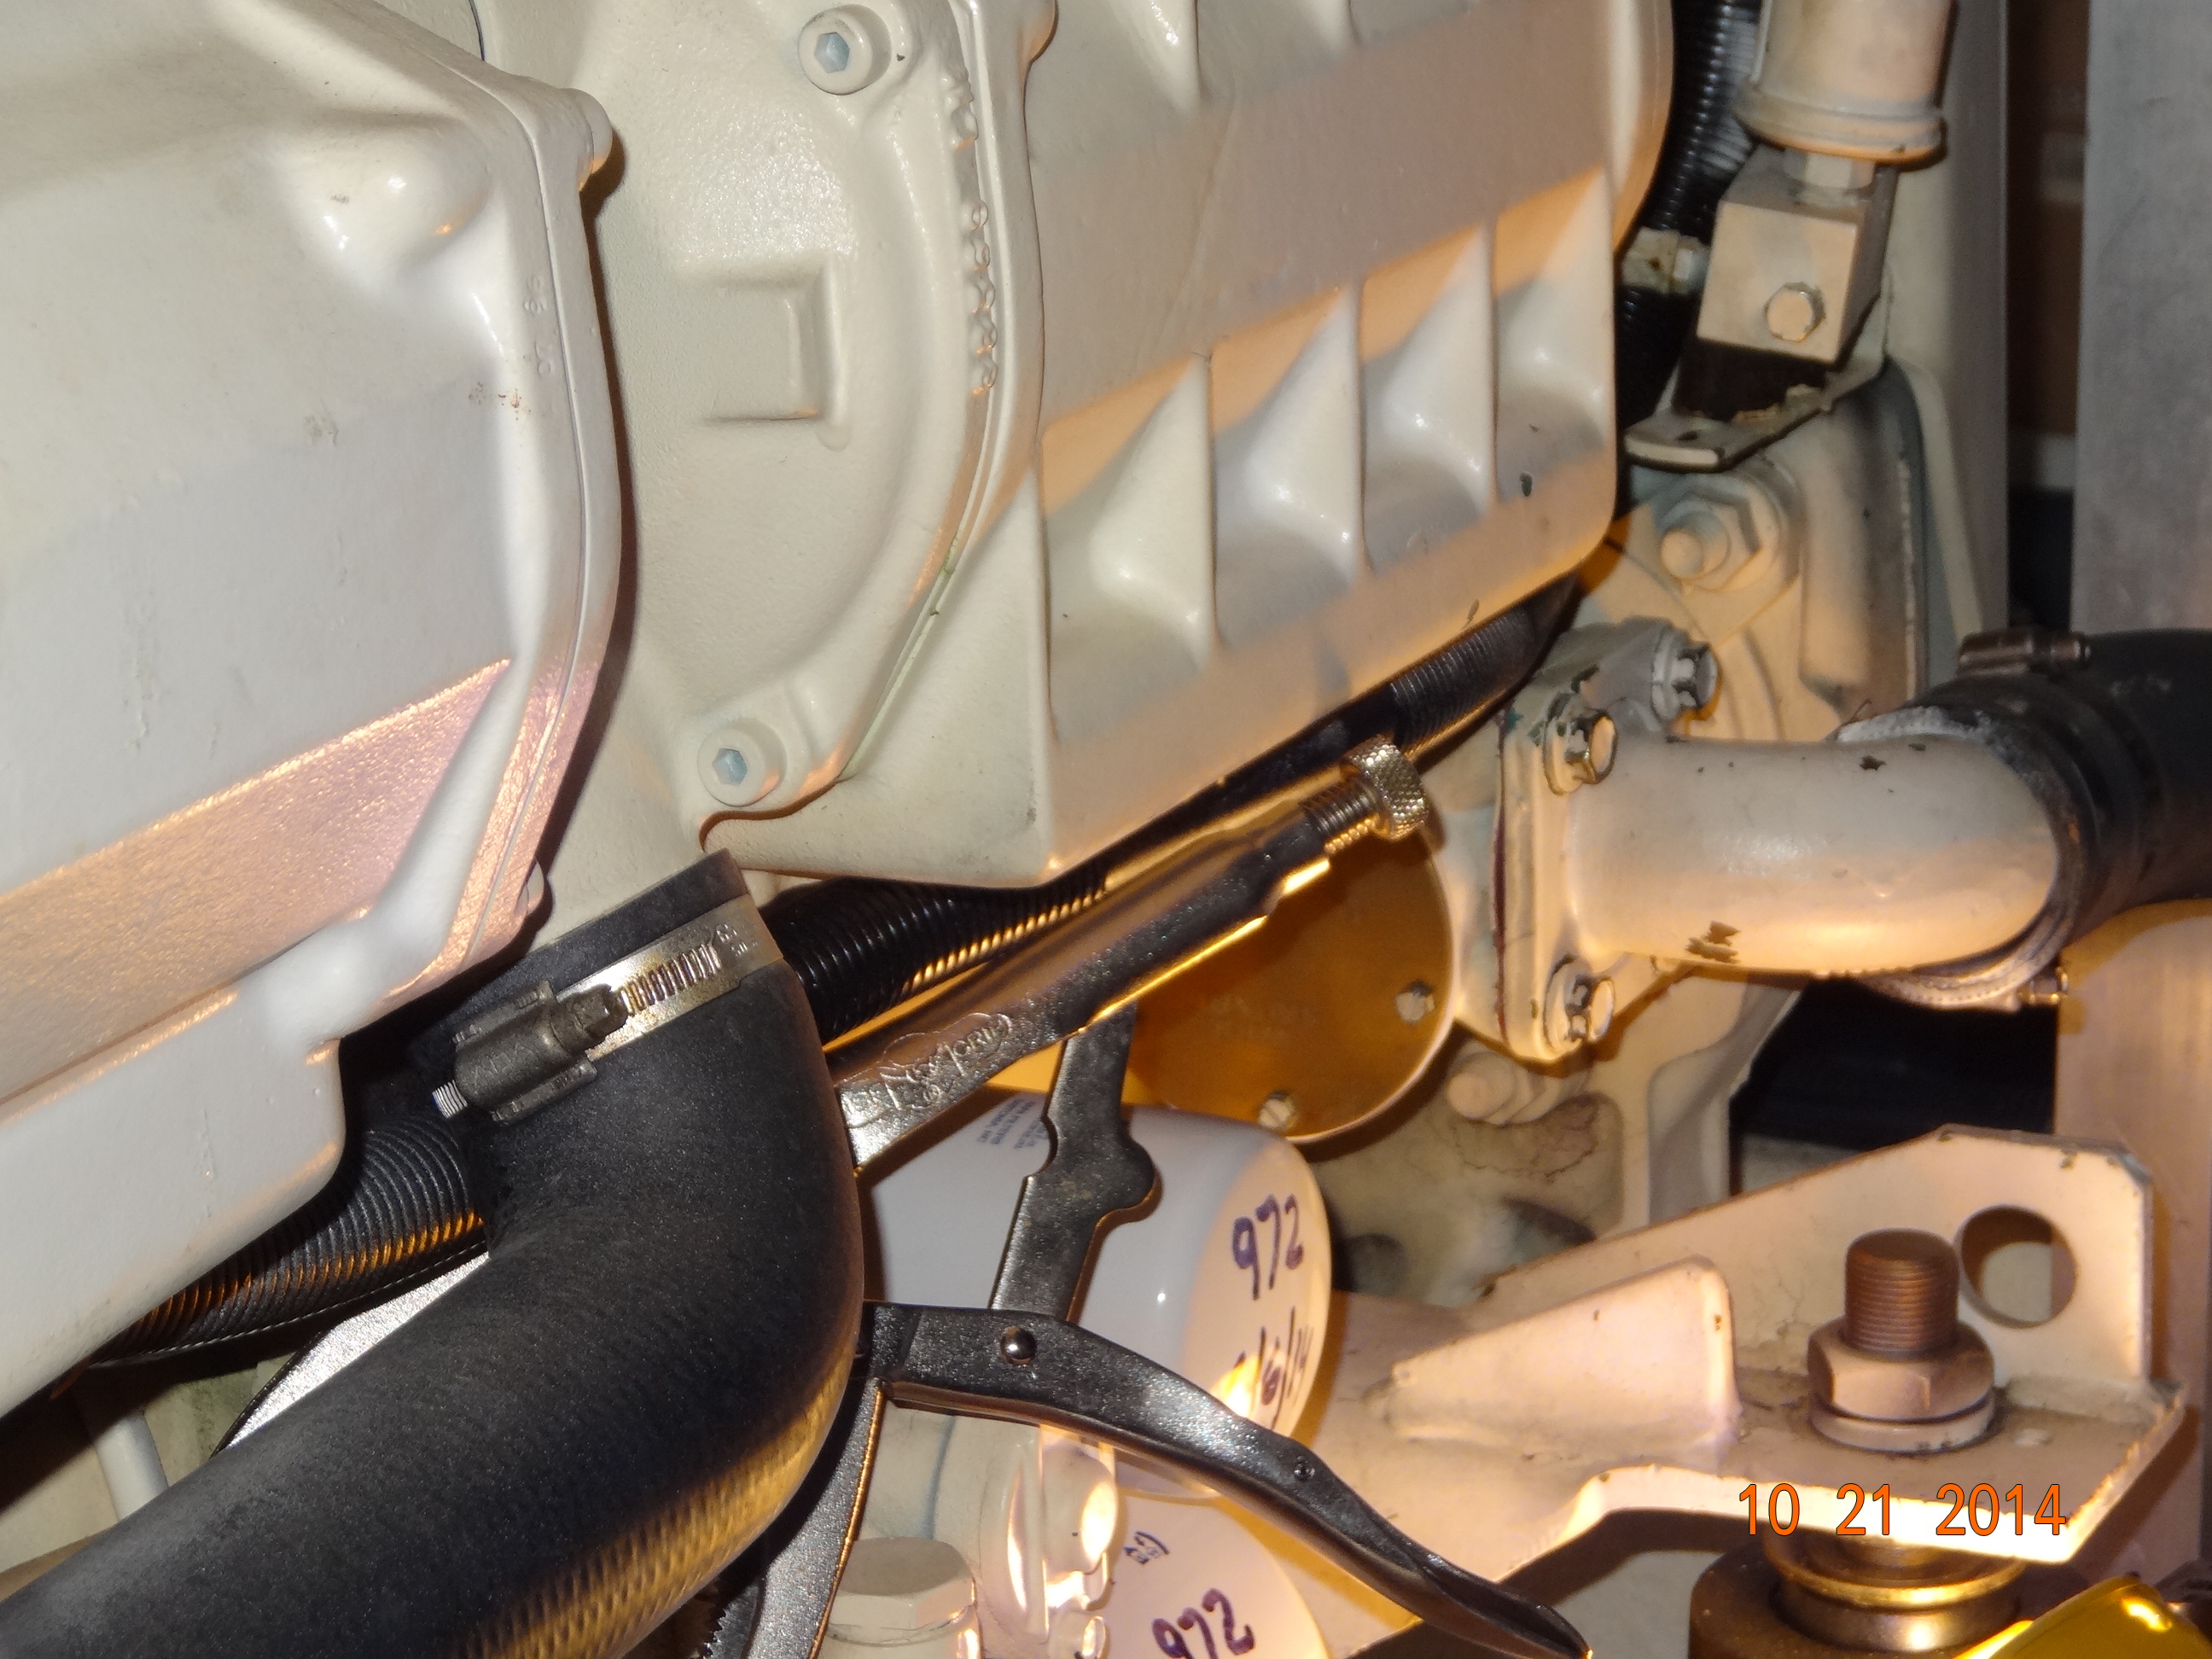
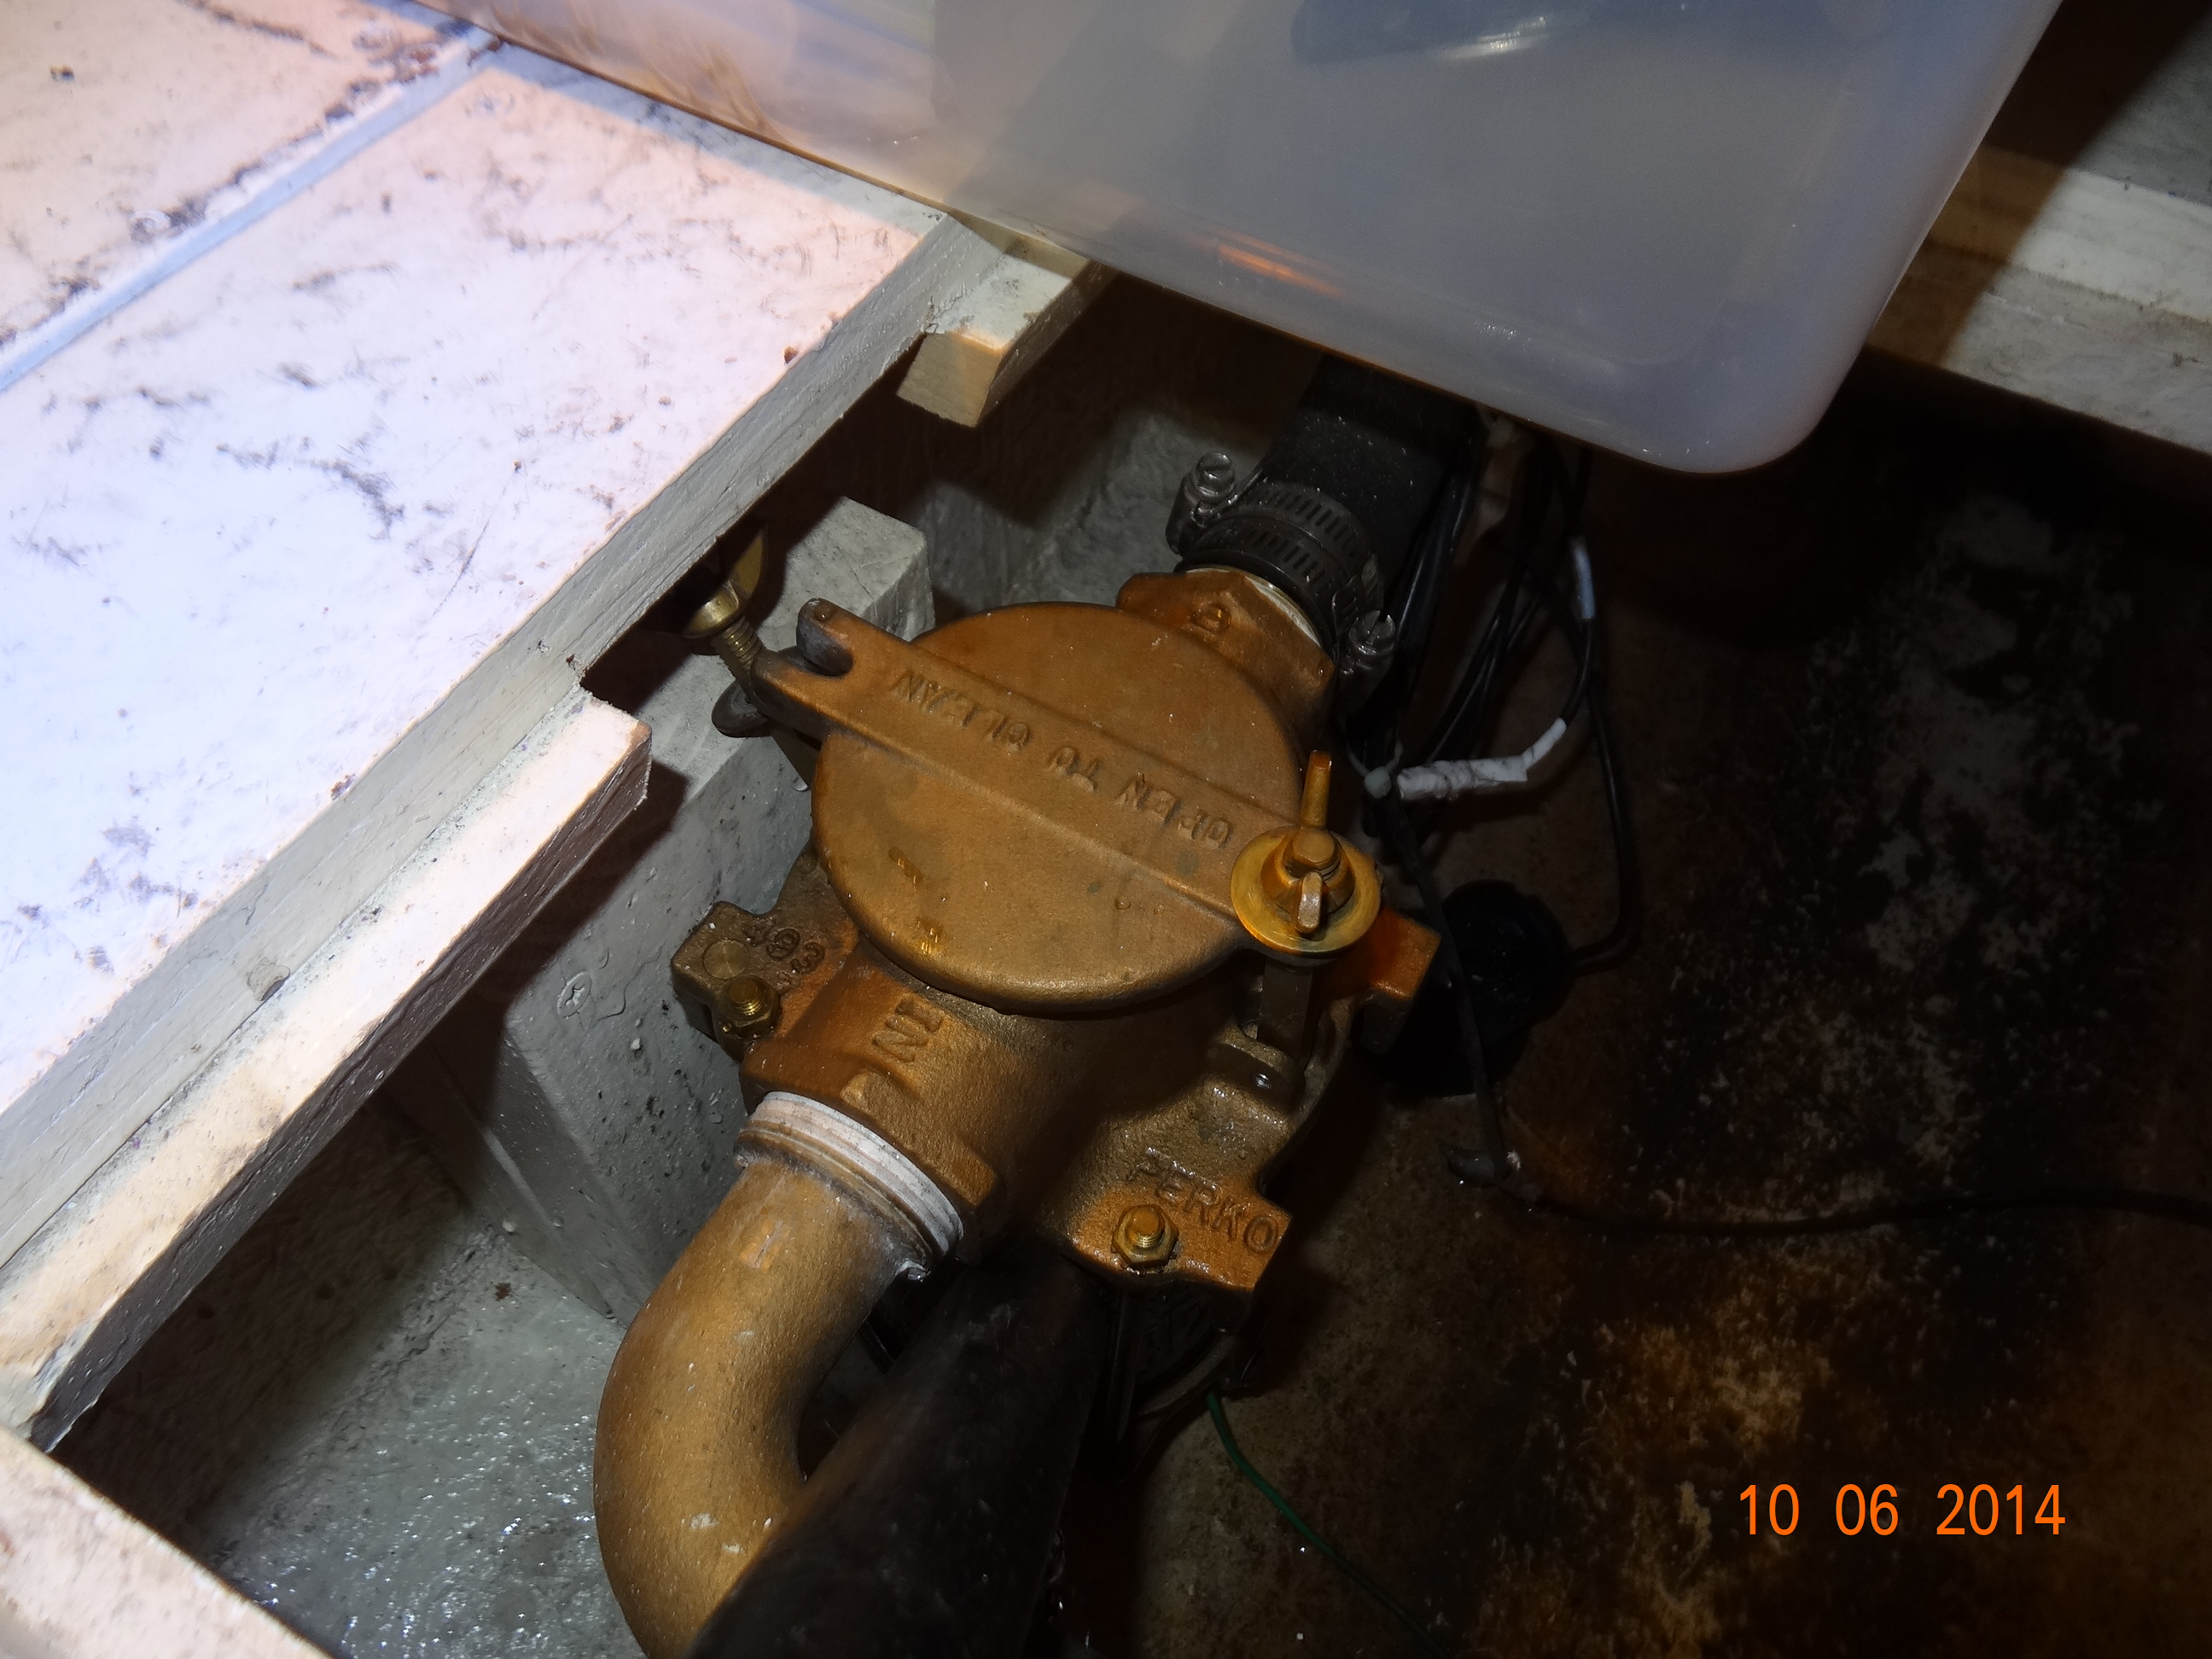
So first of all Gary unscrews the zinc in the heat exchanger in front.
Unscrew Zinc
The zinc is screwed onto a bolt, so a new one looks like this
Zinc on bolt
that is then screwed into the cylinder where it sits and does it’s zinc work. See the threads on the top of the zinc? Watch out when you unscrew the bolts, cause a lot of water pours out of these too, just like when we changed the impellers.
Wow!
Old and new zinc
Not much left
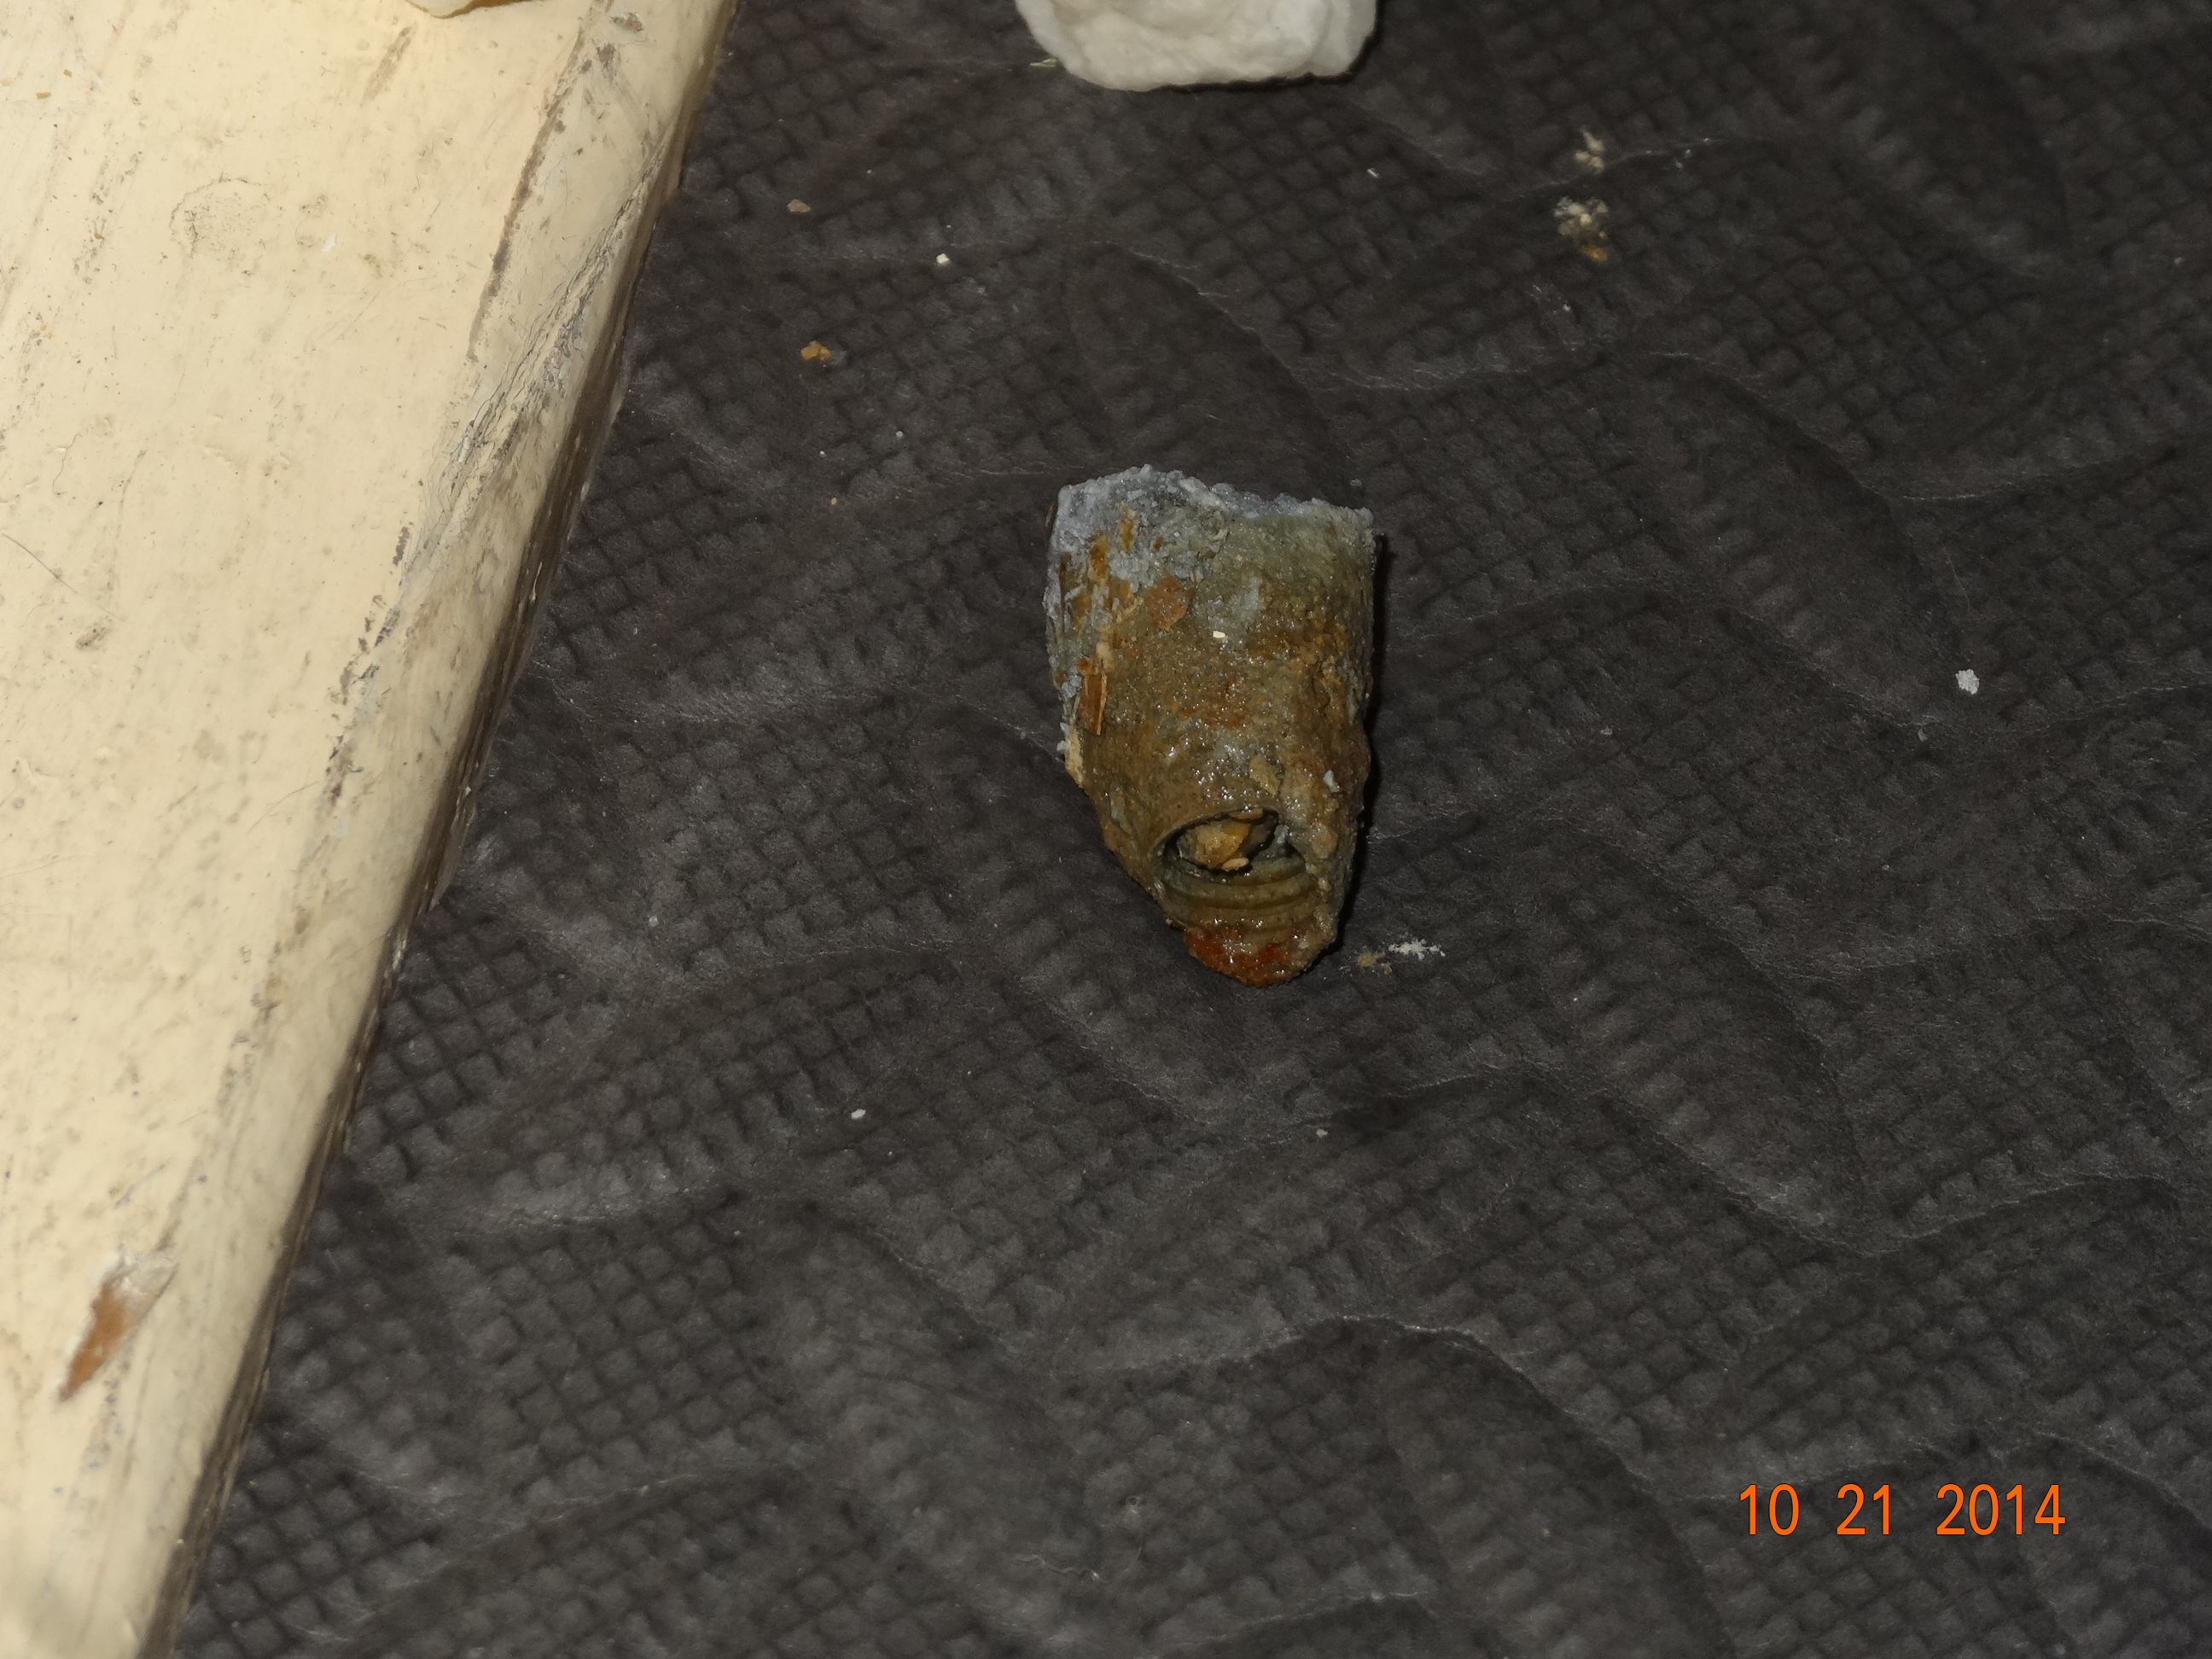
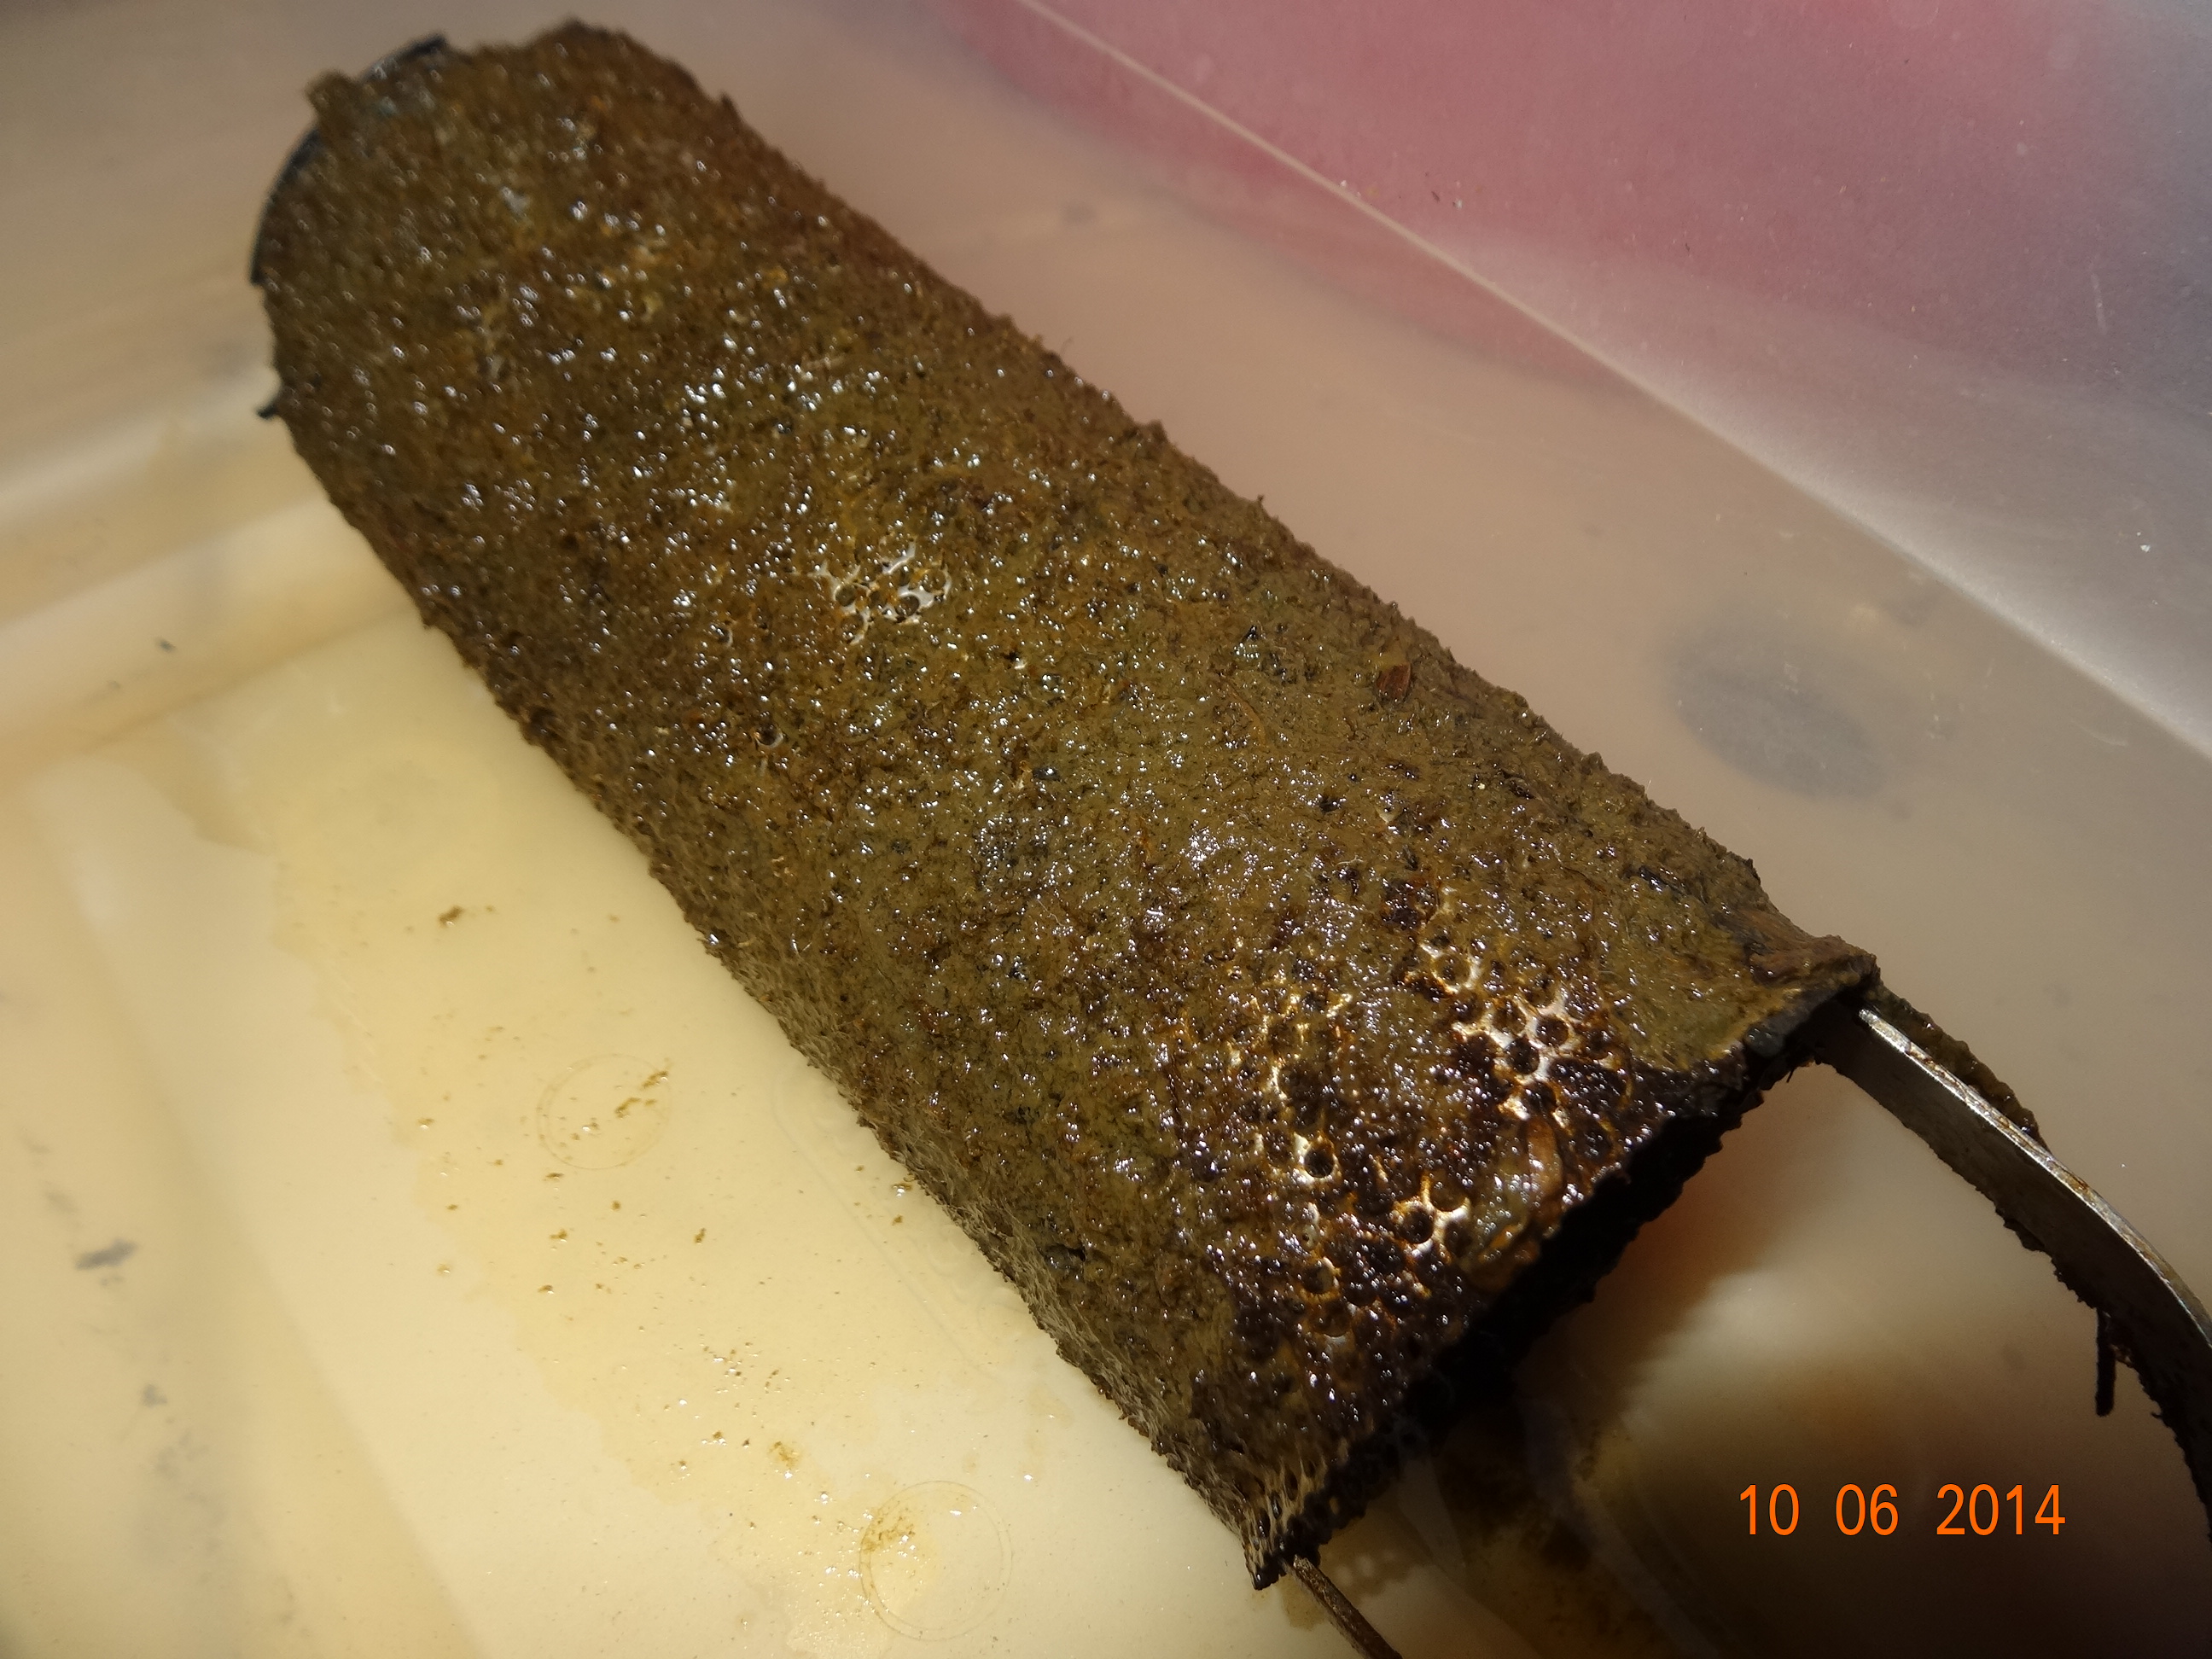
This first one is really eaten up.
Pieces of zinc
There was even pieces of it that broke off inside. See why you need to change them? So to do that you just unscrew the old zinc
Unscrew the old zinc
and screw on the new zinc. Then screw the whole thing back in. Easy huh?
So then we did the 2nd zinc in the heat exchanger that was toward the back of the heat exchanger.
Unscrewing the 2nd zinc
Huh,
2nd zinc looks pretty good
that one is in pretty good shape, we’ll just leave that one.
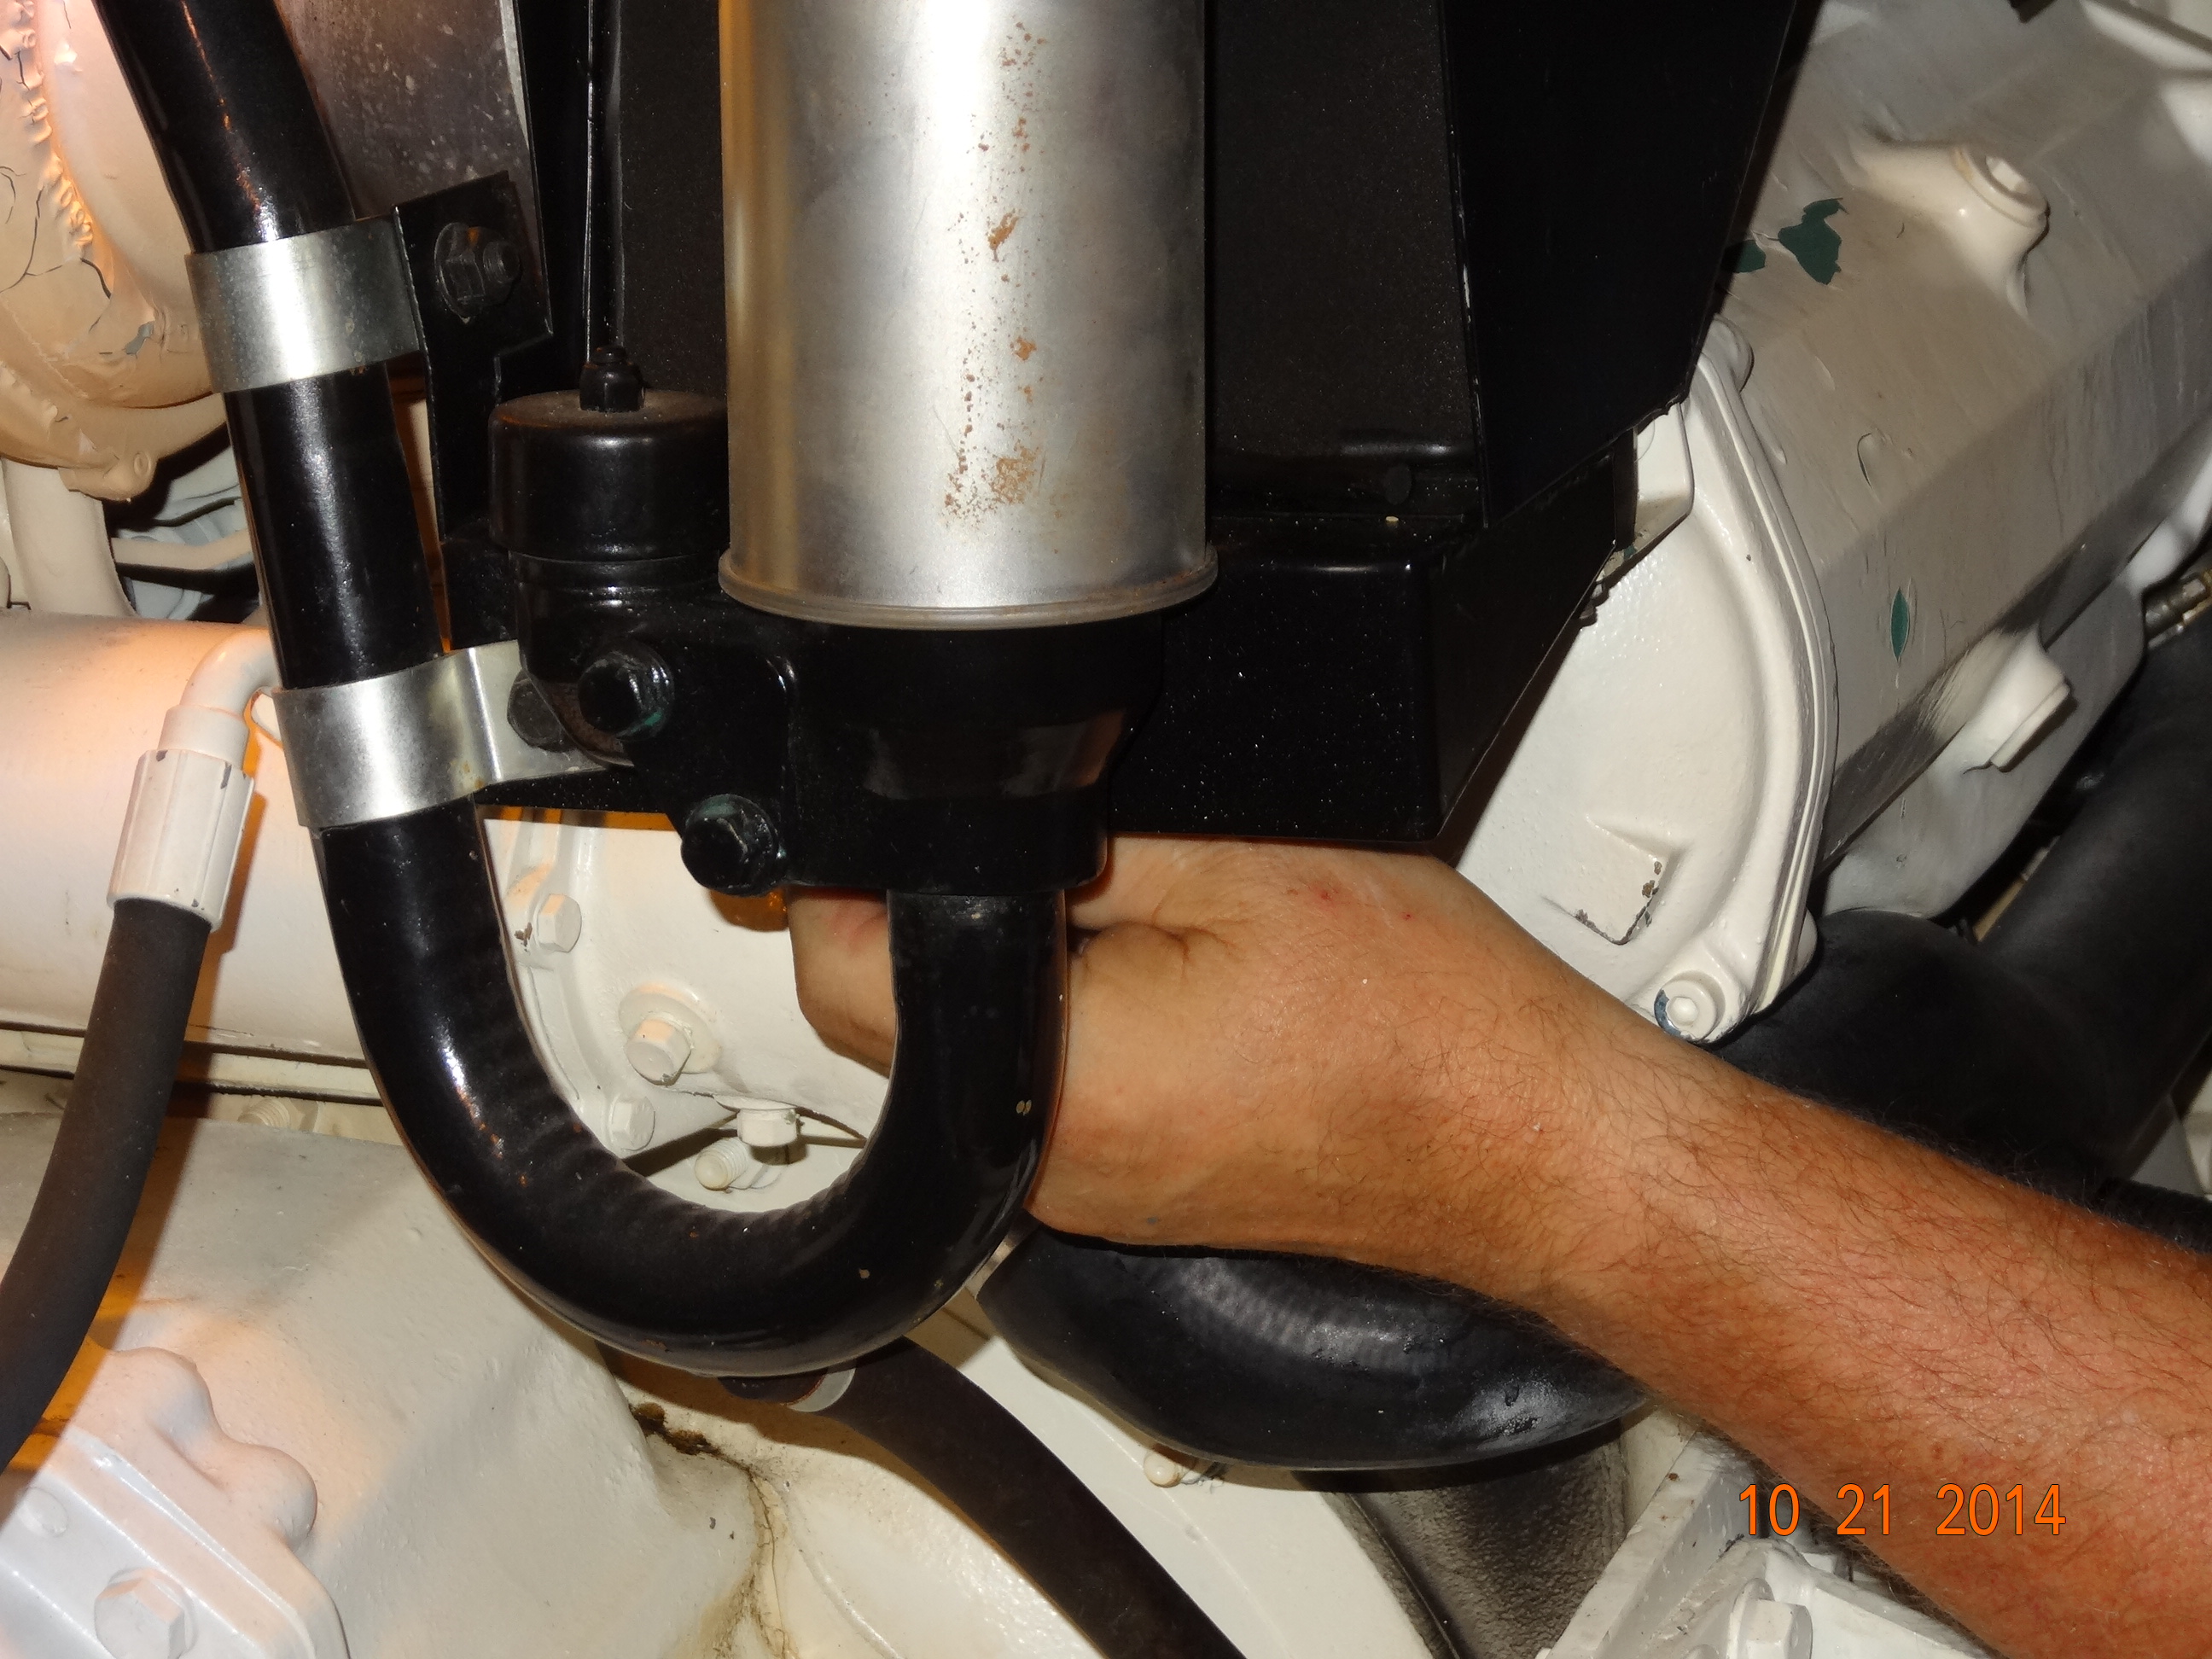
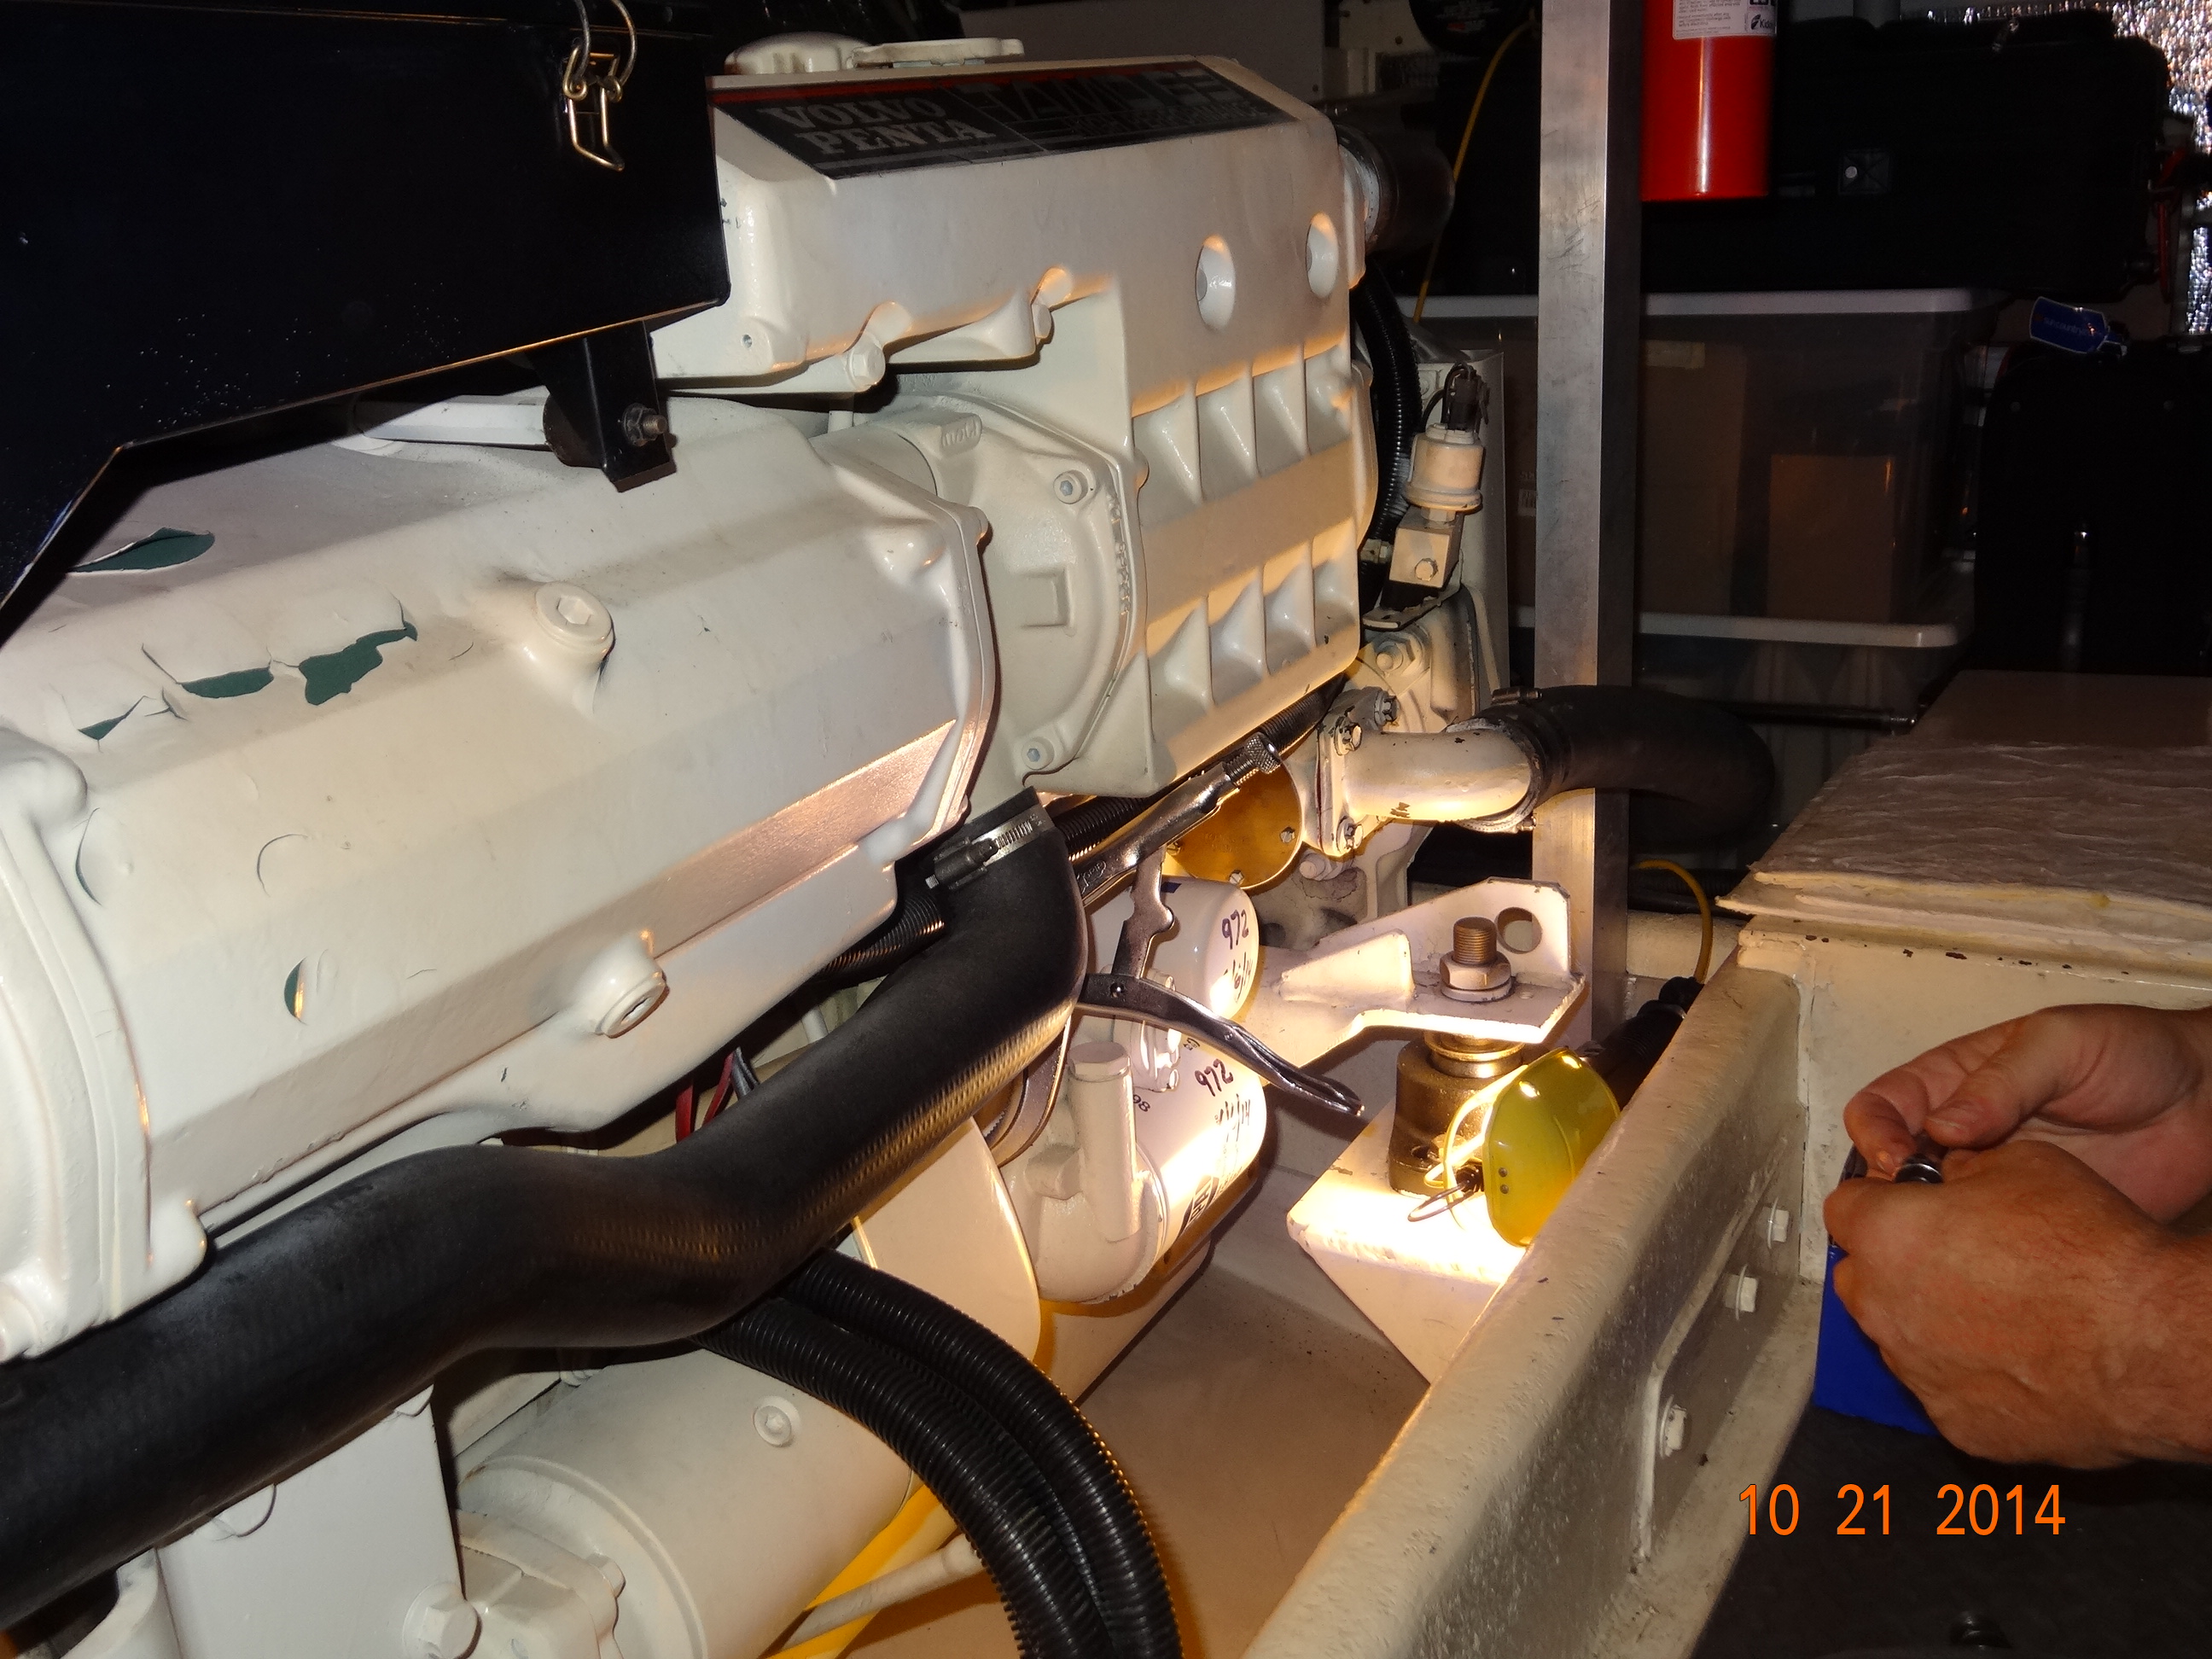
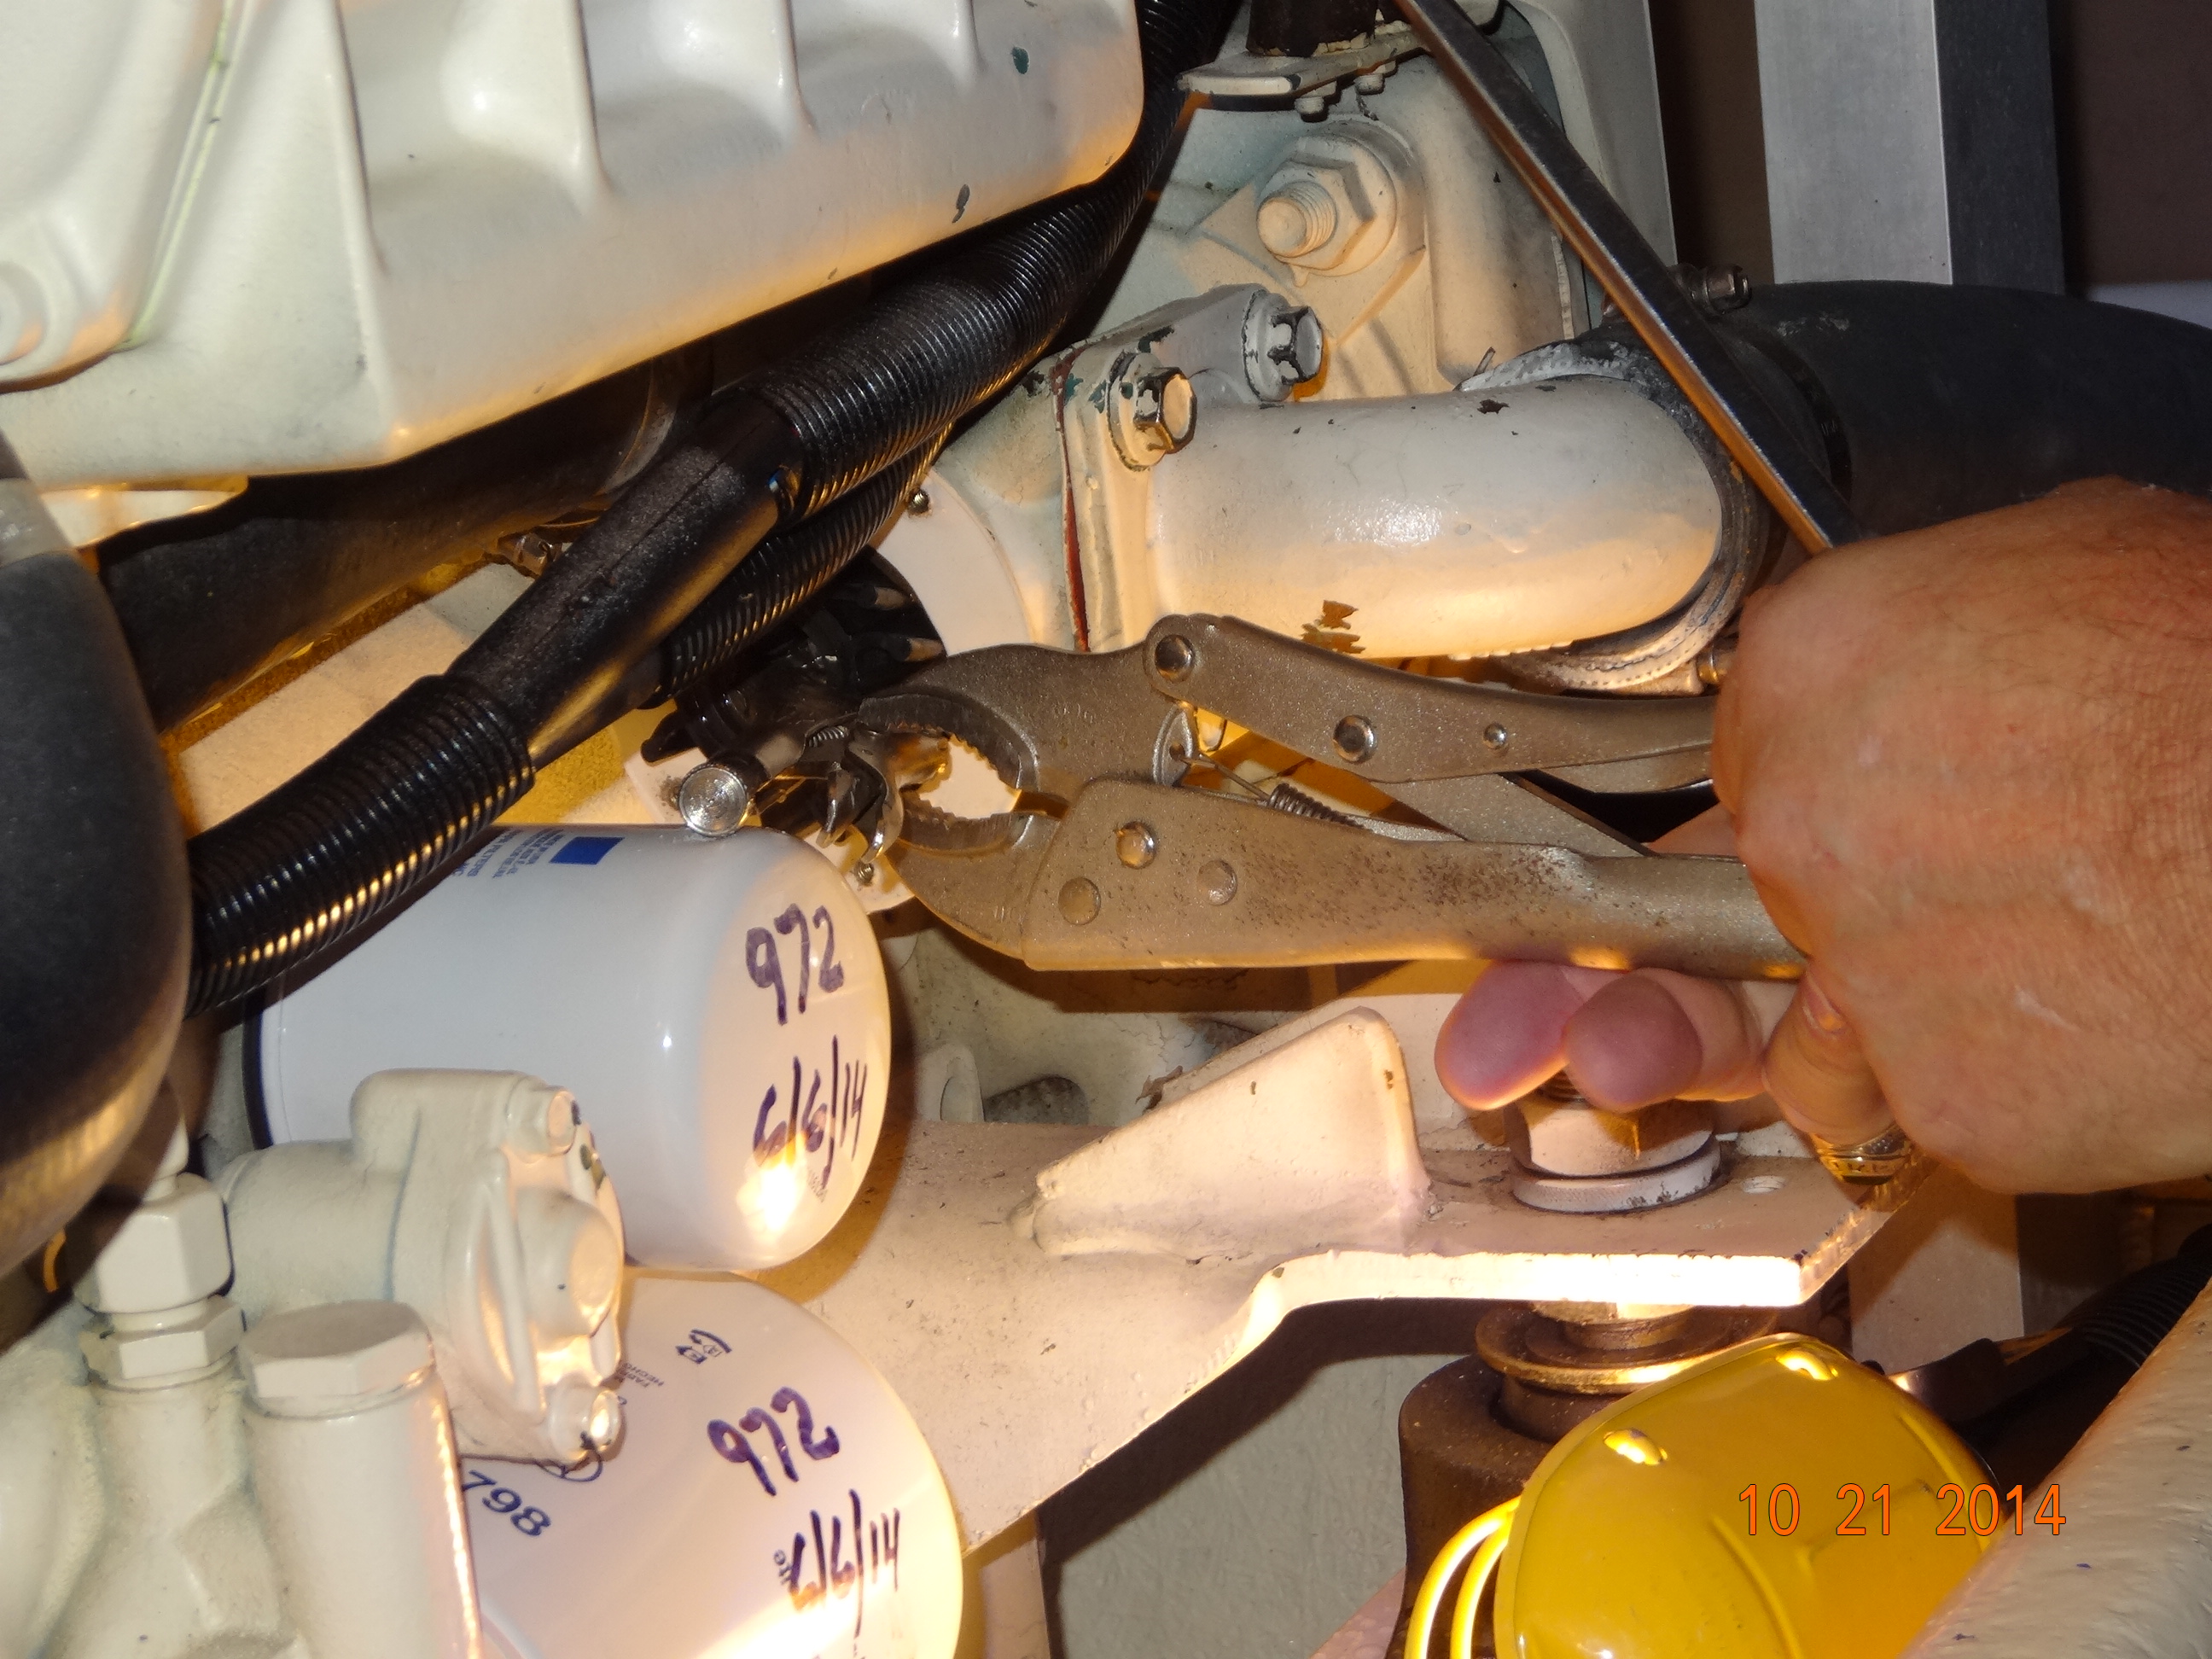
The third one is by the tranny (transmission) oil cooler.
Tranny cooler
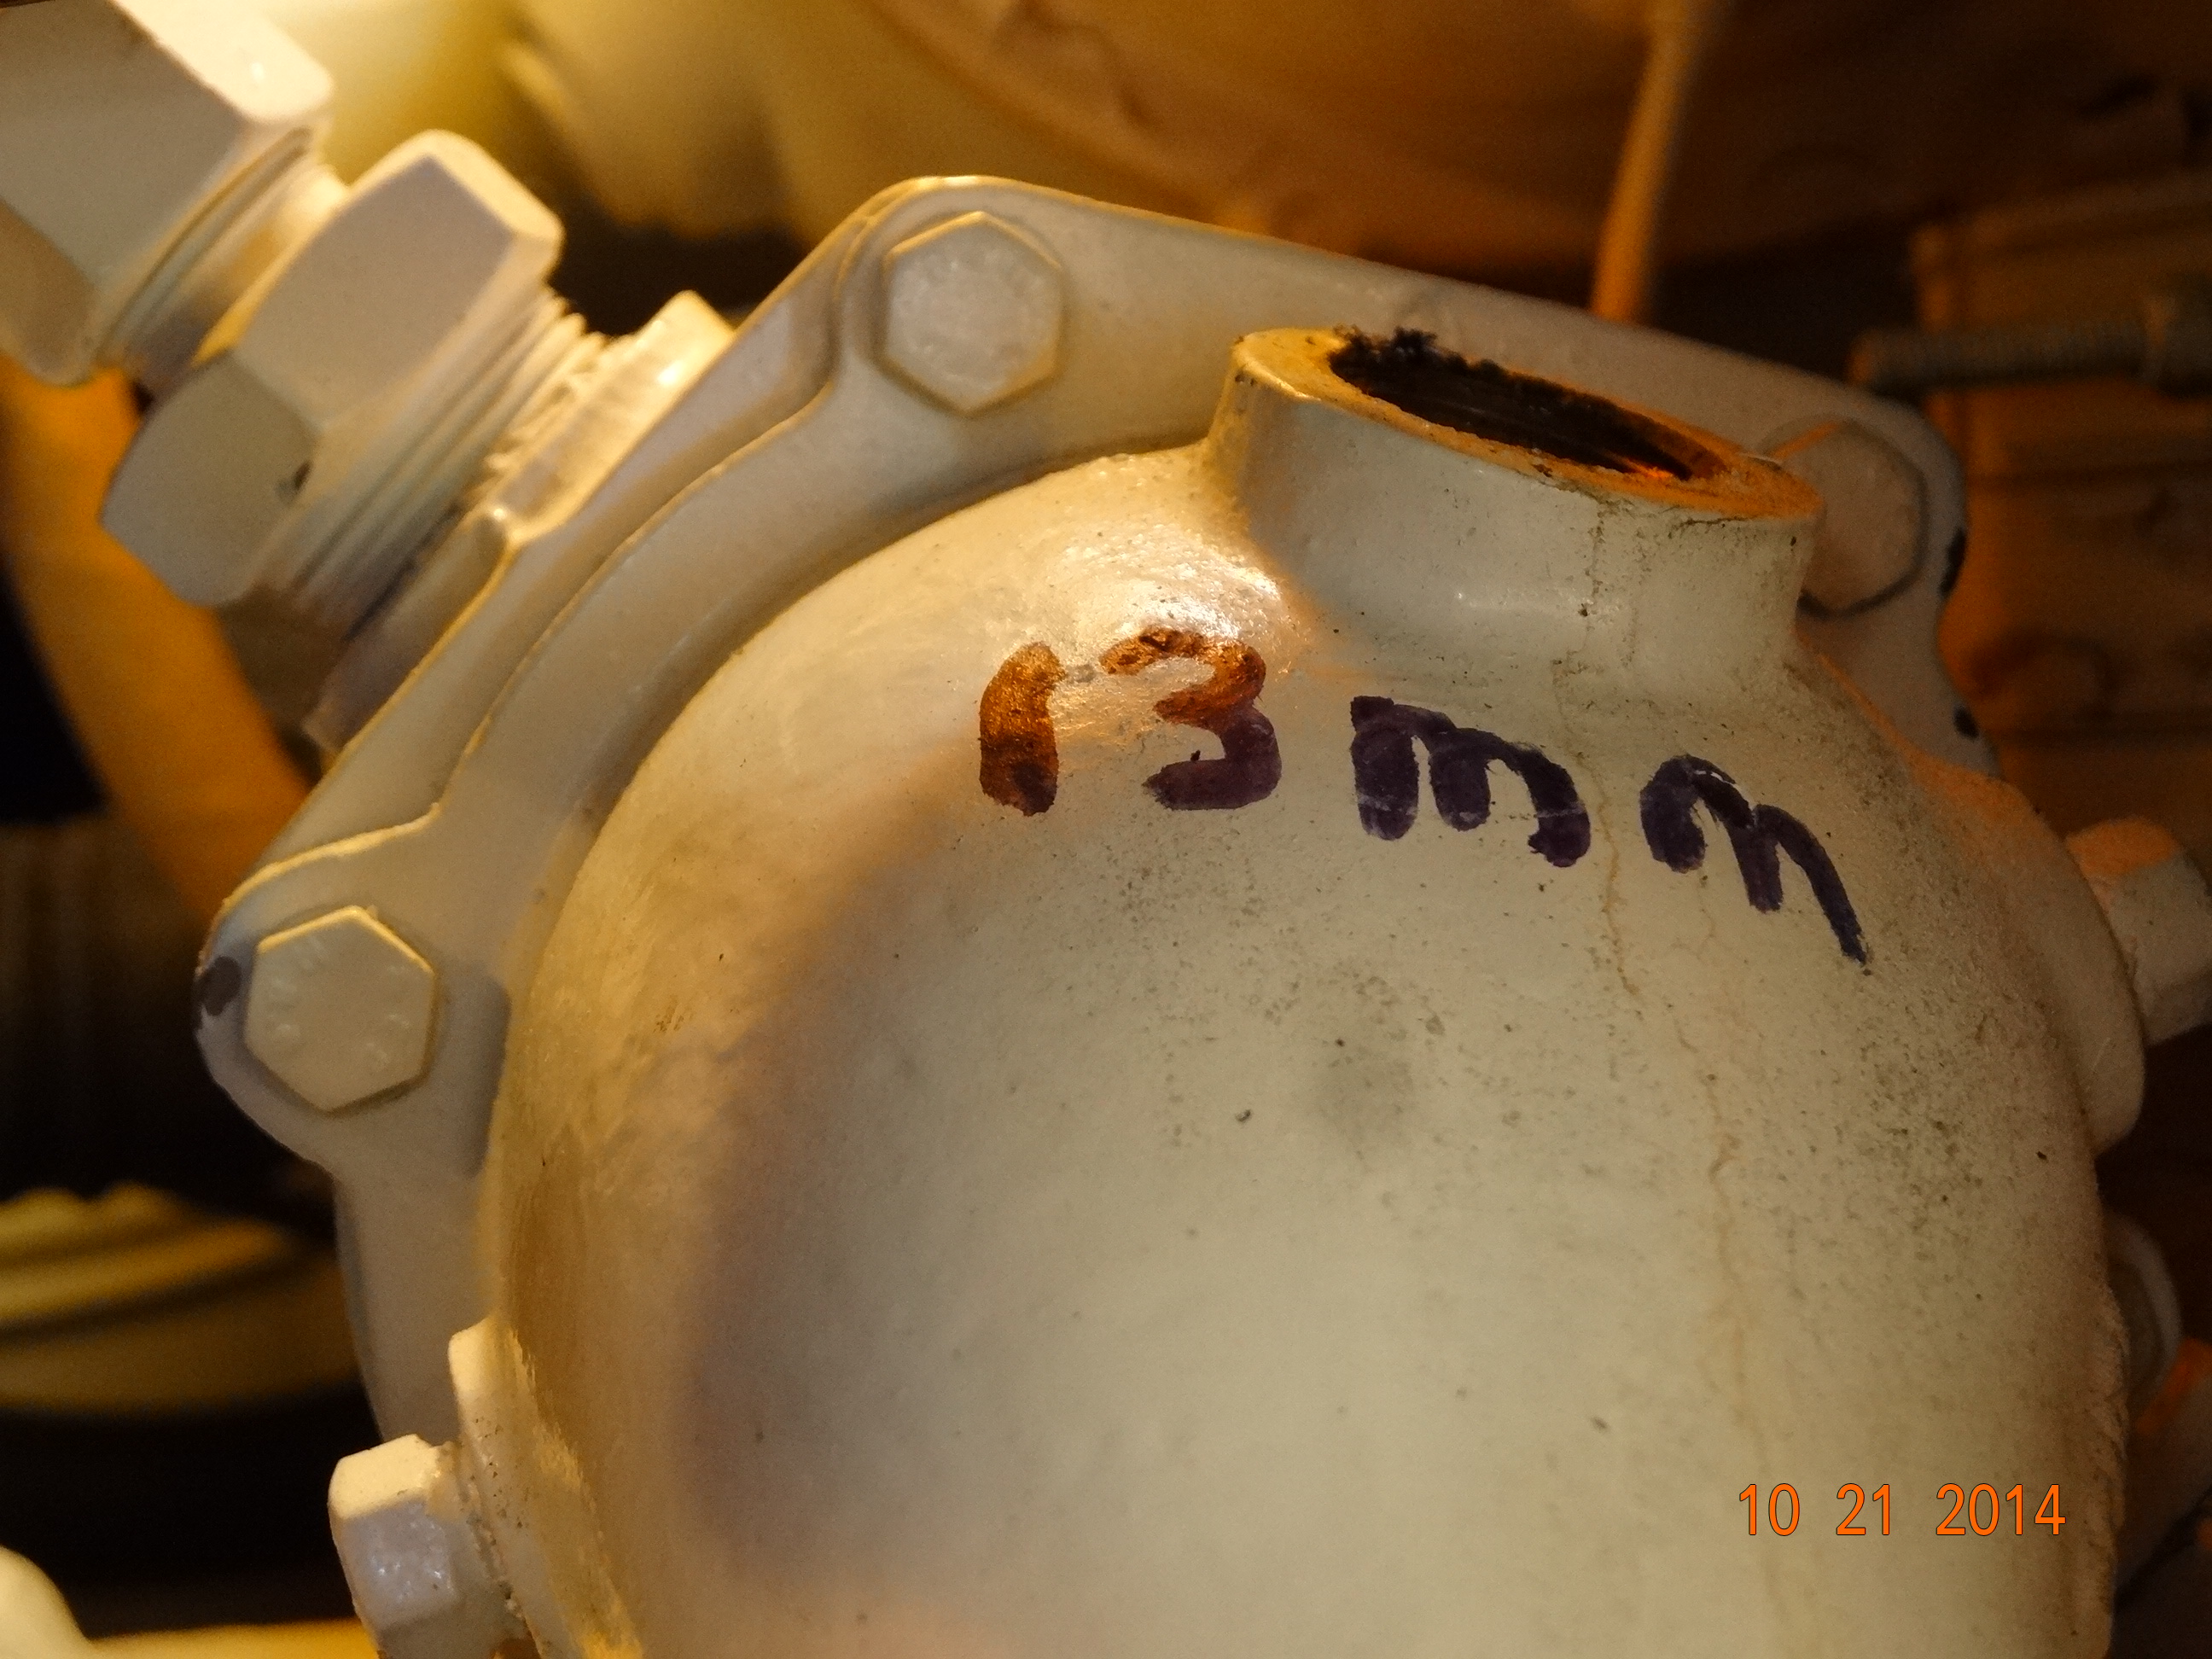
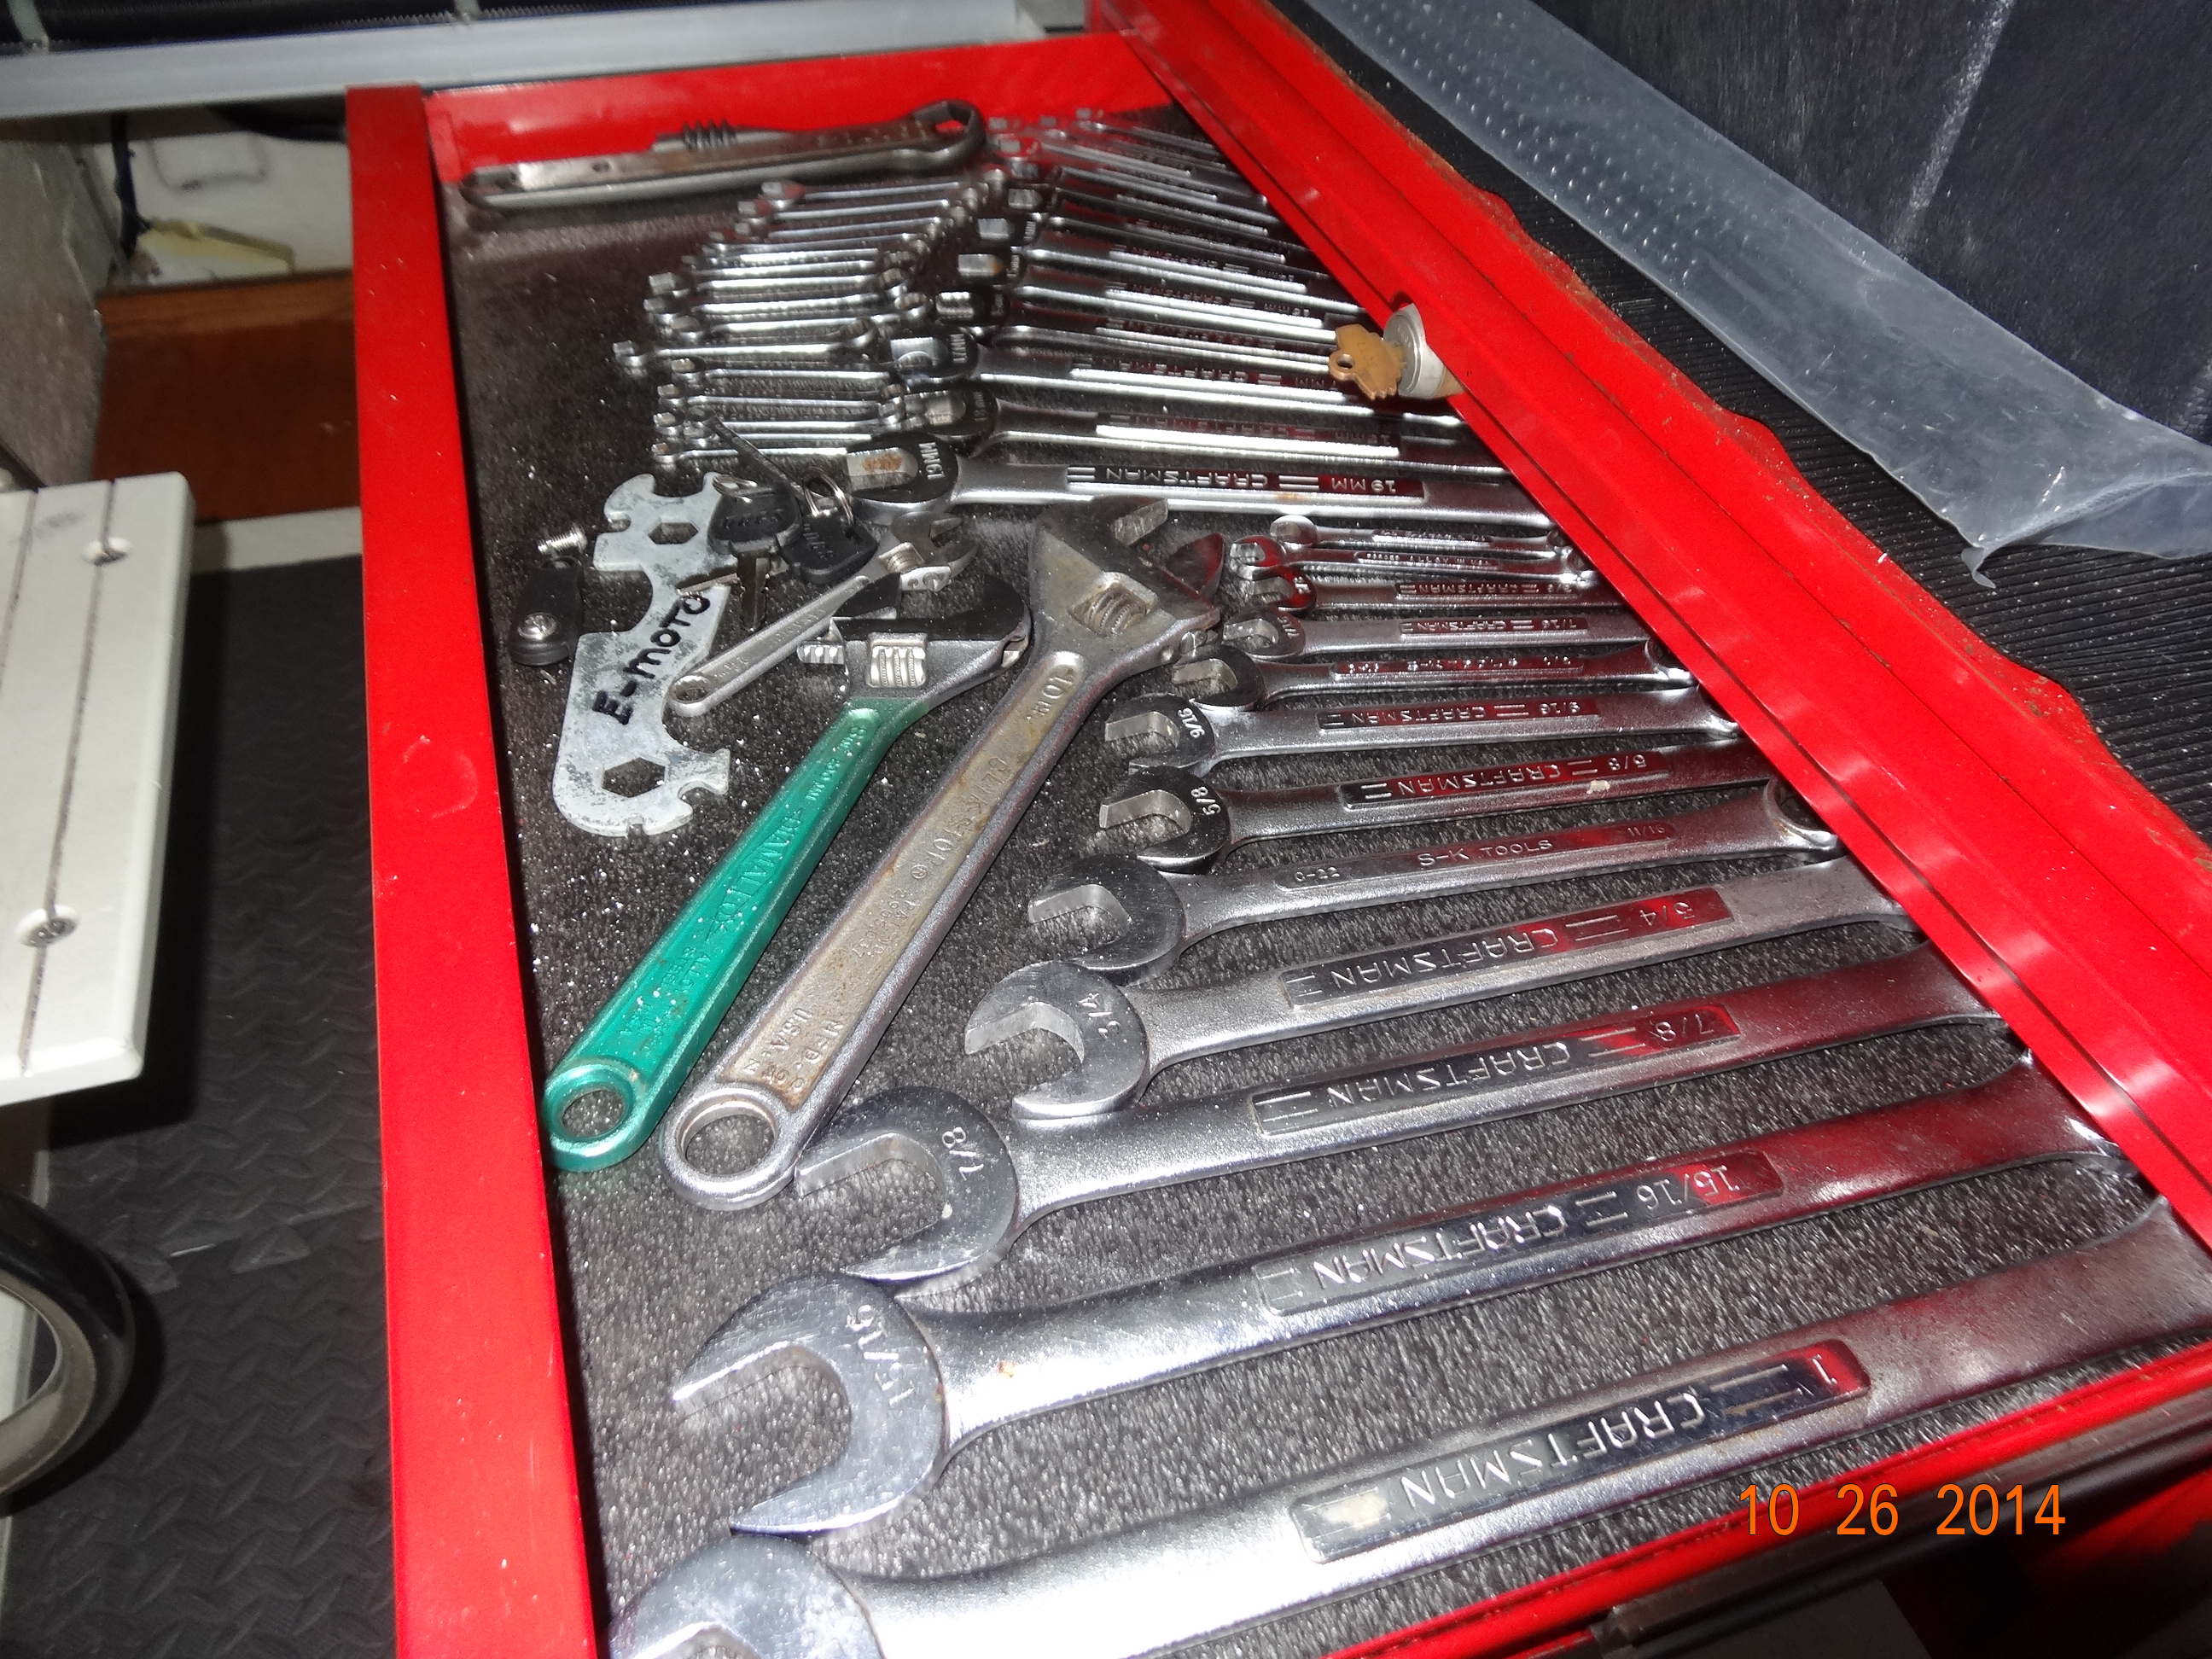
Note how Gary has marked what size wrench he is going to need to unscew the zinc? As he only does this annually, and as the old gray mare ain’t what he used to be (as none of us mares and fillies are 🙂 ), this saves him time, or me, as the case may be, and pain and agony on the knees crawling back and forth between the tool box and where he is working. “Why don’t you set your tool box near where you are working?” you ask? Have you seen his tool box?
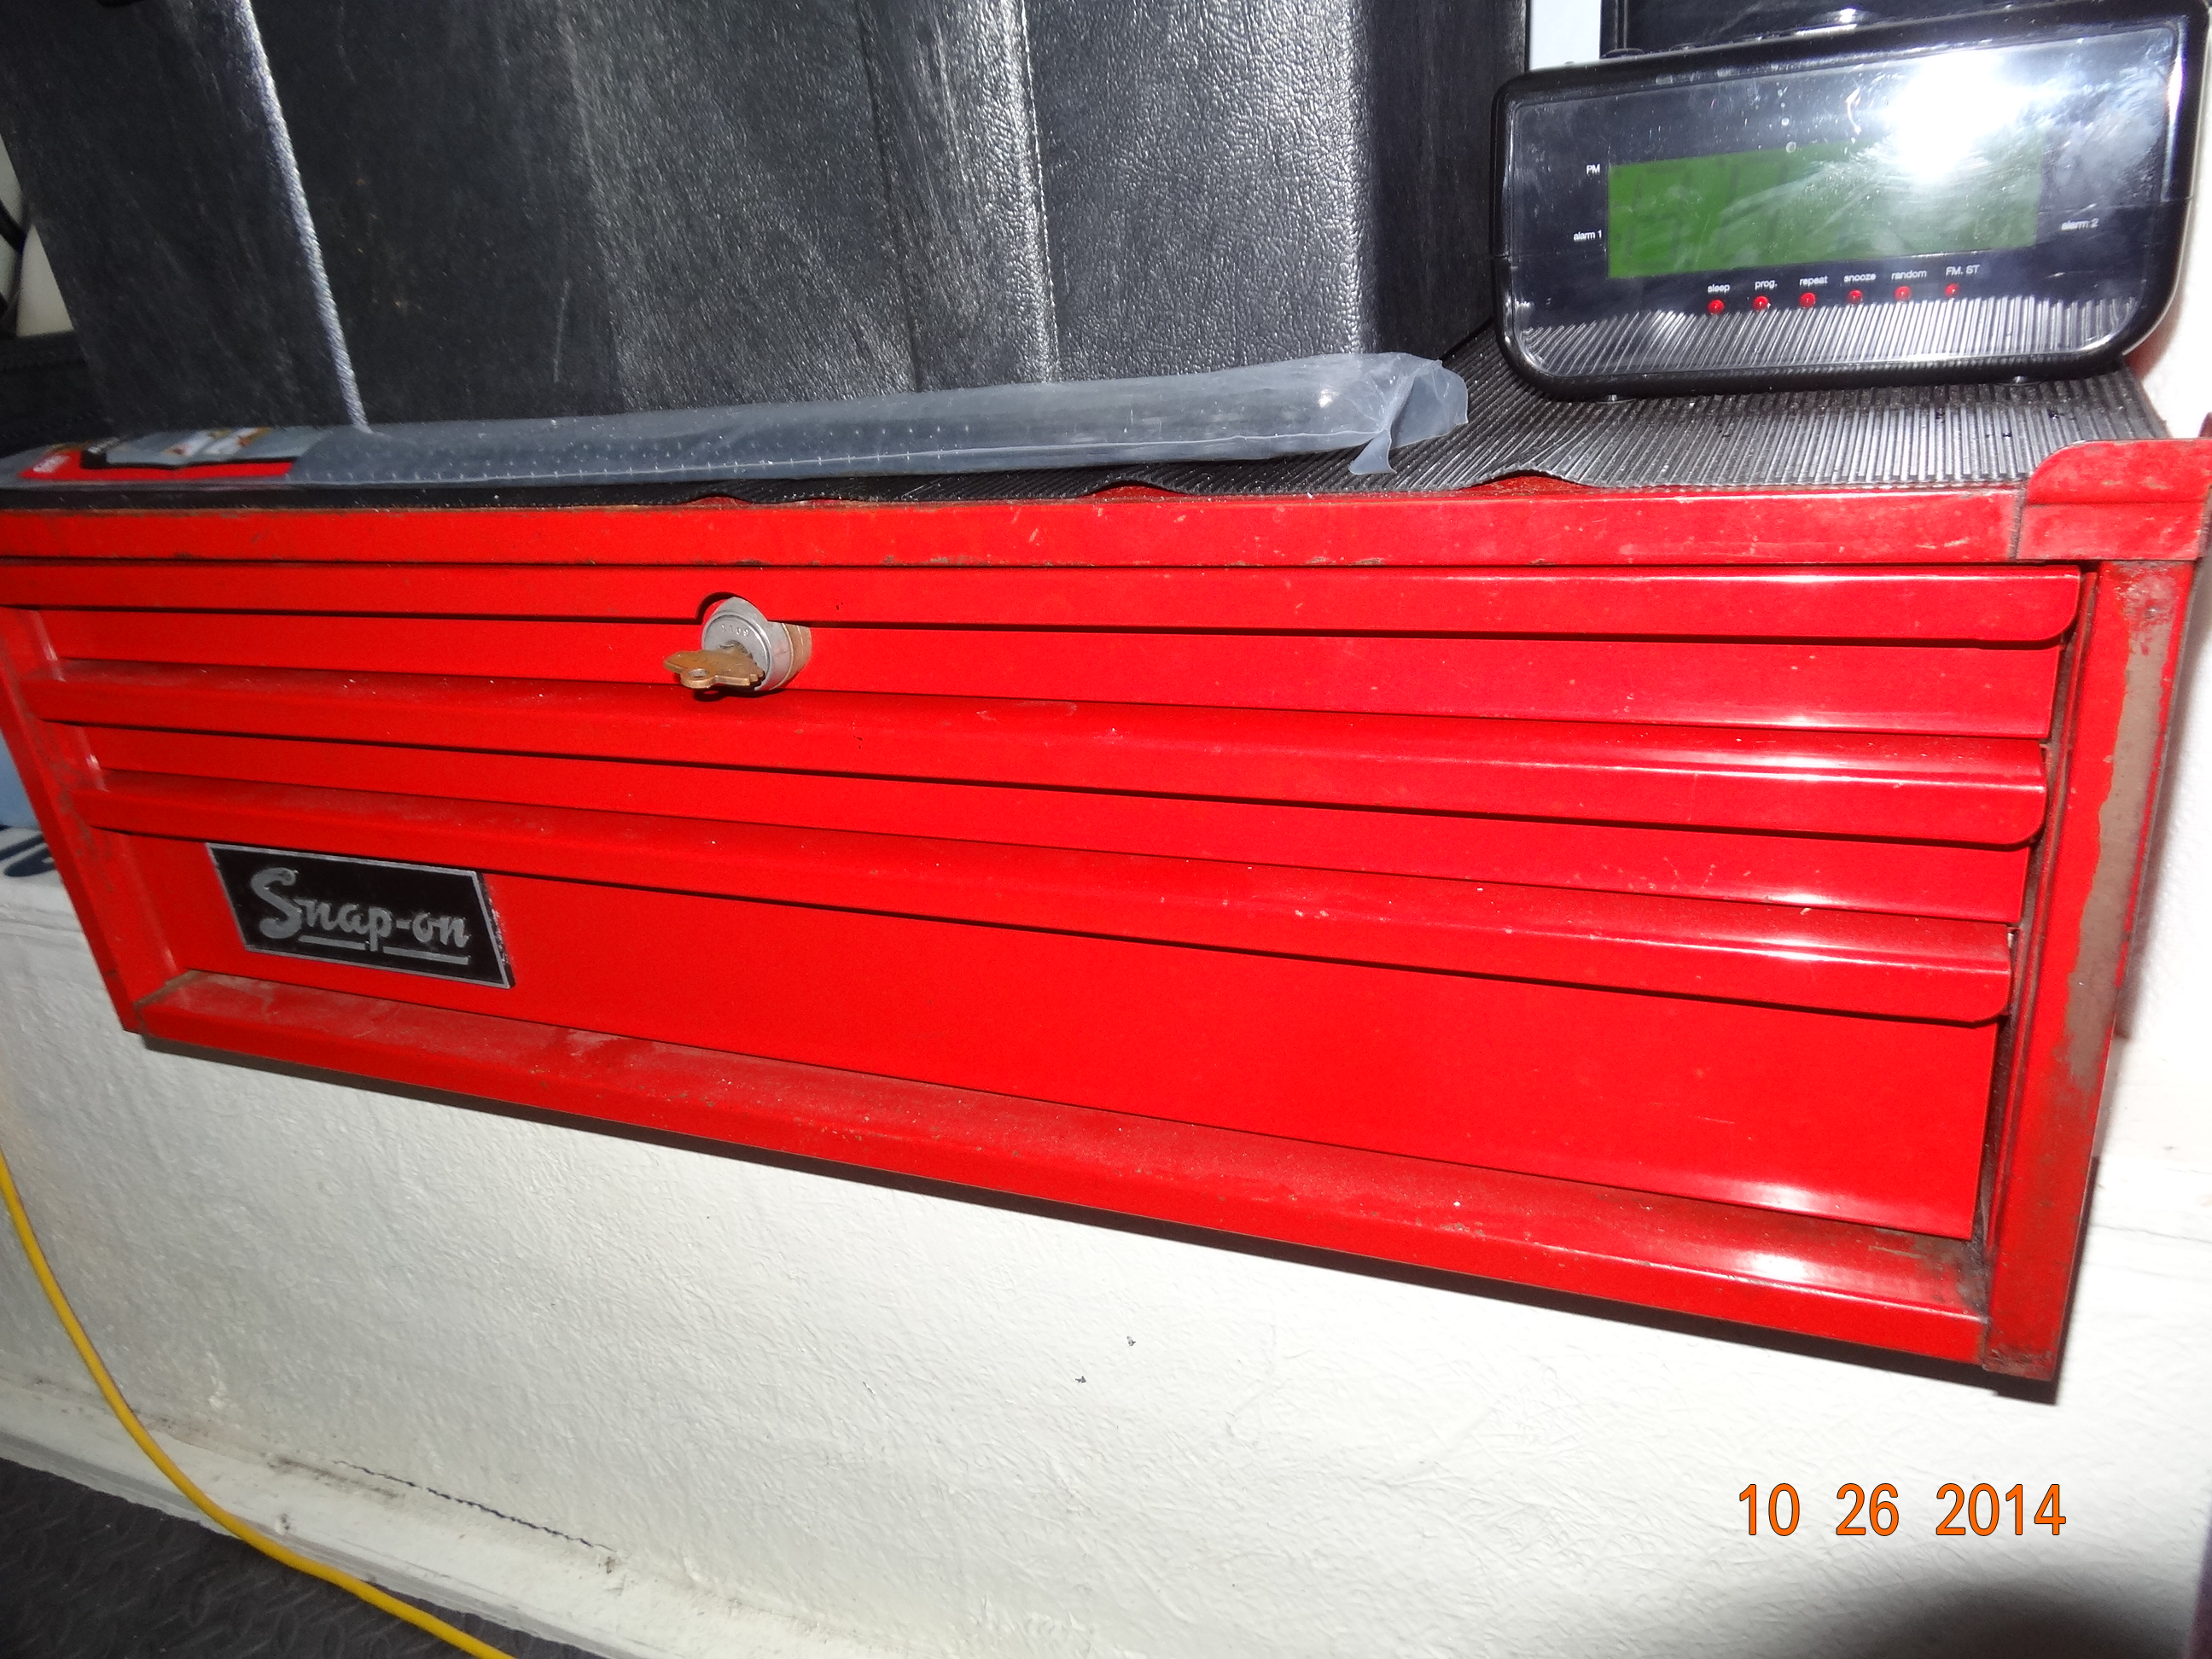
Snap On Tools
This is the top section of his tool box he used to have at the house. Goes back to when he used to wrench on his 1969 Road Runner. This weighs as much as a small pony!
Drawer
That is his wrench drawer….would you expect anything less?
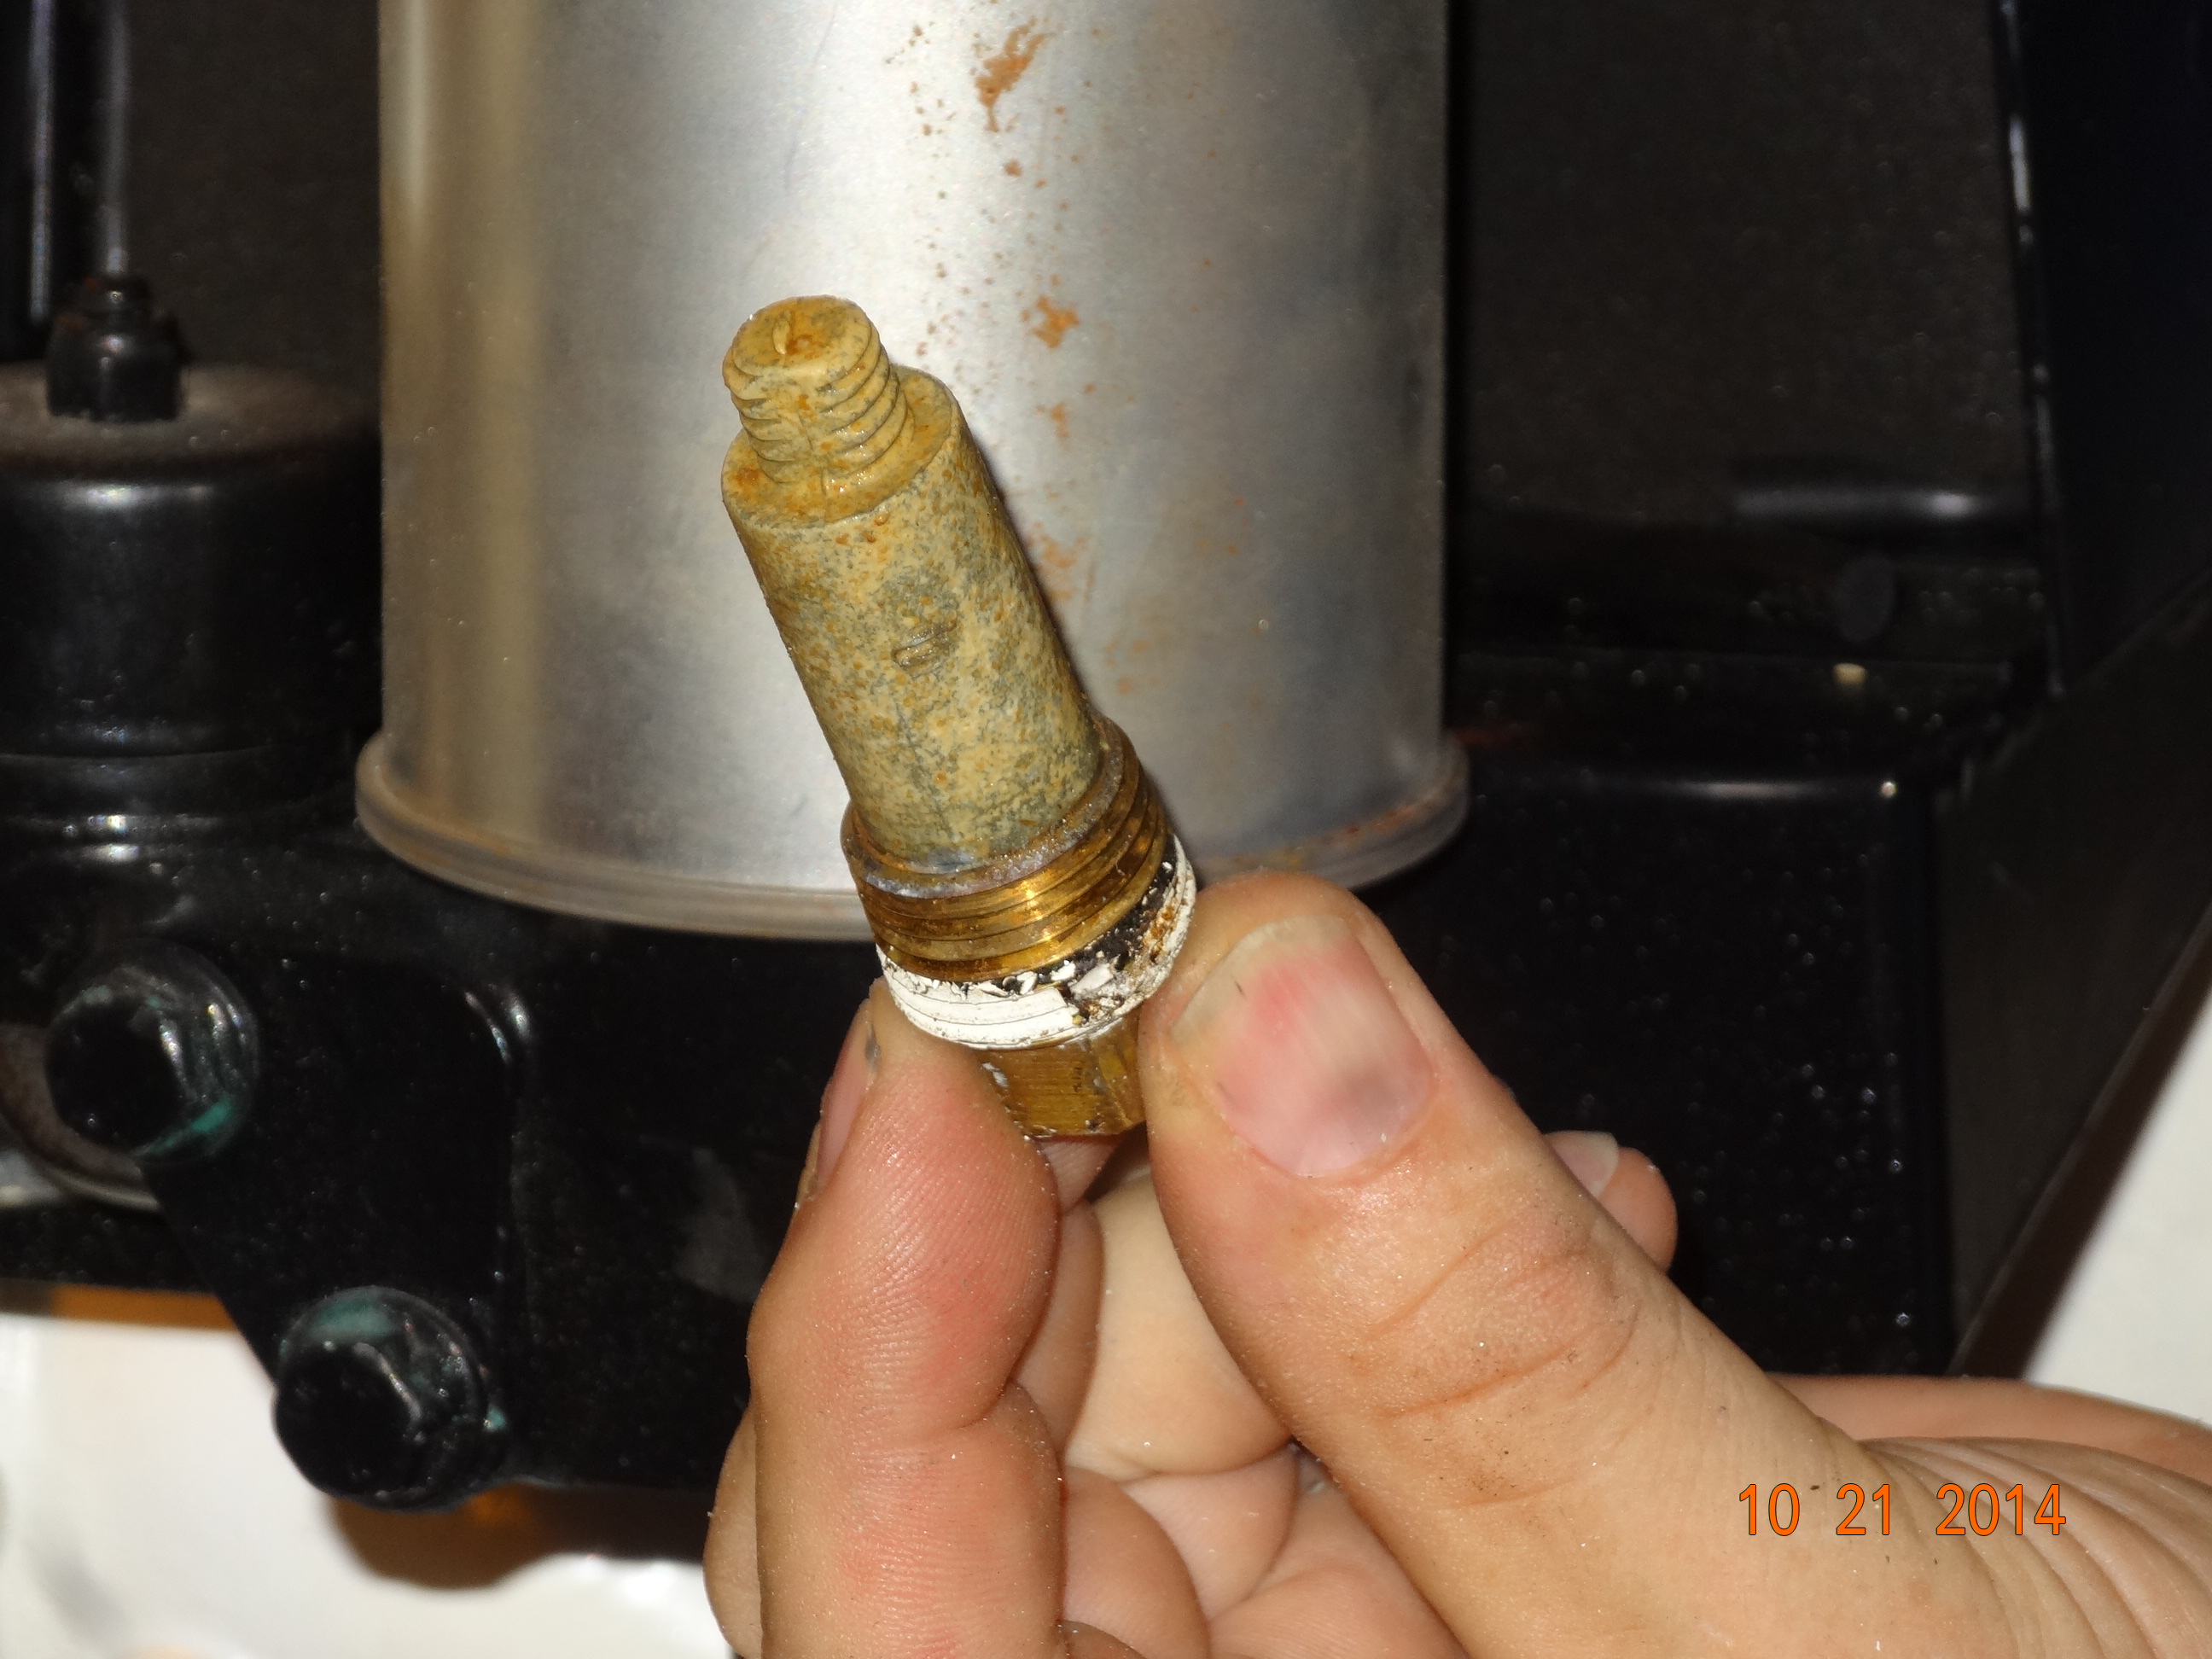
But, back to the tale at hand, changing zincs. Lets see, where was I? Oh yah, the third zinc we pulled out. This one is not as bad as the first, but we still replace it.
Tranny zinc
Last time Gary changed this one, instead of the zinc decomposing, it had a buildup of calcium or hard water deposits on it. So much so, that when he unscrewed it, the zinc itself stayed in the cylinder and just the bolt came out. He had to screw in a bigger bolt and wiggle the zinc around to knock off enough of the build up to get it out of the hole. Crazy man!
We have changed all the zincs on one of the engines. See, that wasn’t too bad. Now this would be better than cleaning the toilets :). I think I could handle this. Of course the zincs on the starboard engine would be a pain, so I guess I’d leave them for Gary.
That’s it. Maybe next time we’ll show you how to change the oil! I bet you can hardly wait…..I know I can’t!
Changing Raw Water Impellers
So today we go on to impellers. Last time we changed ours was September of 2013, we had 742 hours on the engines. We now have 974 hours on the engines. As you’ll see when we take out the old one, it still is in pretty good shape but as we are planning another trip over 1500 mile in the next year, we figured we should change them out. The kit costs about $35, cheap insurance, and it includes the impeller, a white gasket, some lubricant and a large black O-ring (which we didn’t need so we tossed).
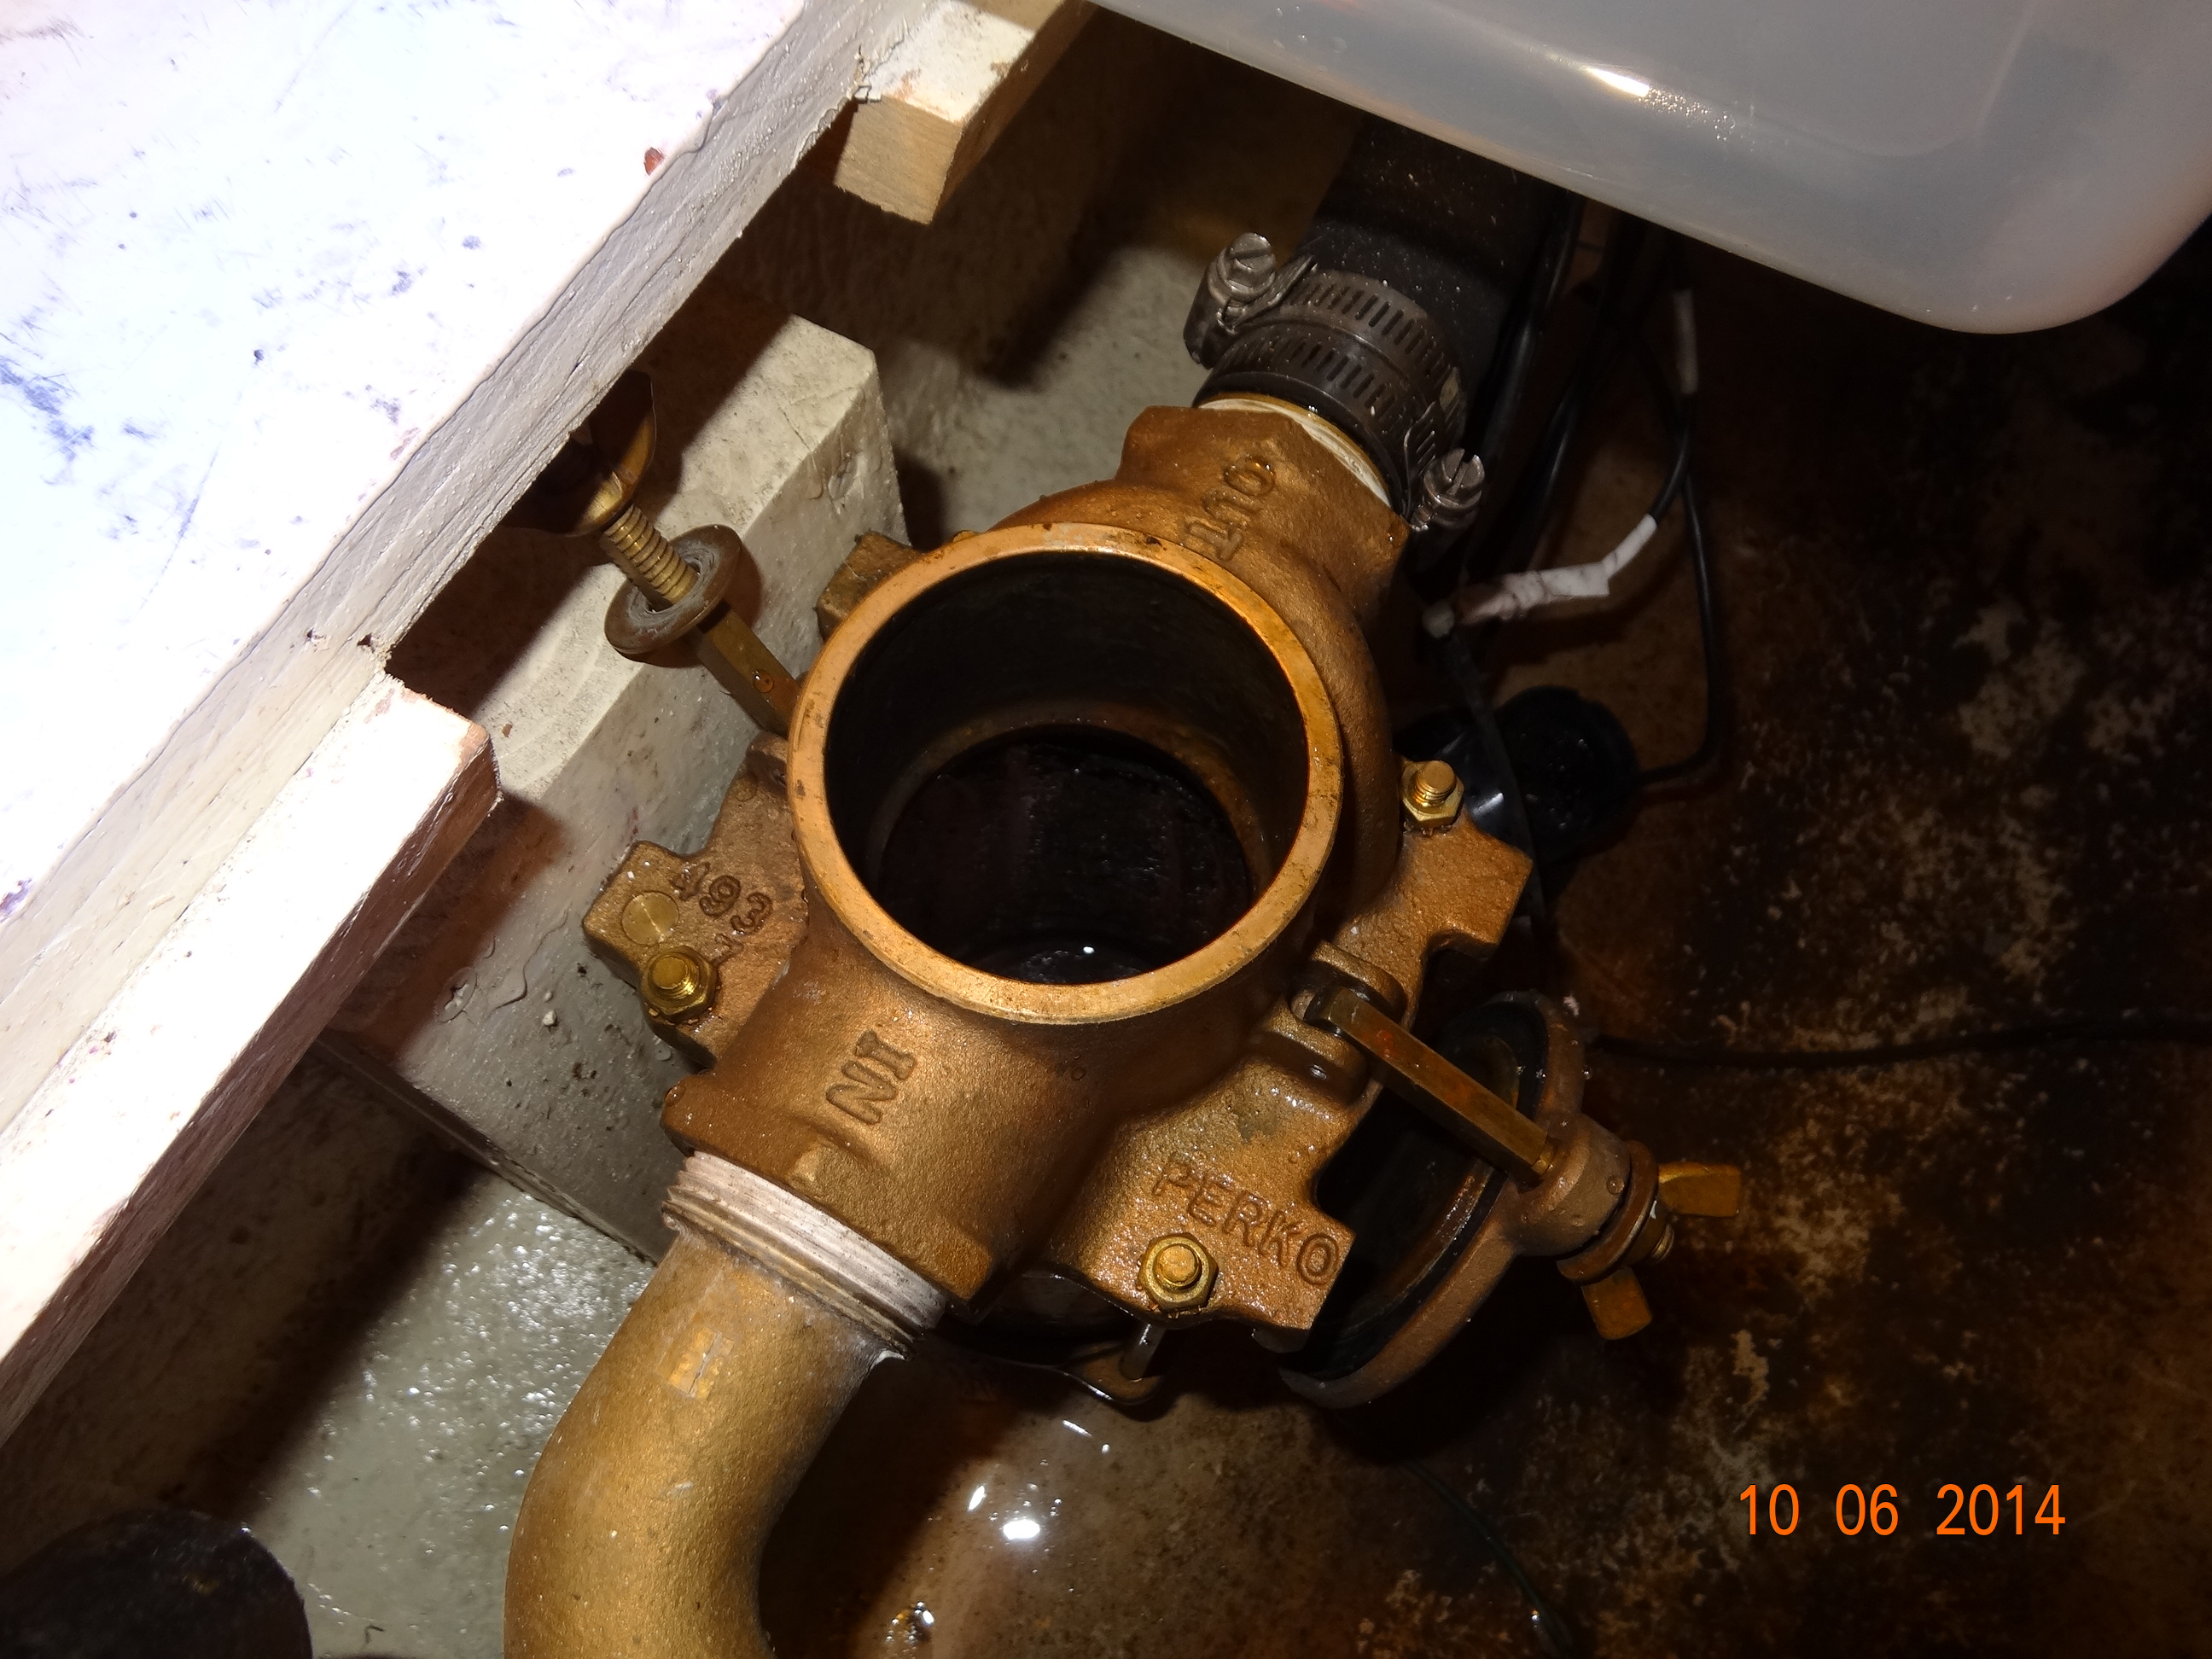
So, lets begin. The first thing you want to do is close the sea cock. Do you remember what that is from cleaning the sea strainers? Here’s a picture
Close thru hull, this one is open
Again, very important. Then we are going to unscrew the brass plate of the raw water pump where the impeller is hiding behind
Close up of Brass plate
Here are a couple of pictures taken further away so you can get the idea of where it is located on the engine
Further
Even Further, this is the starboard side of the port engine
As I said, the impeller sucks in sea water so when you take the plate off there will be water draining from it. So if you want to put something under it to catch the water, you can. This will save getting the wet vac out later (that is of course if you really care about a little water getting in the engine room :))

See the water droplets?
Then you are going to screw the black bolt of the impeller removal tool into the impeller. (Not all impellers are the same size. So this tool may not work on your impeller)

Impeller puller
As you screw out the silver bolt, it will pull the impeller partially out, then the fun part starts :).
Extra help
As it is tight quarters and you can’t really get a good grip on the impeller that is wedged in there and not coming out no matter how hard you pull on it, I think it is time to get the hammer too……whew! After attaching 2 vice grips and giving them a few whacks with the hammer, the impeller finally comes out. Scheze Louise! It looked so easy on YouTube :).
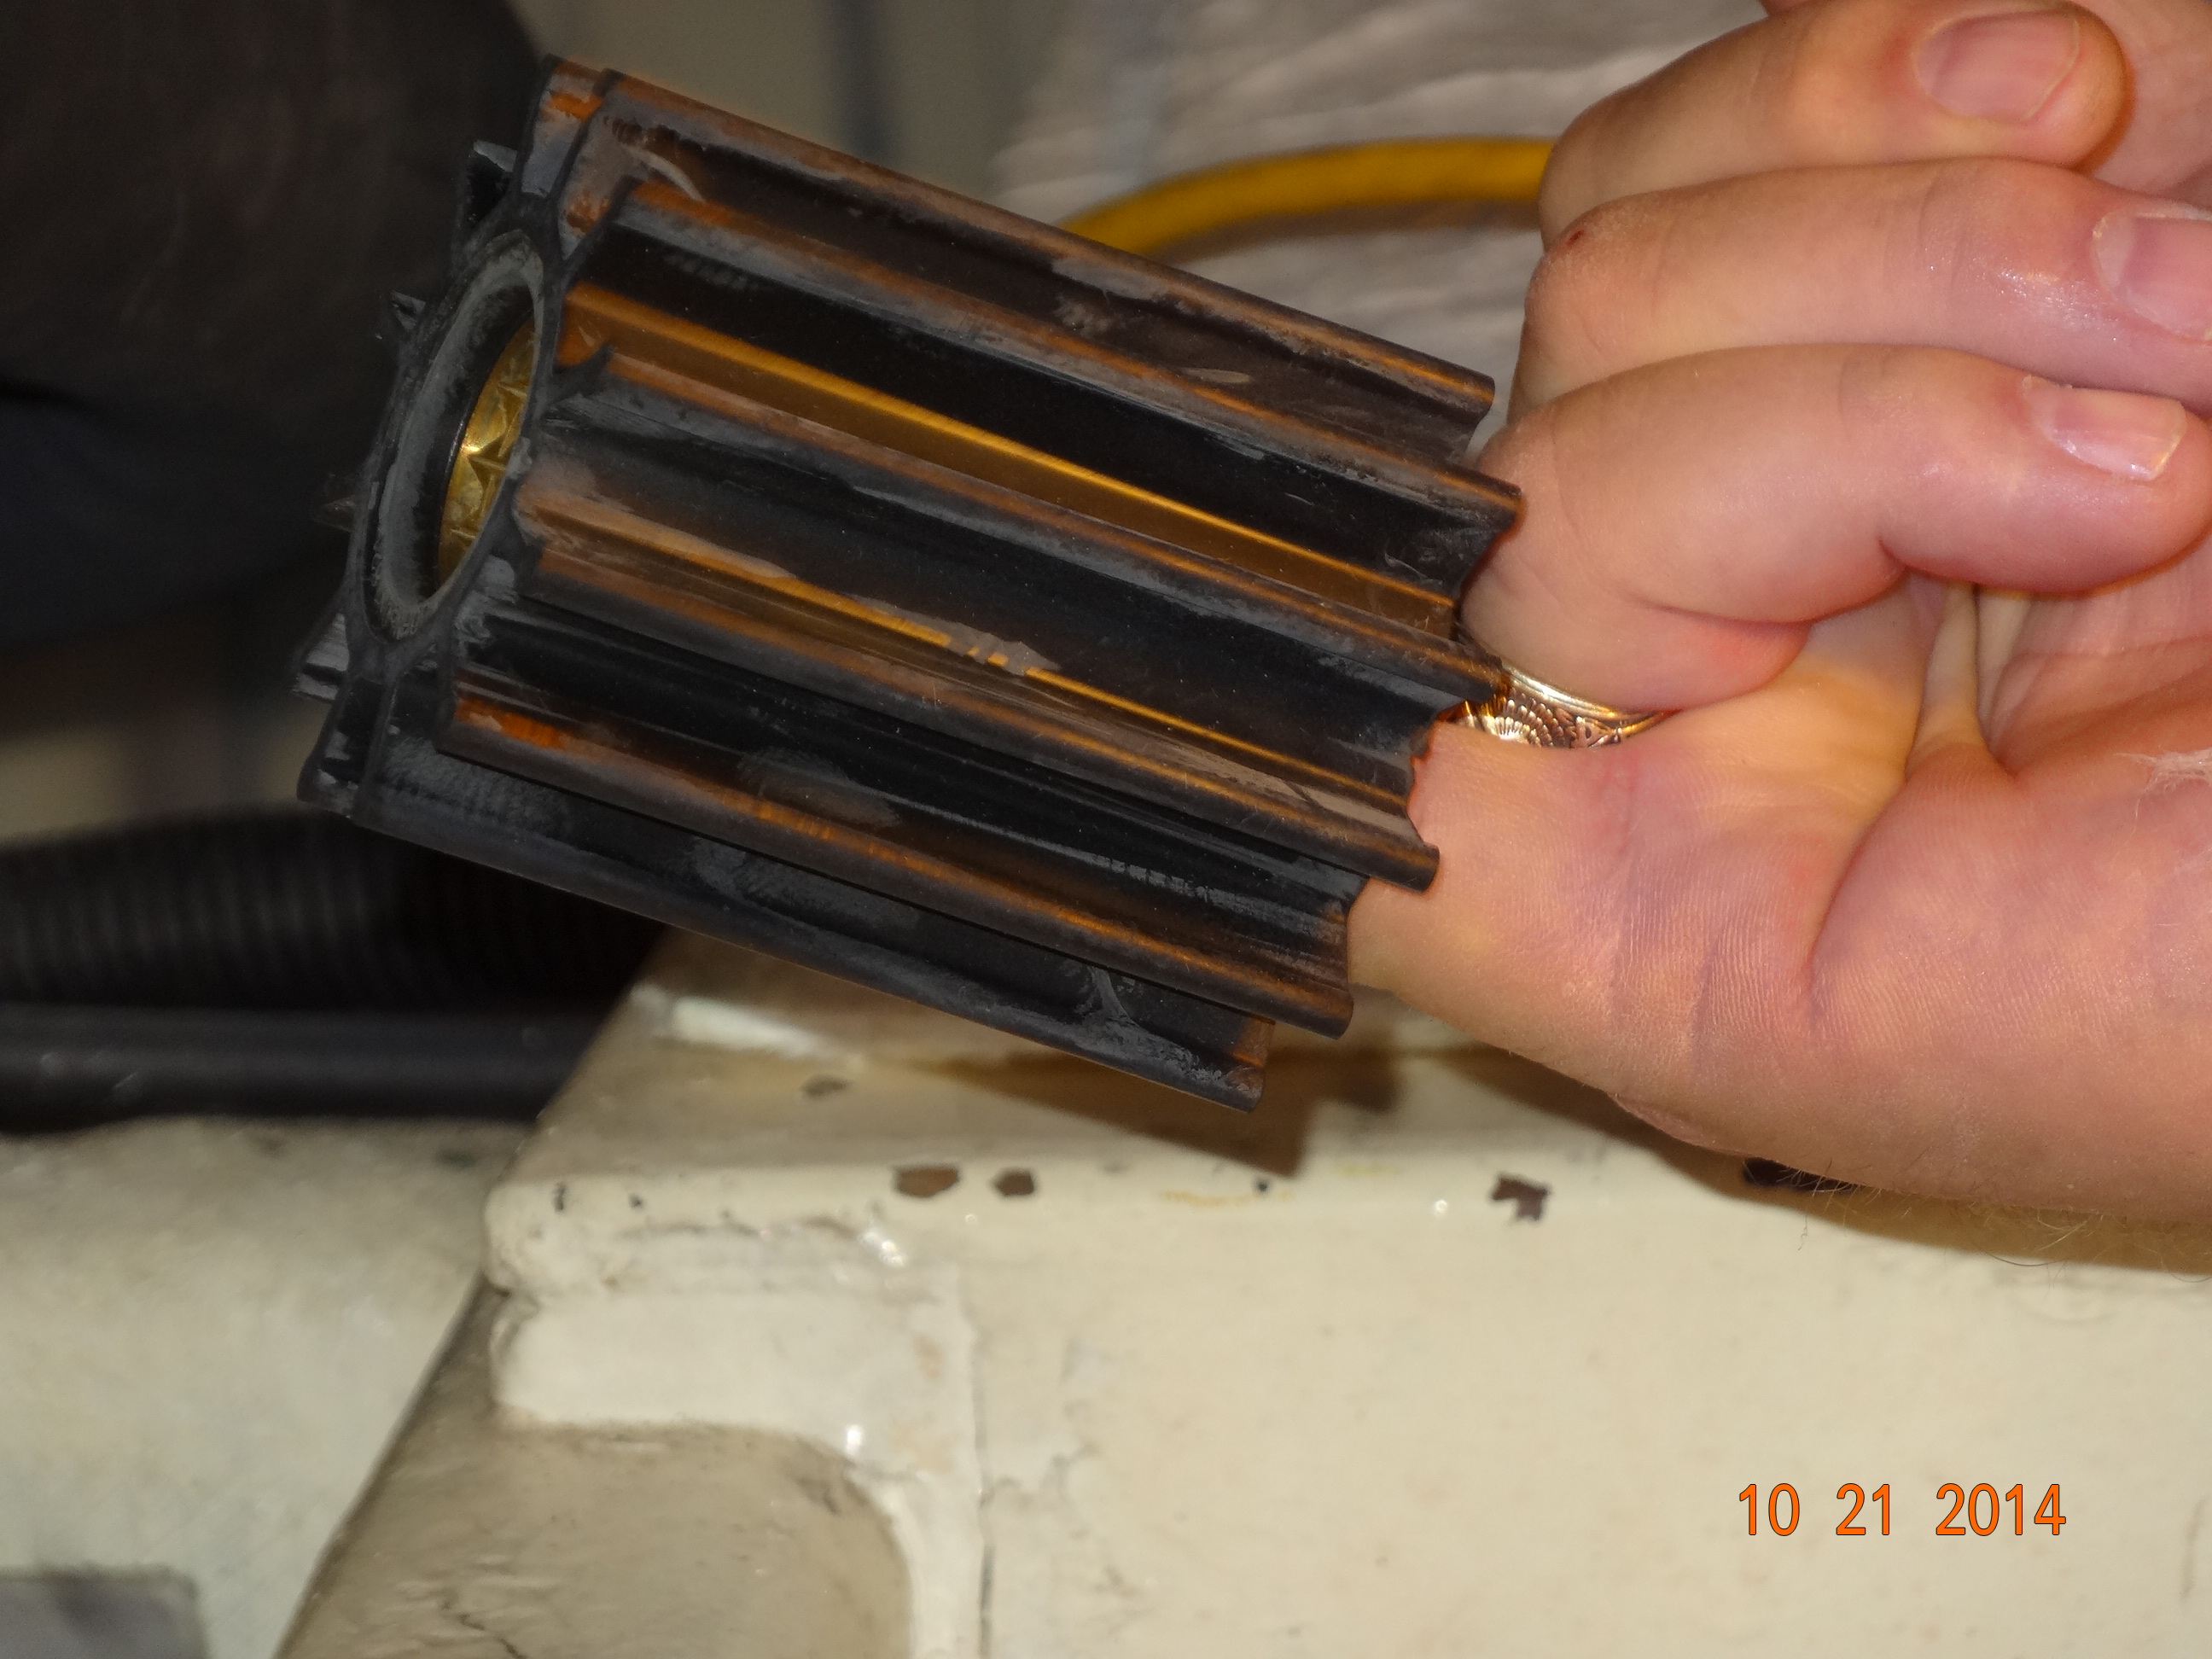
Old impeller
See, the impeller doesn’t look bad, still has all it’s veins! Here is a picture I got off the internet of a bad and a good impeller. This person obviously didn’t follow Gary’s maintenance schedules 🙂
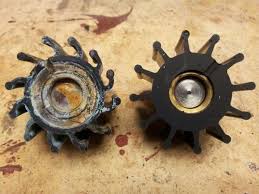
Bad and good impeller
So, now we have the impeller out, we wipe out the inside of the raw water pump just to make sure there is nothing icky inside of it and because we are Gary and we like to wipe things off (I think he got that from his mom, good thing I am not a smooth surface, he’d be wiping me off all the time!) Next you want to open the little lubricant tube that comes with the kit
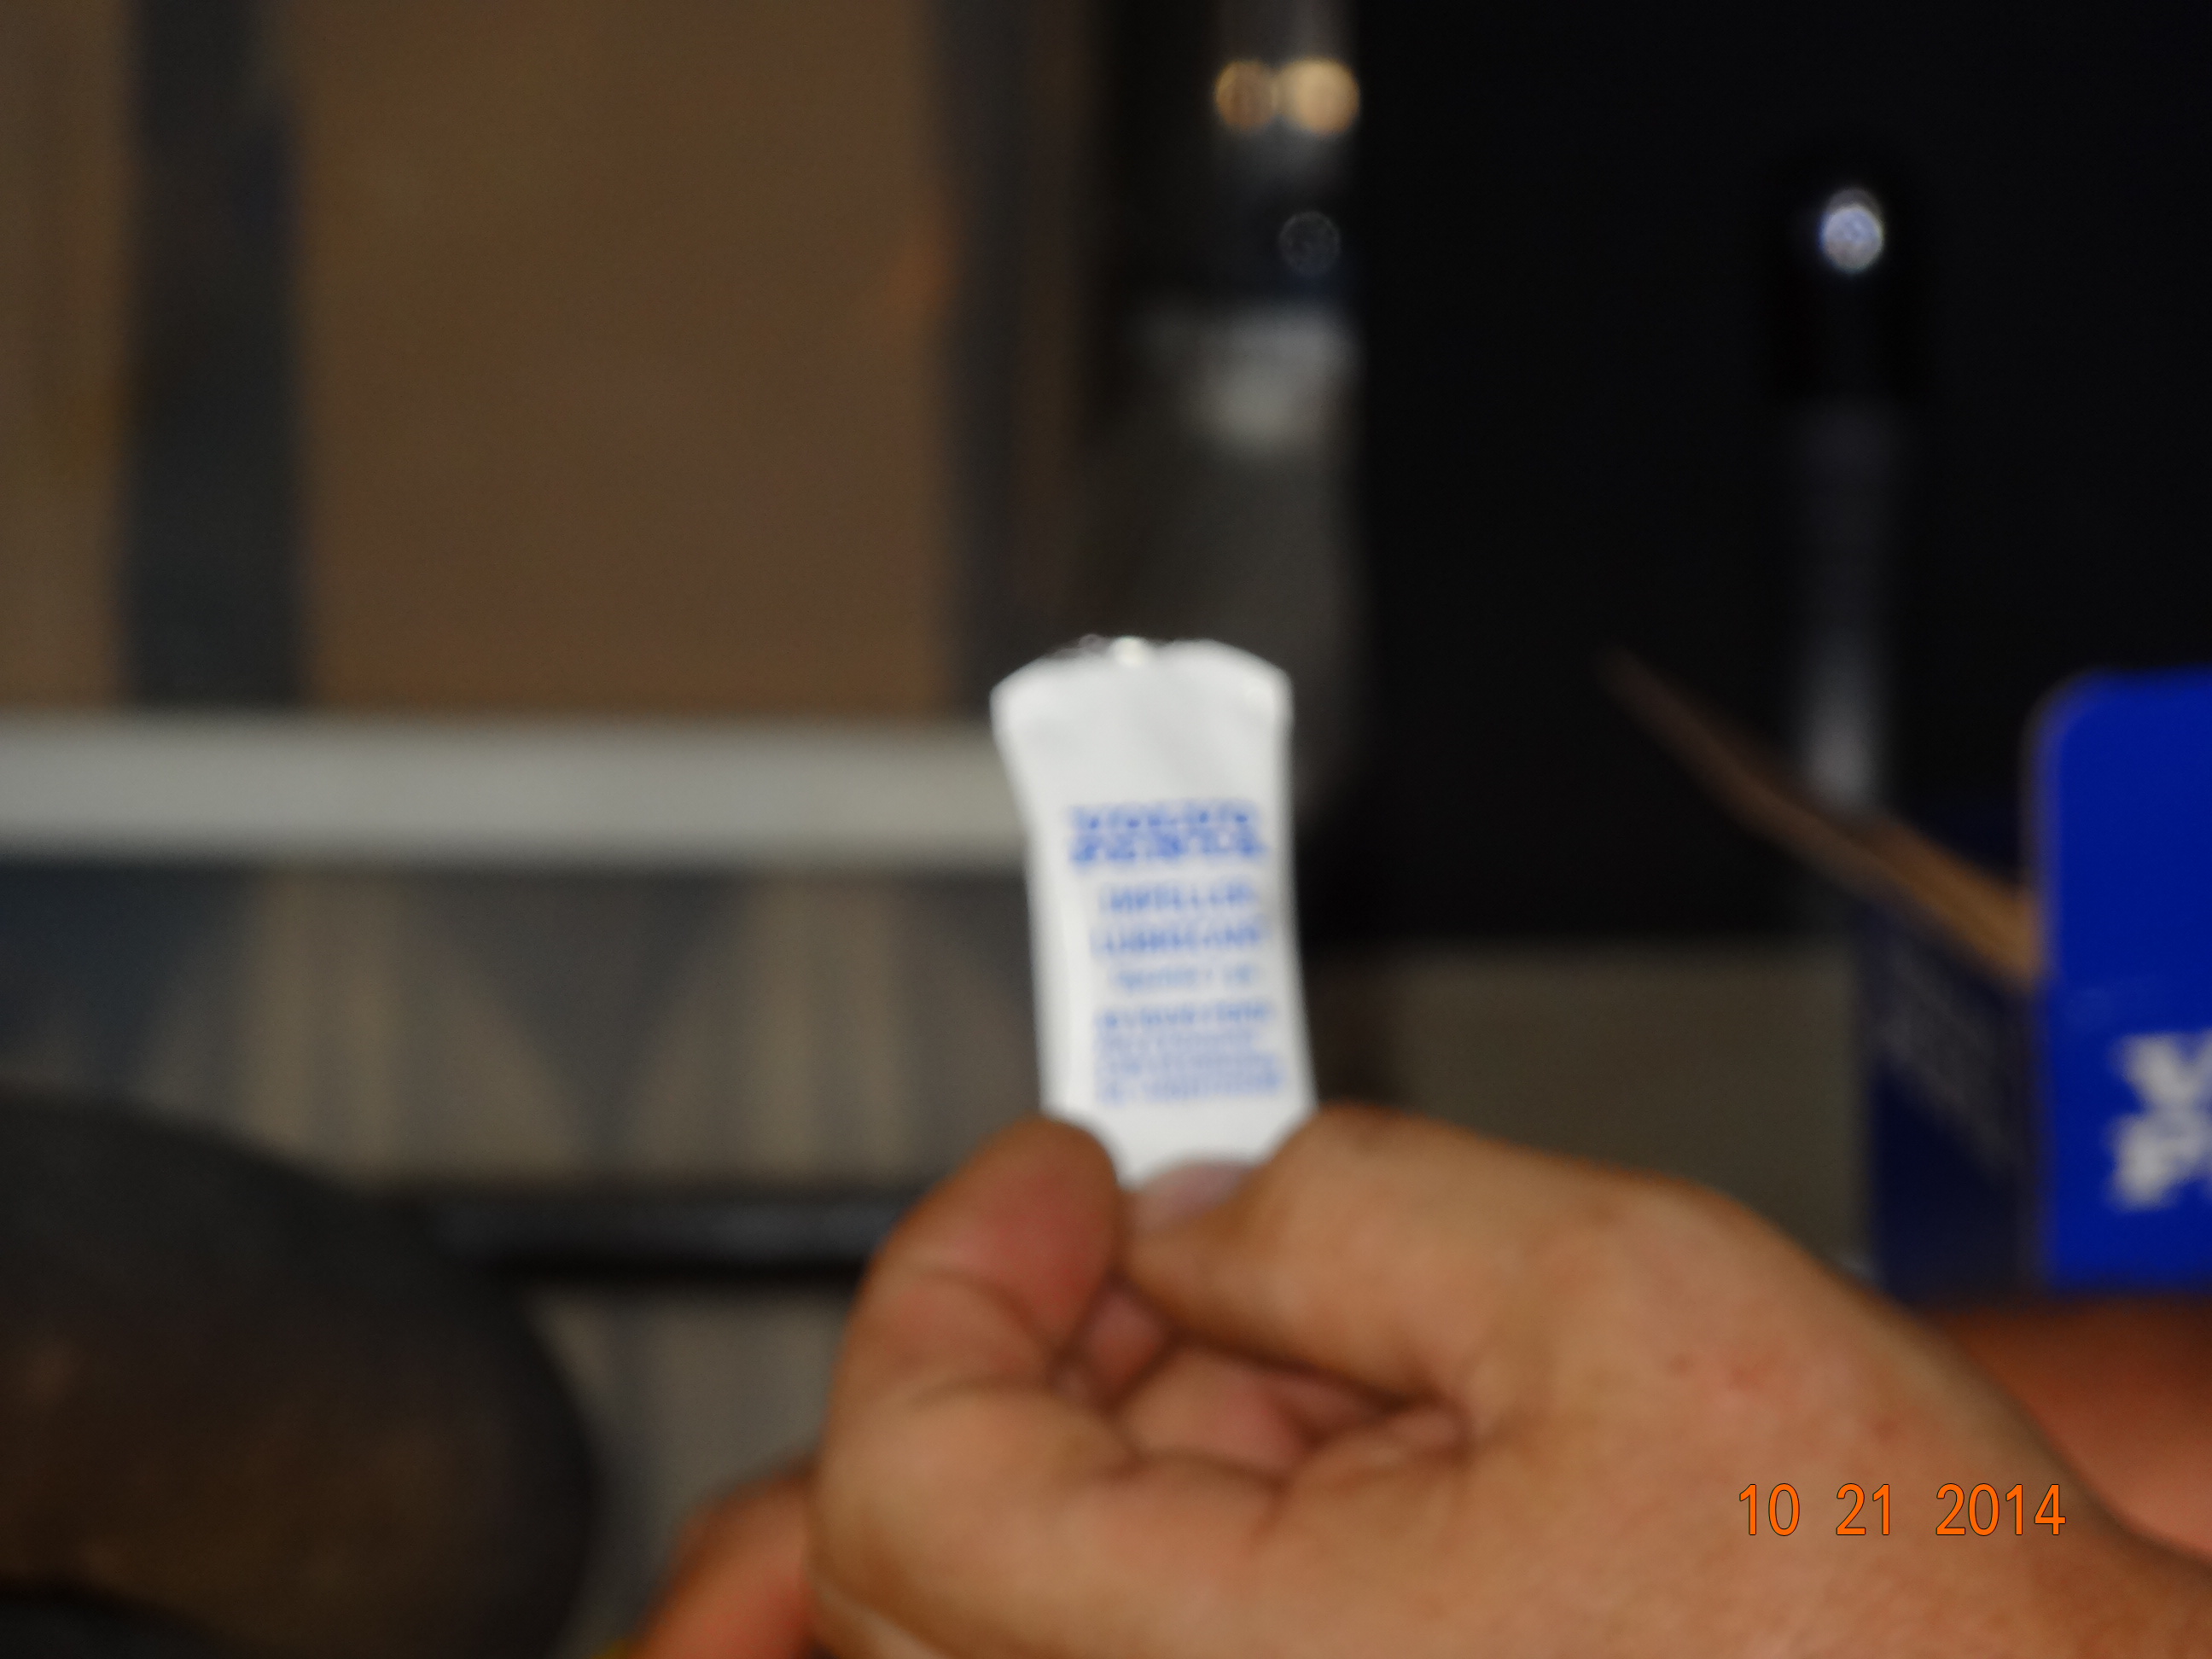
Lubricant tube
and you want to smear this on the tips of the fins of the impeller.
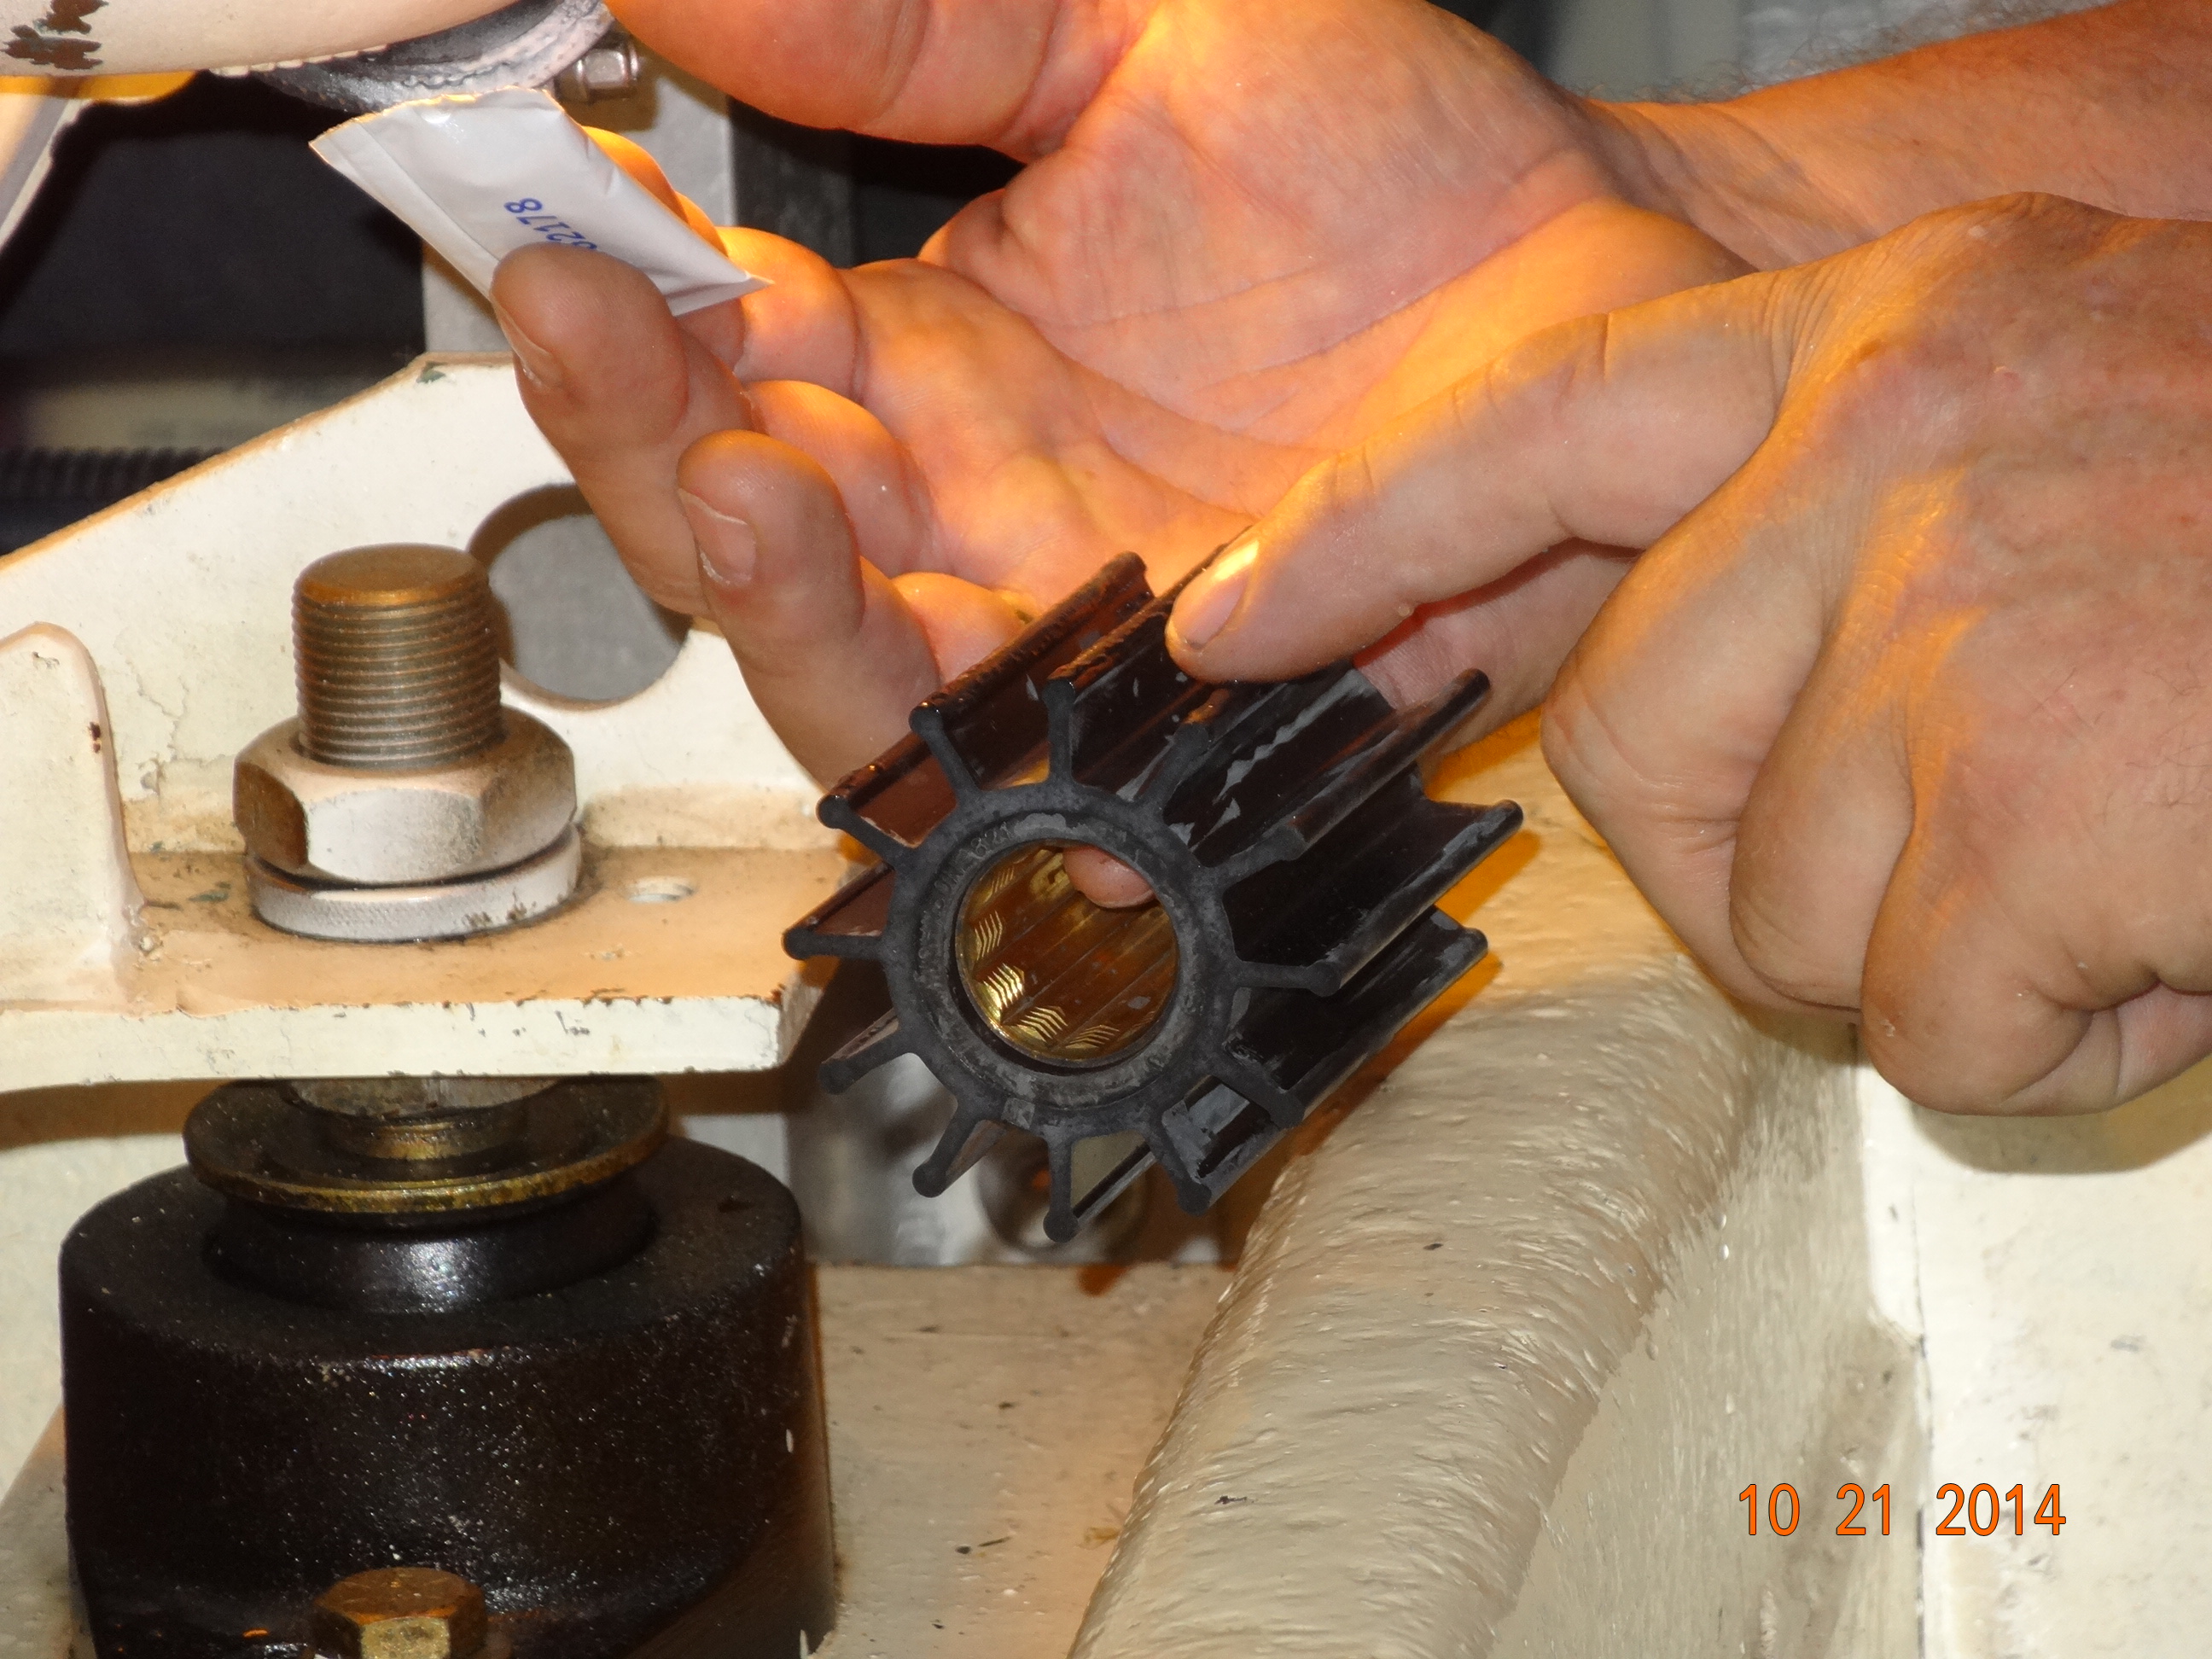
Putting on lubricant
This will (hopefully), make the new impeller slide back in easier. (Yah right! On the other engine he also squirted some WD40 on it, and it went in much easier. Something every home or boat should be sure to have is WD40 and duck tape. You can fix a lot of problems with these two items 🙂 )
After some more light pounding with the hammer, the impeller is in place. Now all we do is put the gasket on the brass plate
Cover Gasket
screw back on the brass plate, and there, all done with that one. The last thing, again, most important, open the sea cock!
Of course, this engine was the easy one to work on cause Gary could sit on the walkway in the engine room
Gary in walkway
The engines face the same way so in order for Gary to change the impeller on the other engine, he has to crawl around the starboard engine and lay up against the hull
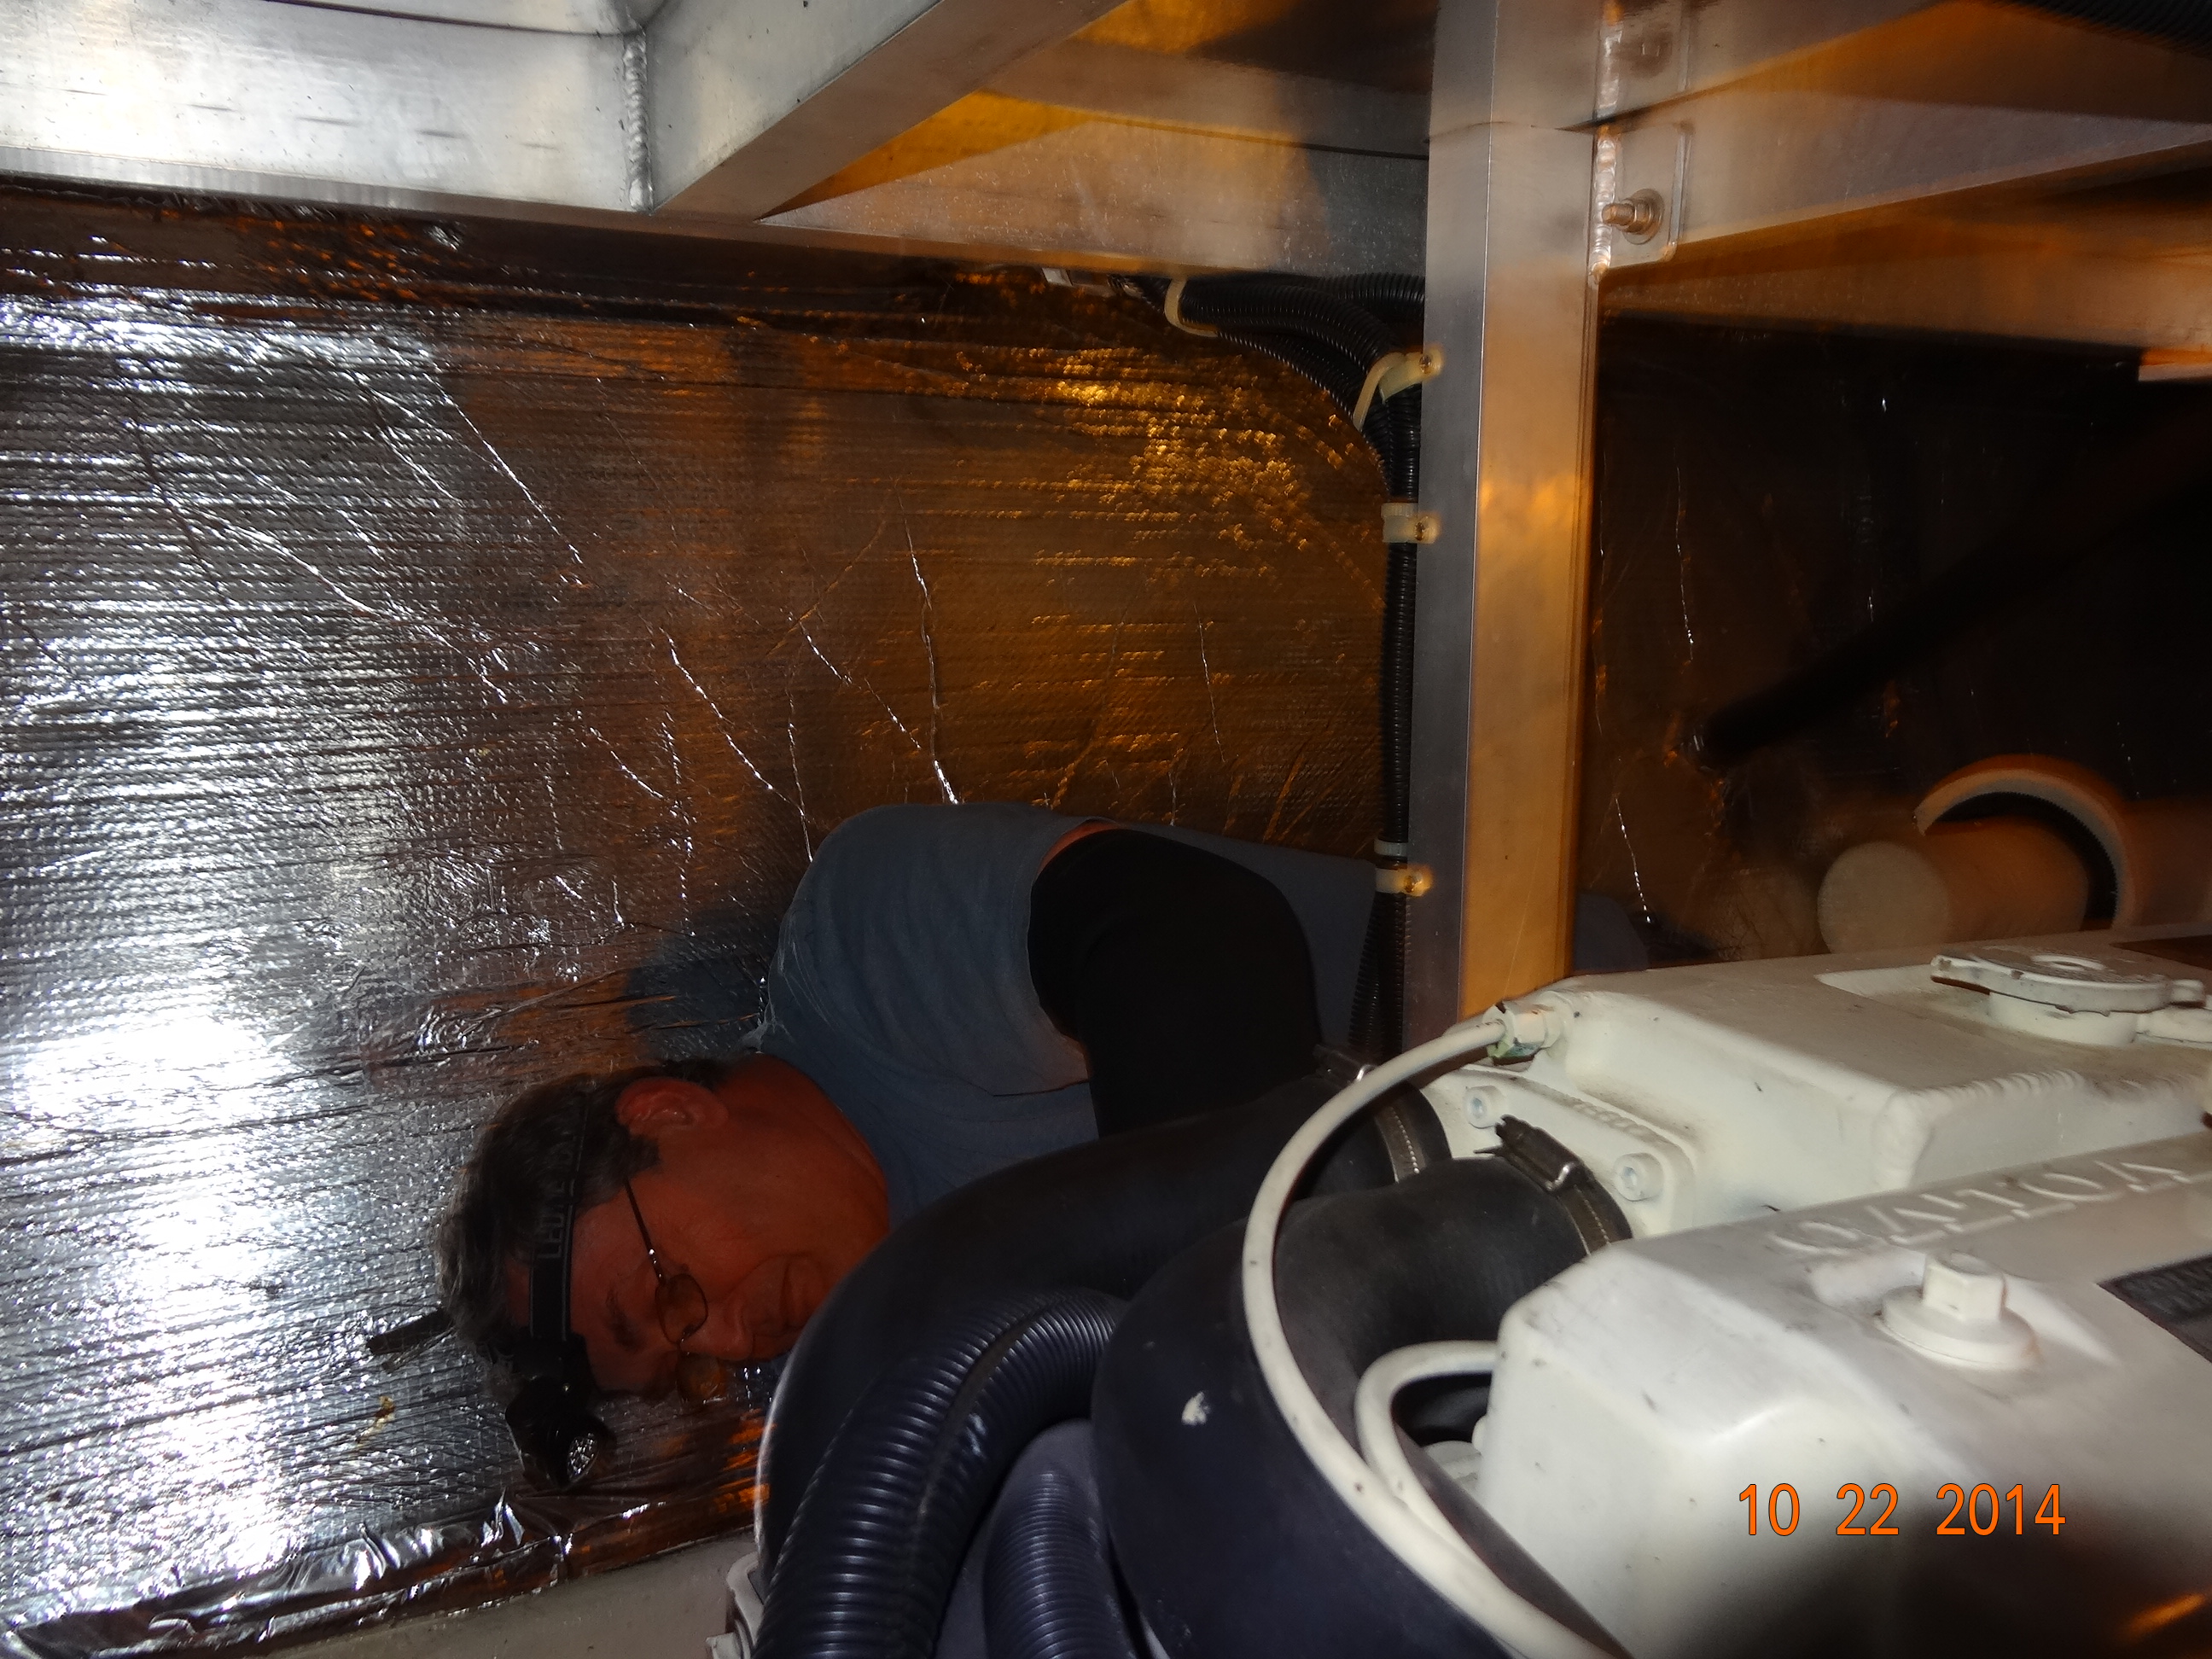
Doing the Starboard engine
Not as much room but much more room that others have. So after about two hours, we have finished changing both impellers. My knees are killing me from crawling back and forth fetching tools for Gary. I think I’d rather clean the toilets!
Cleaning the Sea Strainers
I have now learned how to clean the sea strainers and what they are for. Ya know, it is always good for the First Mate to learn these things in case the Captain is indisposed, like taking a nap or having a beer :).
The first thing I learned is that the Sea strainers are used to have the “sea” water flow thru them and clean it before the water runs thru various machines, engines, generators, etc., in your engine room to cool them. A sea strainers look like this

Sea Strainer with glass bottom
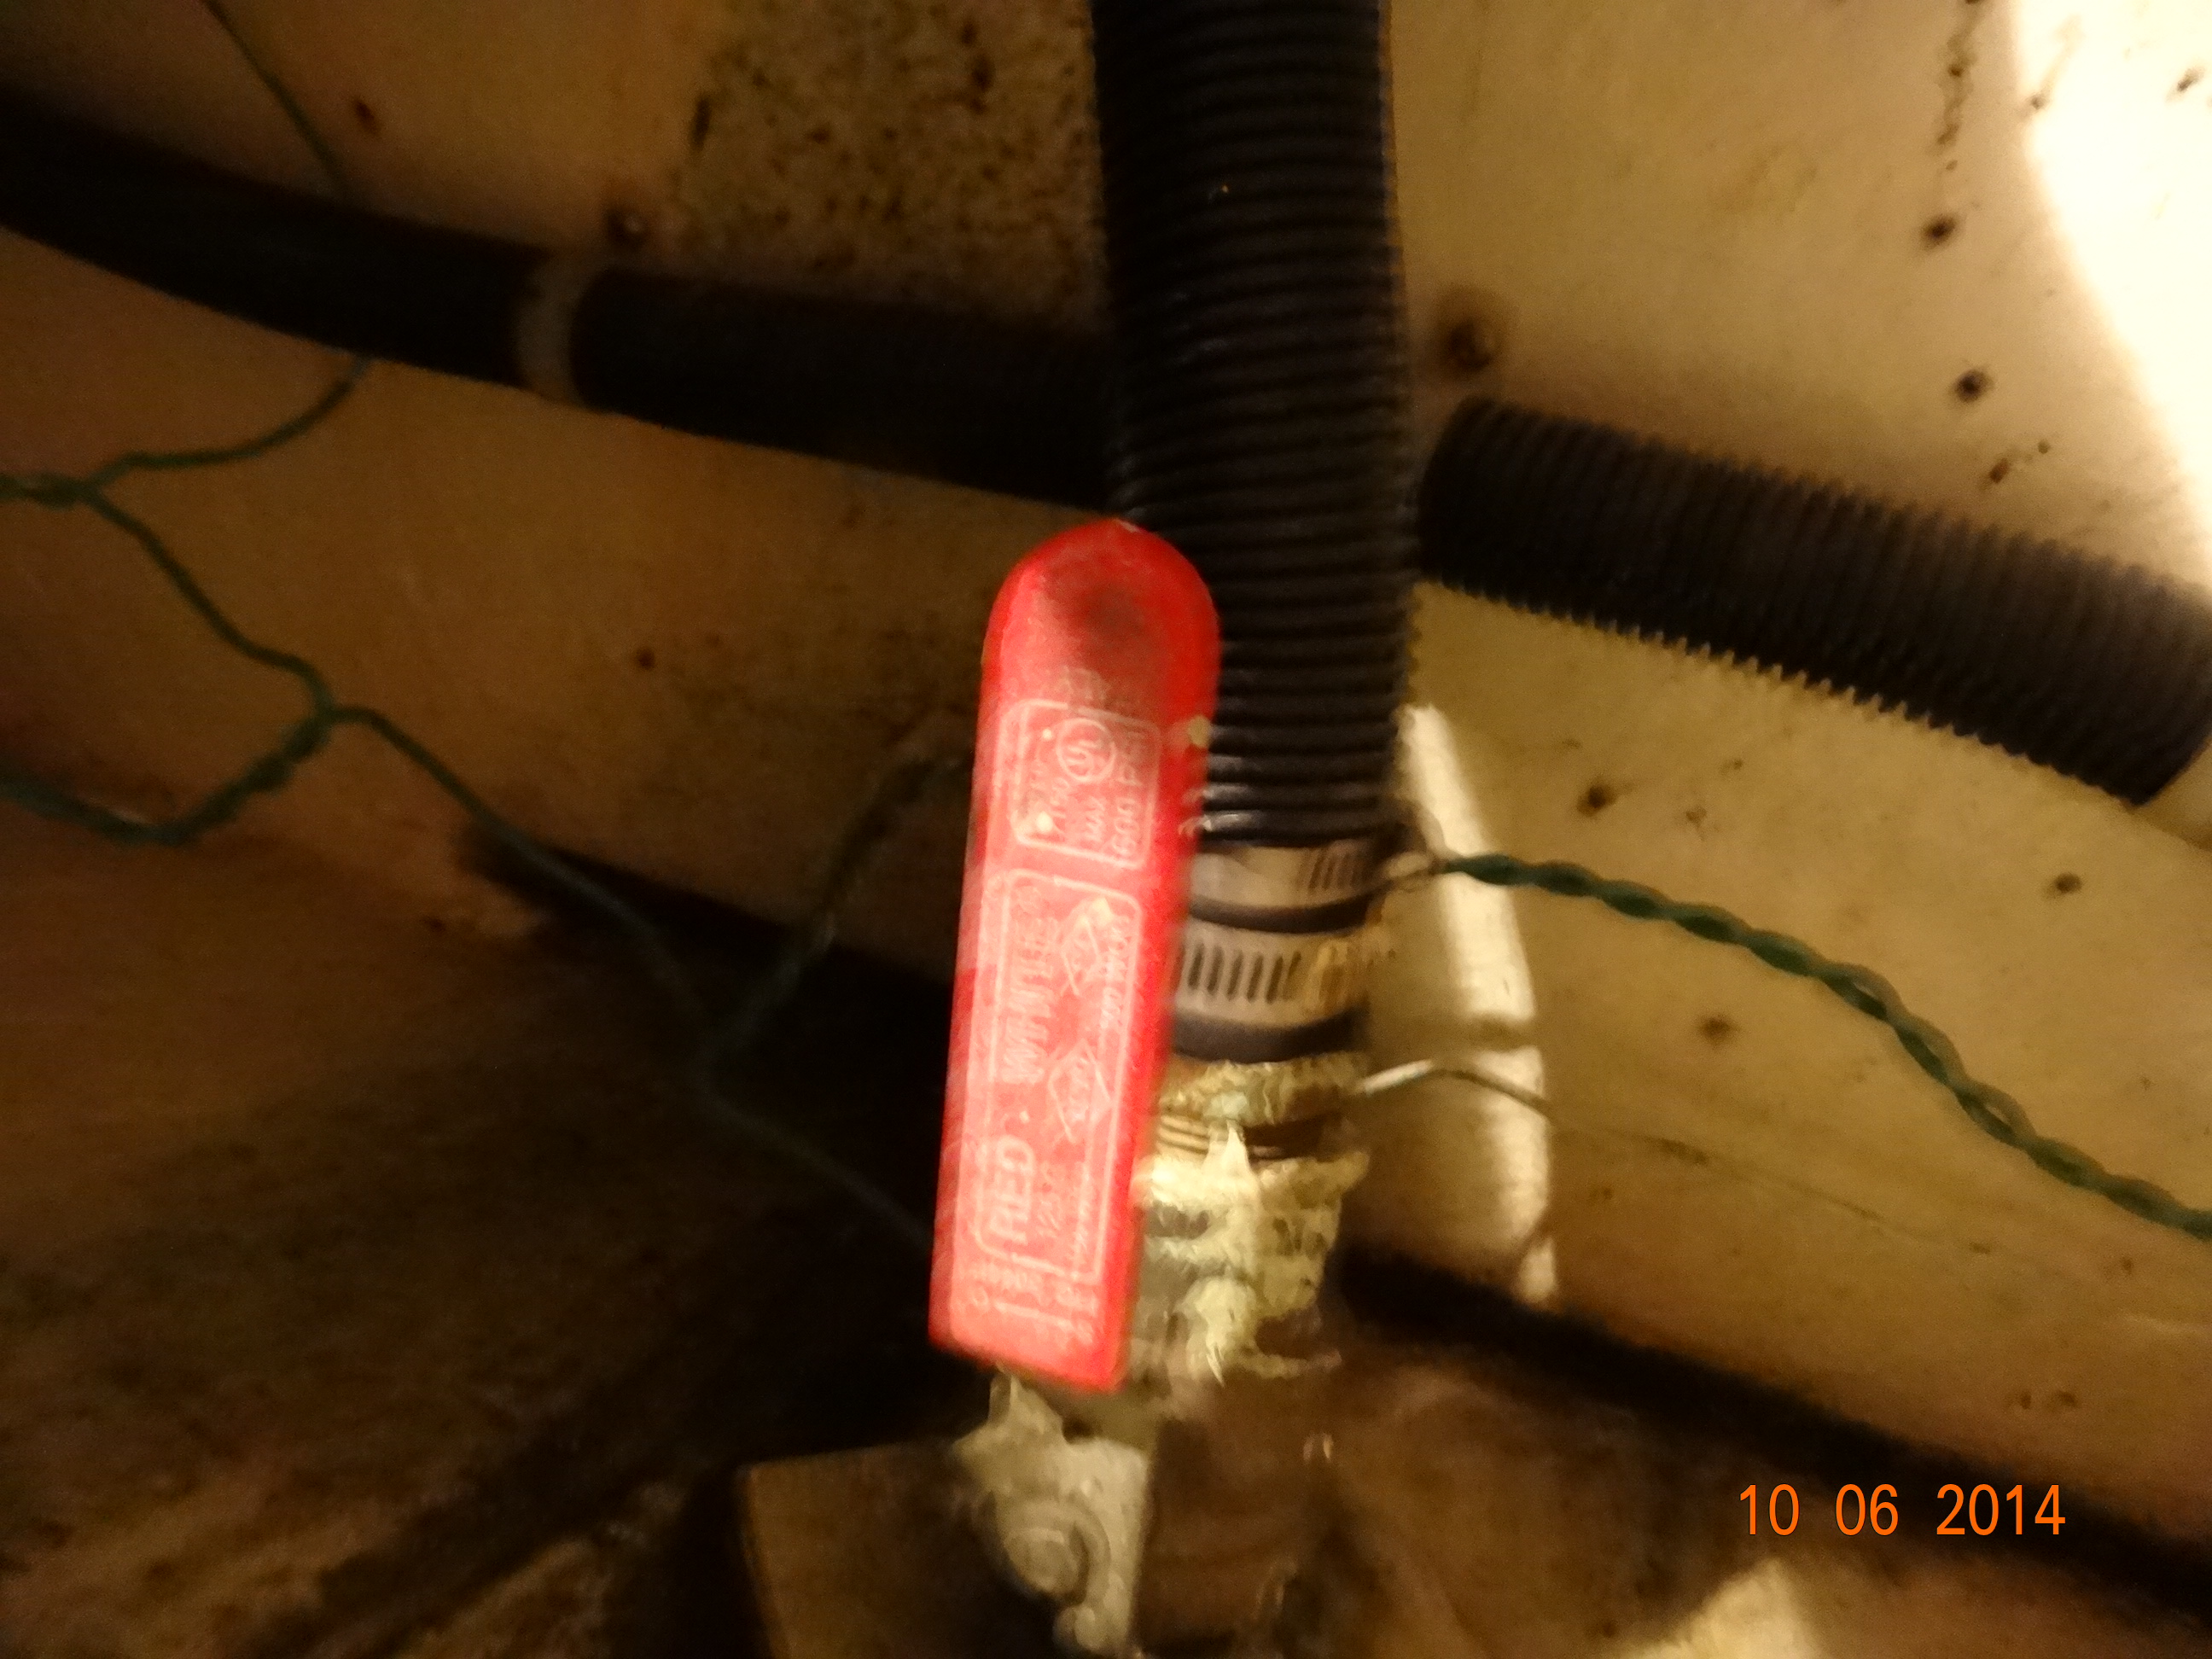
This one happens to have a glass bottom. Not all strainers look alike so yours may look a little different. As you can see, the brass top has already been removed in this picture. The “sea” comes holes in the hull. These holes have valves on them called “Thru Hull Valves”. This is where the water comes in the boat and flows thru the sea strainers. When the red lever is pointed up, the thru hull is open so water can flow into the hoses
Open thru hull
When the red level is parallel with the hull, the thru hull is closed and no water can enter the hoses.
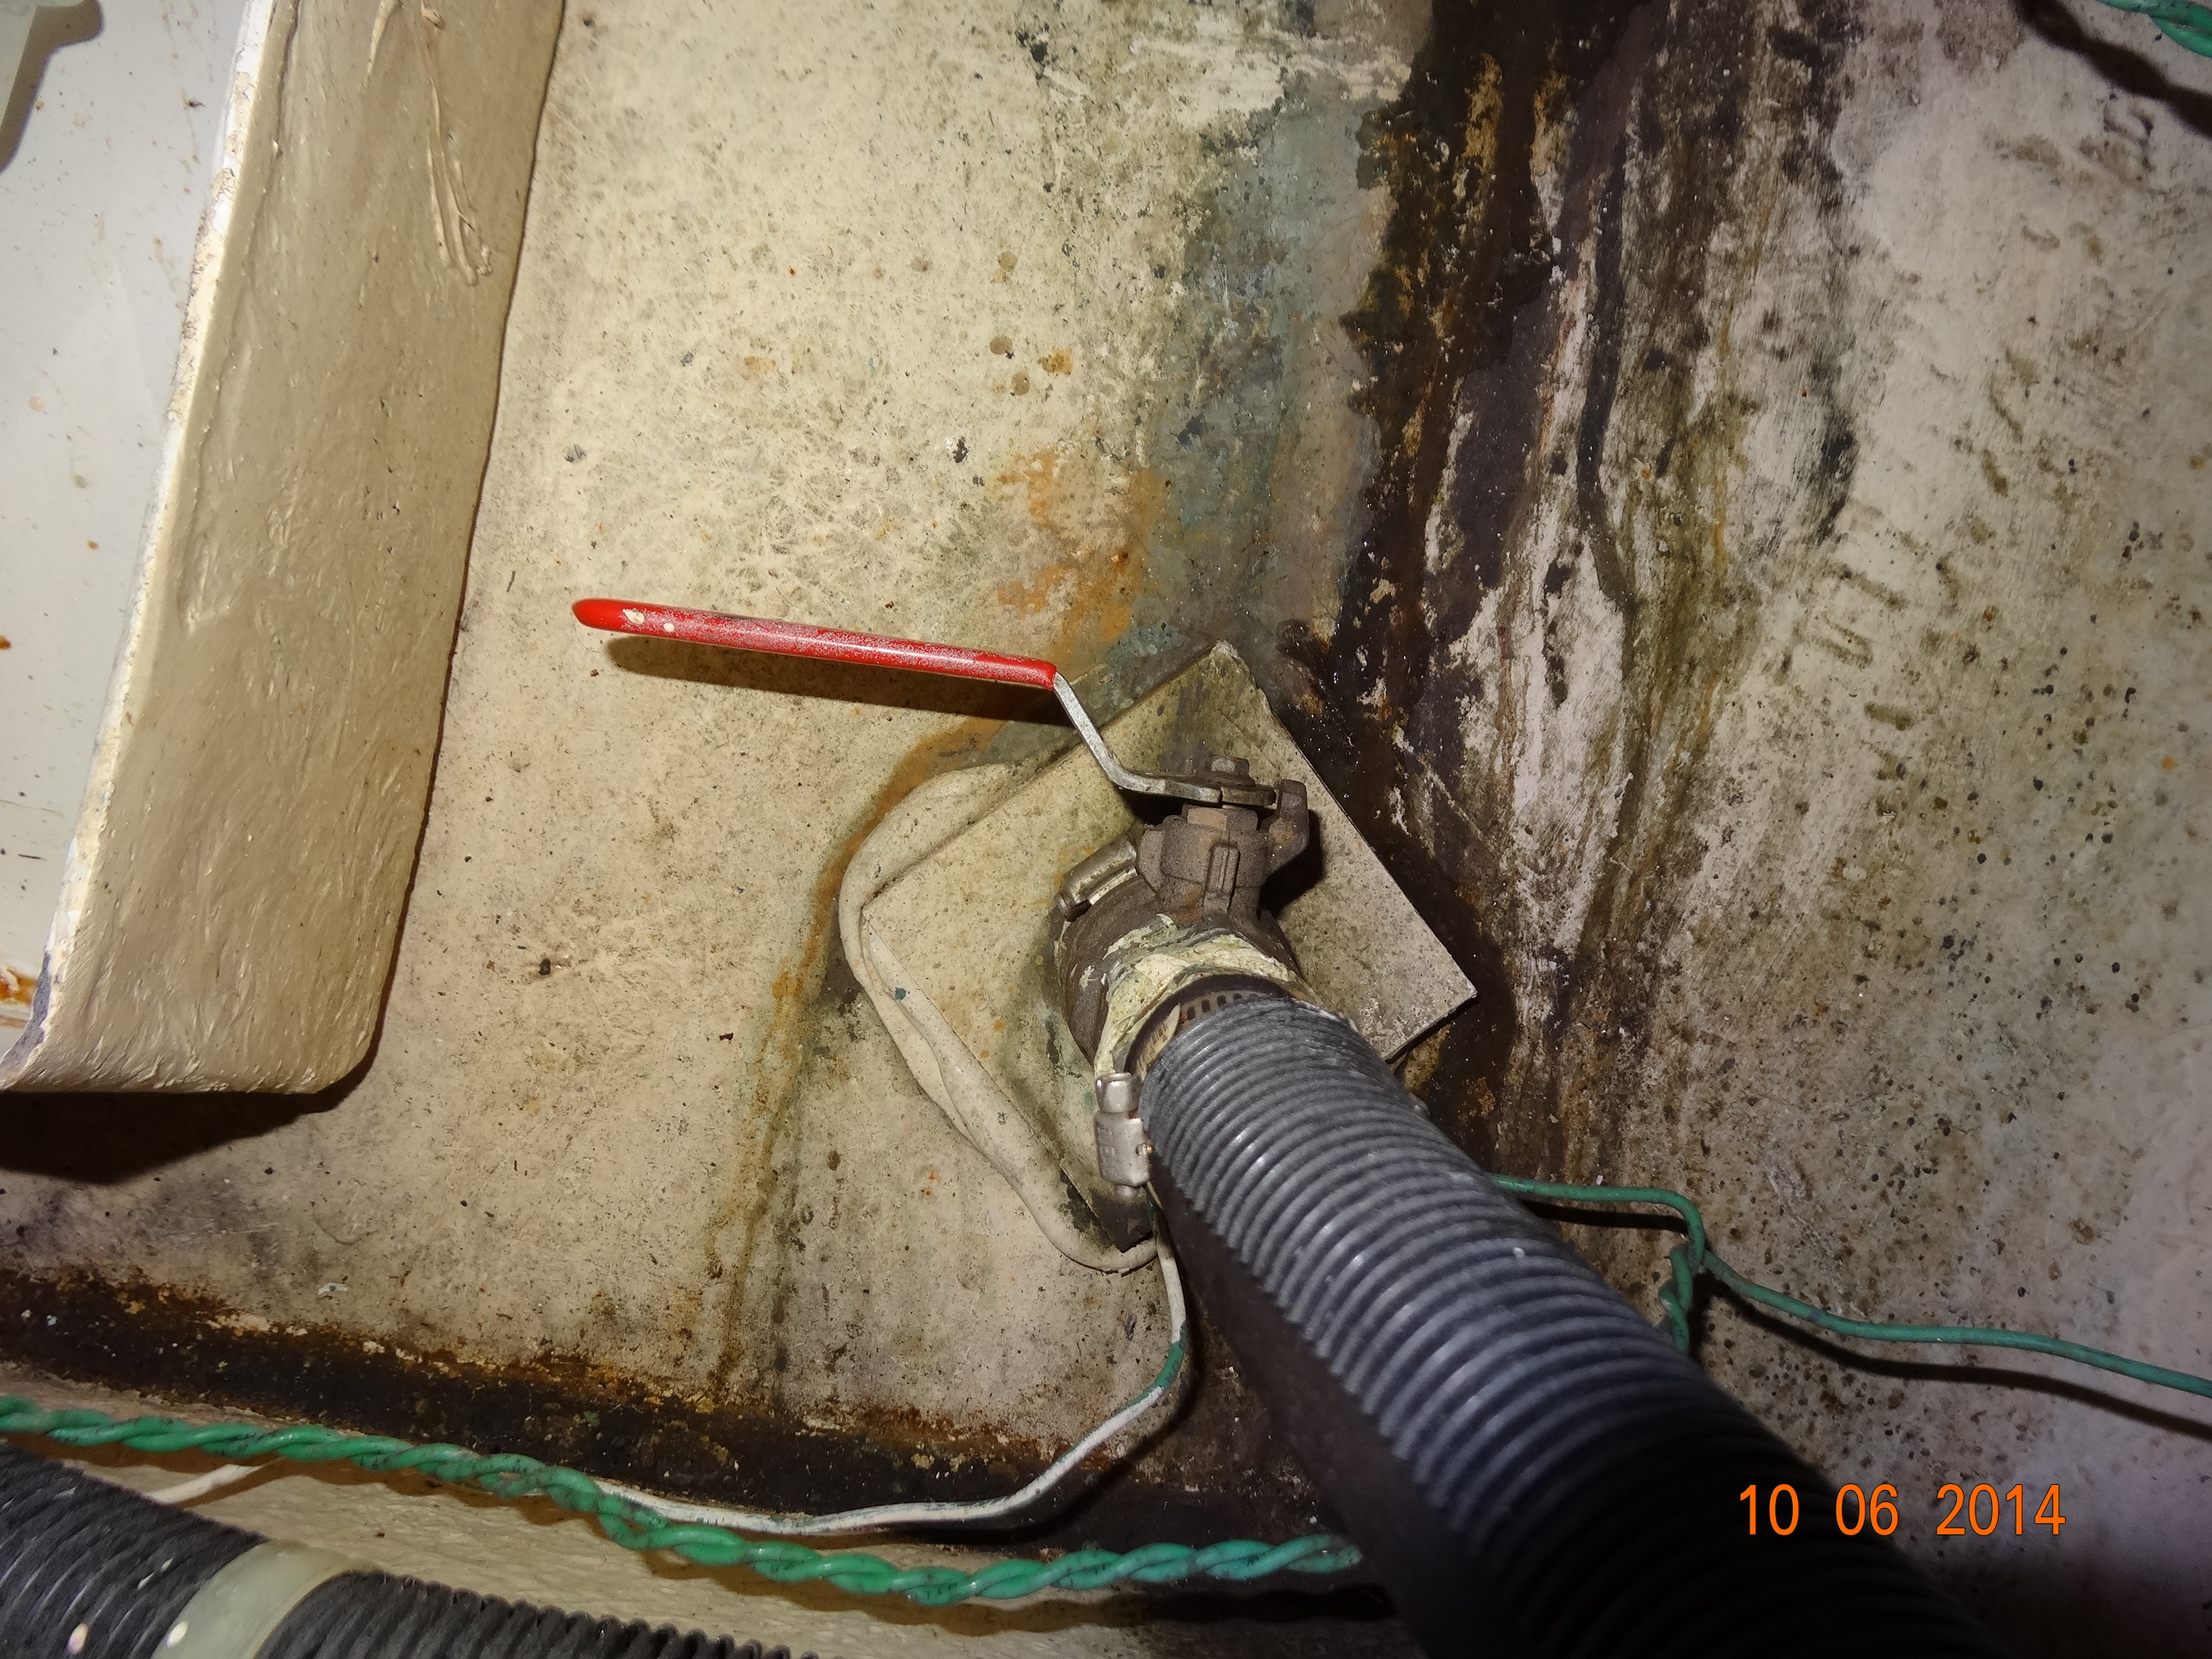
Closed Thru hull
Attached between these thru hulls hoses are the sea strainers. The sea strainer is placed between the thru hull and the machine that needs the water to cool it, to filter out “stuff” before it enters the machine. So the sea strainer has an in and an out flow on it.
In and Out of sea strainer. See the word “out” around 7 o’clock on the circle?
The sea strainers have a “Basket” inside where items are filtered before they enter the machine.
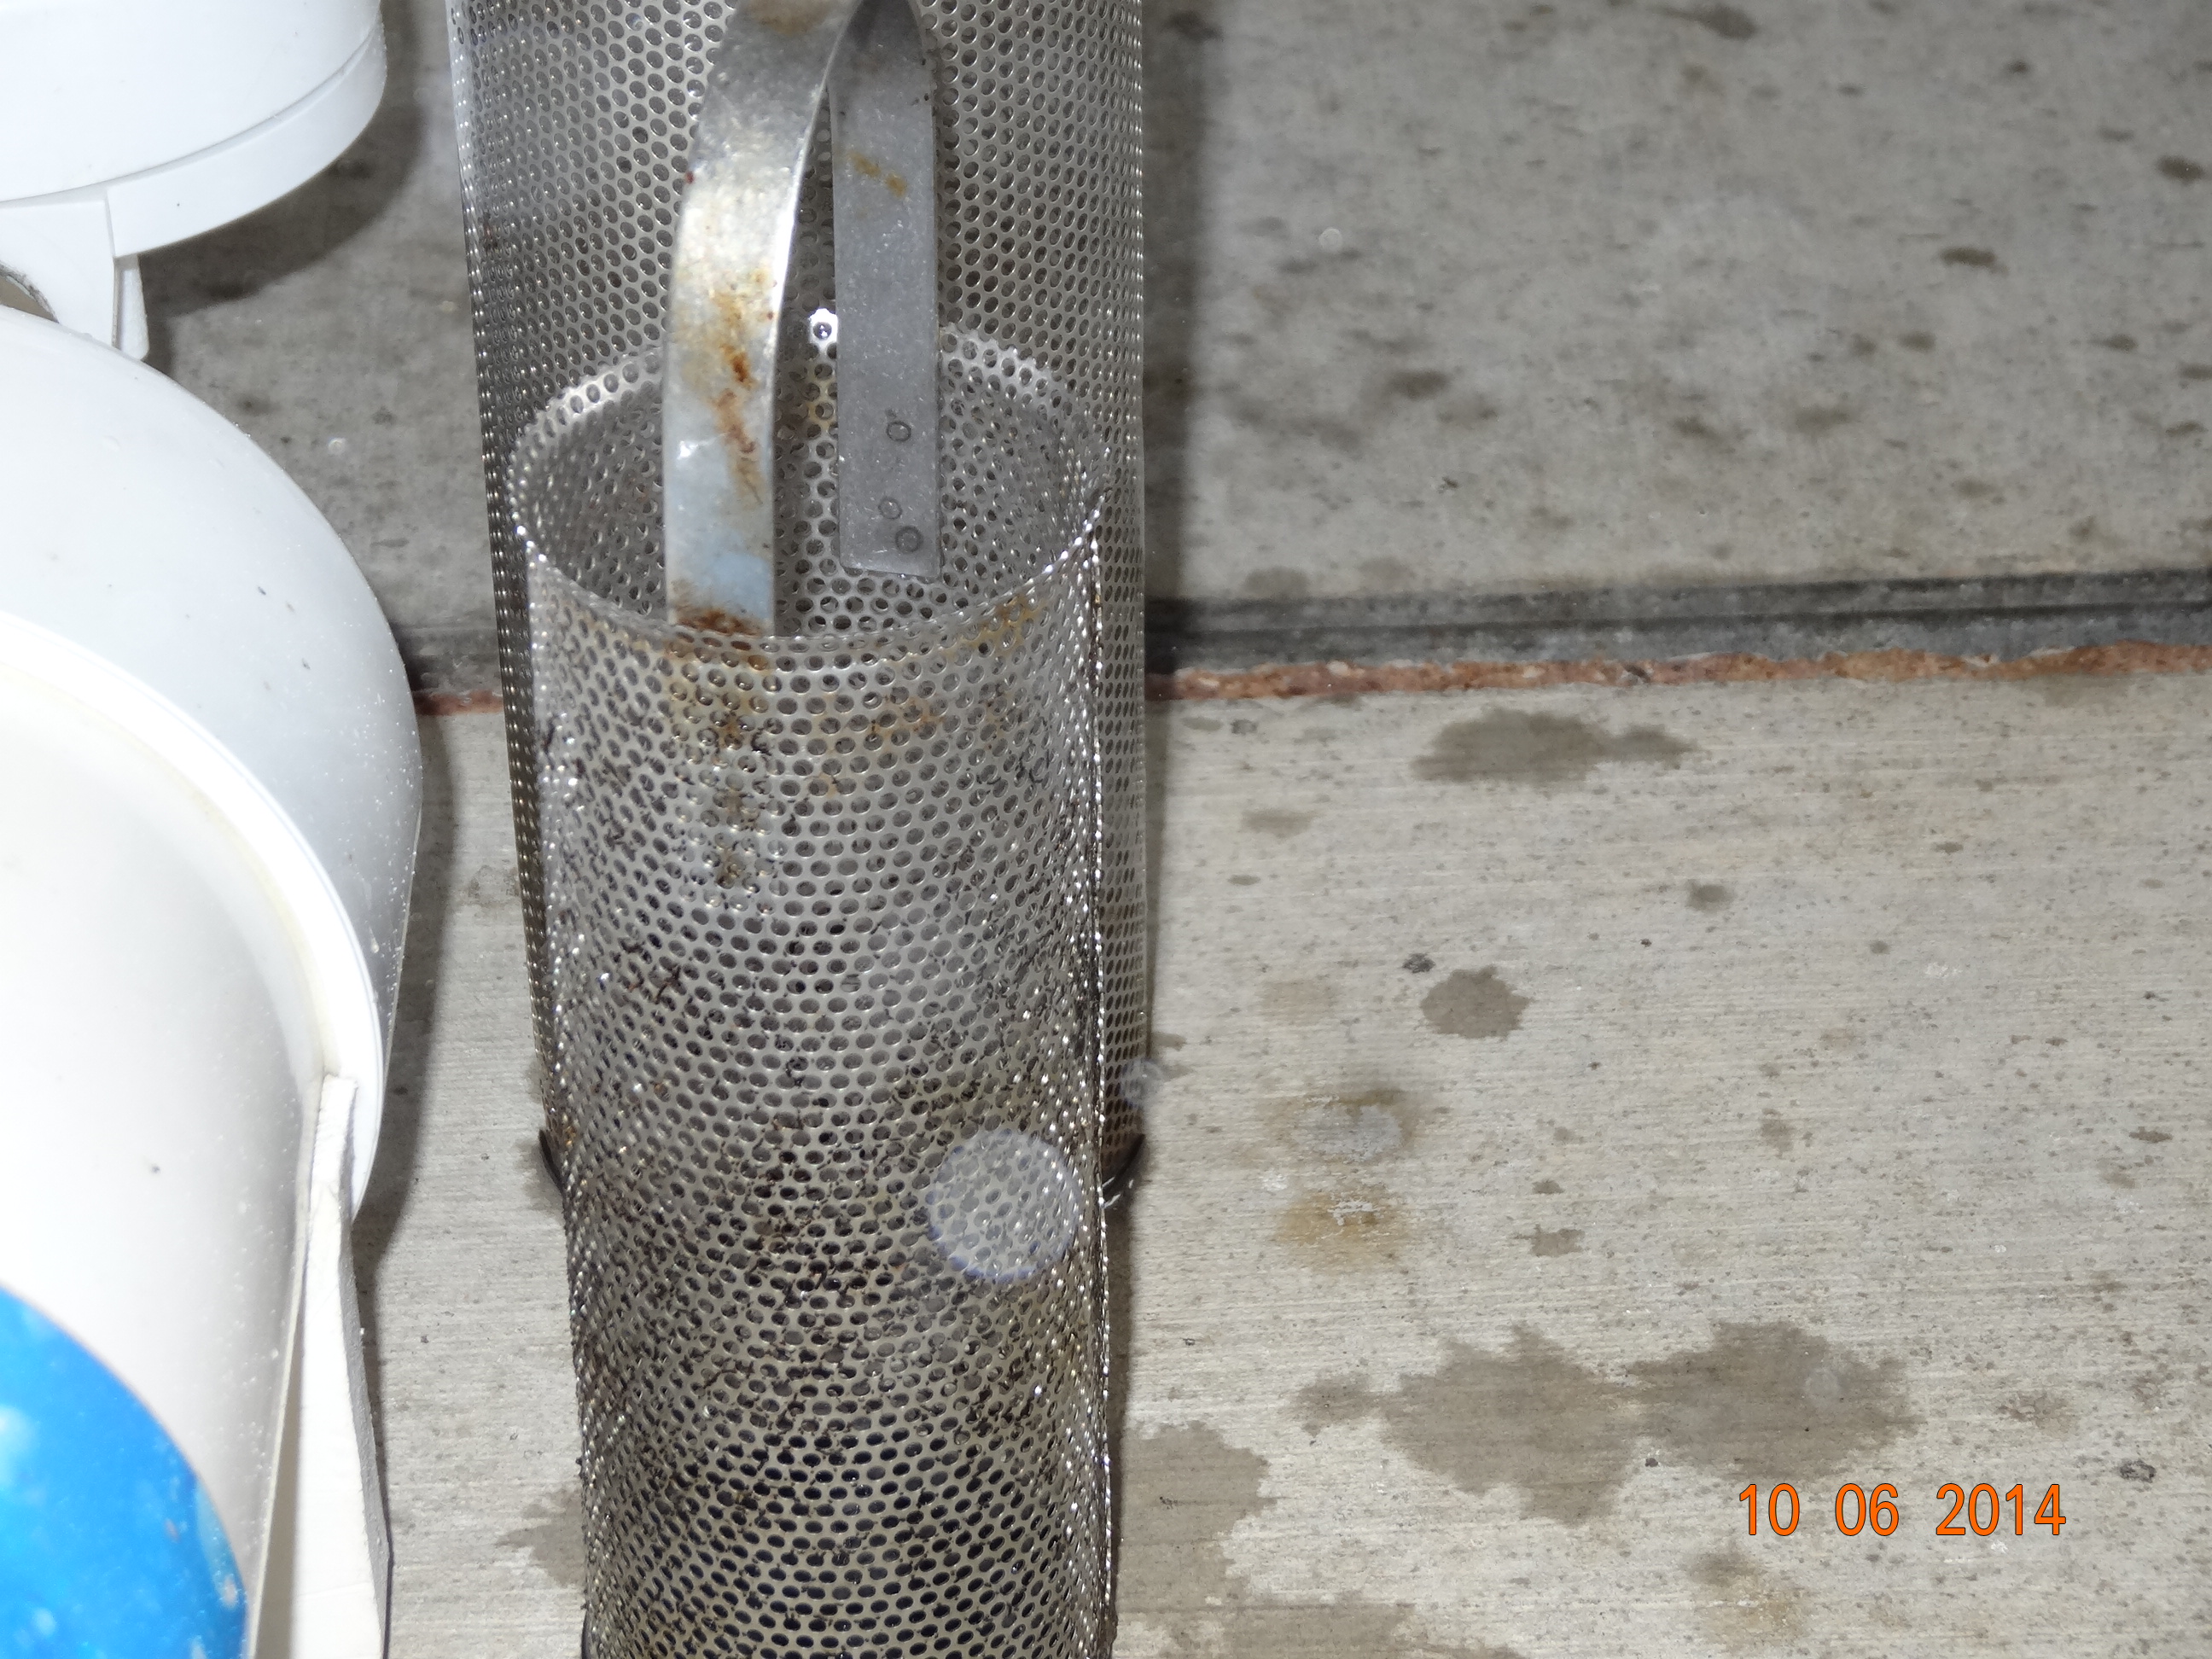
Basket, notice the handle?
If you don’t check and clean out these baskets, they can become so clogged with “stuff” that no water will be able to pass thru and then you can burn out your machines.
We currently have 4 sea strainers and 5 thru hulls. One strainer for each engine, one for the generator and one for the air conditioners. The extra thru hull is for the galley sink.
To change the Sea Strainers the first thing you do is CLOSE THE THRU HULL. Very important thing to remember. If you don’t, water will come flooding in when you open the sea strainer. Then you want to remove the wing nuts so you can get the top off the strainer and get to the basket.
Remove the 2 wing nuts
Then pull out the basket. Look at this nasty one!
Nasty basket
One of the boaters we met last winter was cleaning his strainers and he found small worms in the baskets! YEW!!!!!!! Gary was even afraid to check his. Ya never know what you are going to find in these baskets so be prepared 🙂
Gary takes the sea strainers out and puts them in a plastic container. He visually checks the glass container and if it also looks nasty, he’ll suck out the water (he uses our wet vac not his lips) and then he cleans the glass container with some paper towels. He takes the baskets out to the dock and sprays them with the hose
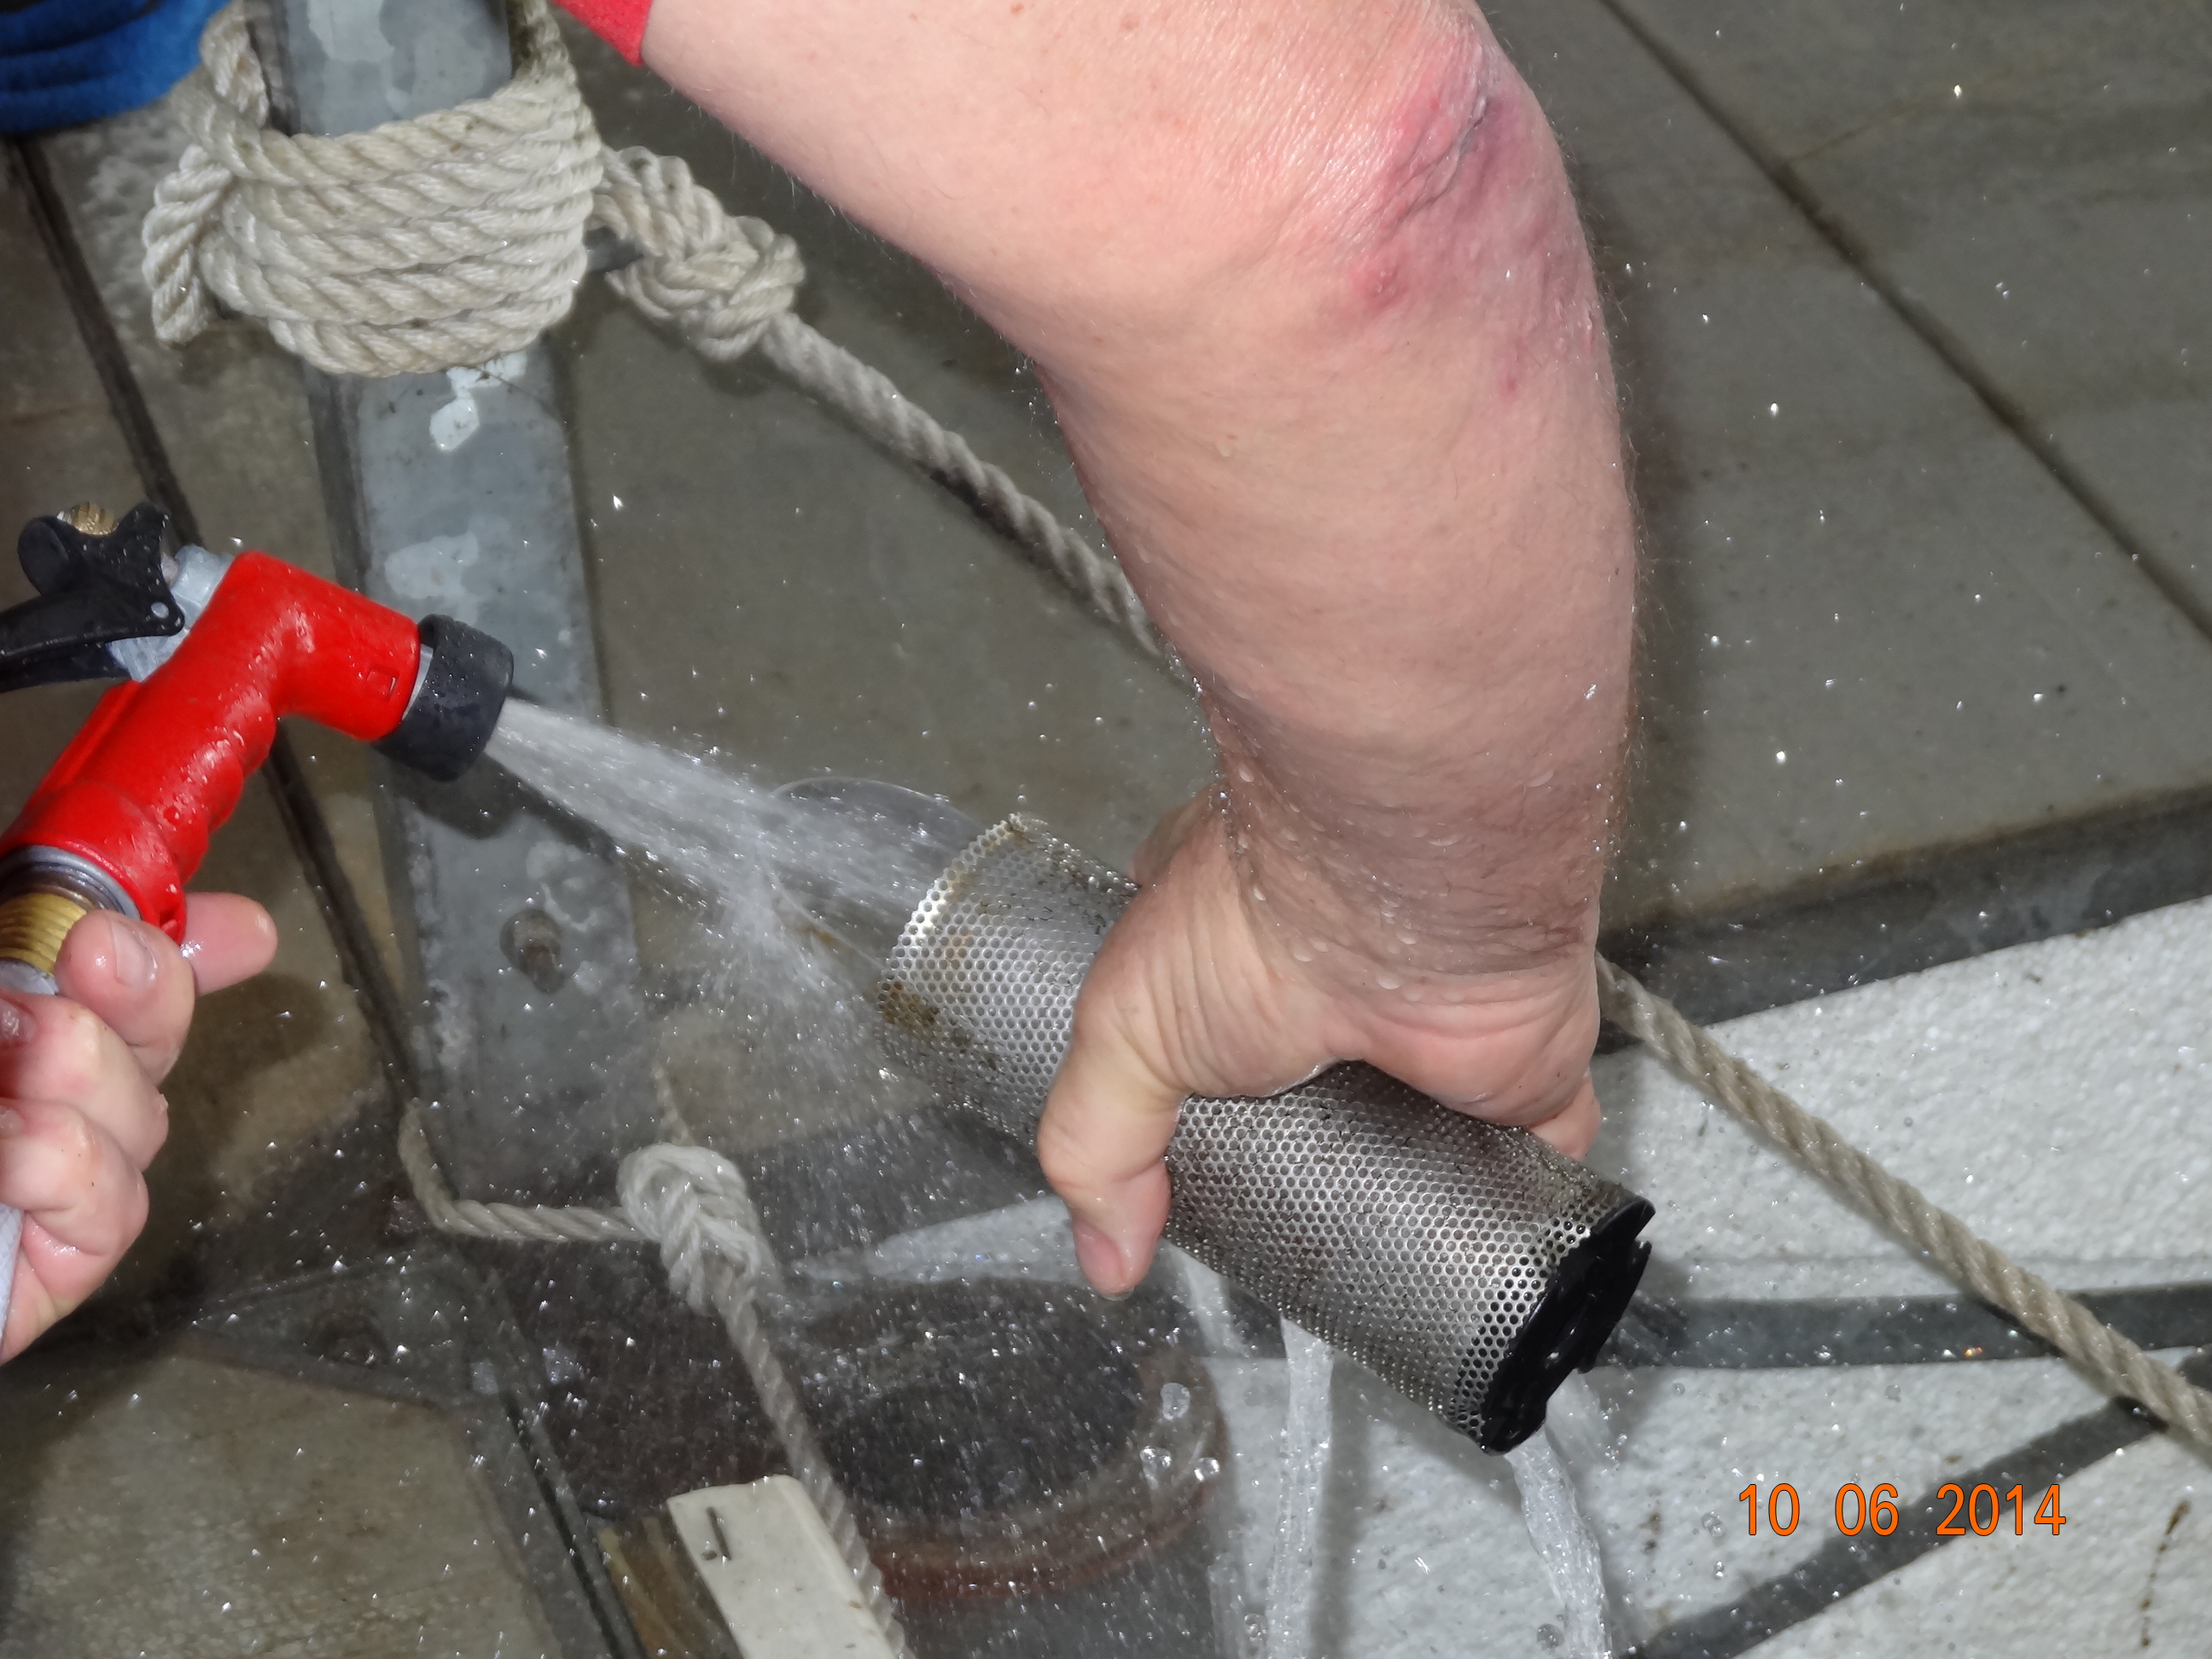
Cleaning the basket with the hose. Good thing we have good water pressure here 🙂
Sometimes he needs to use the handy dandy baby bottle brush to really scrub out the basket
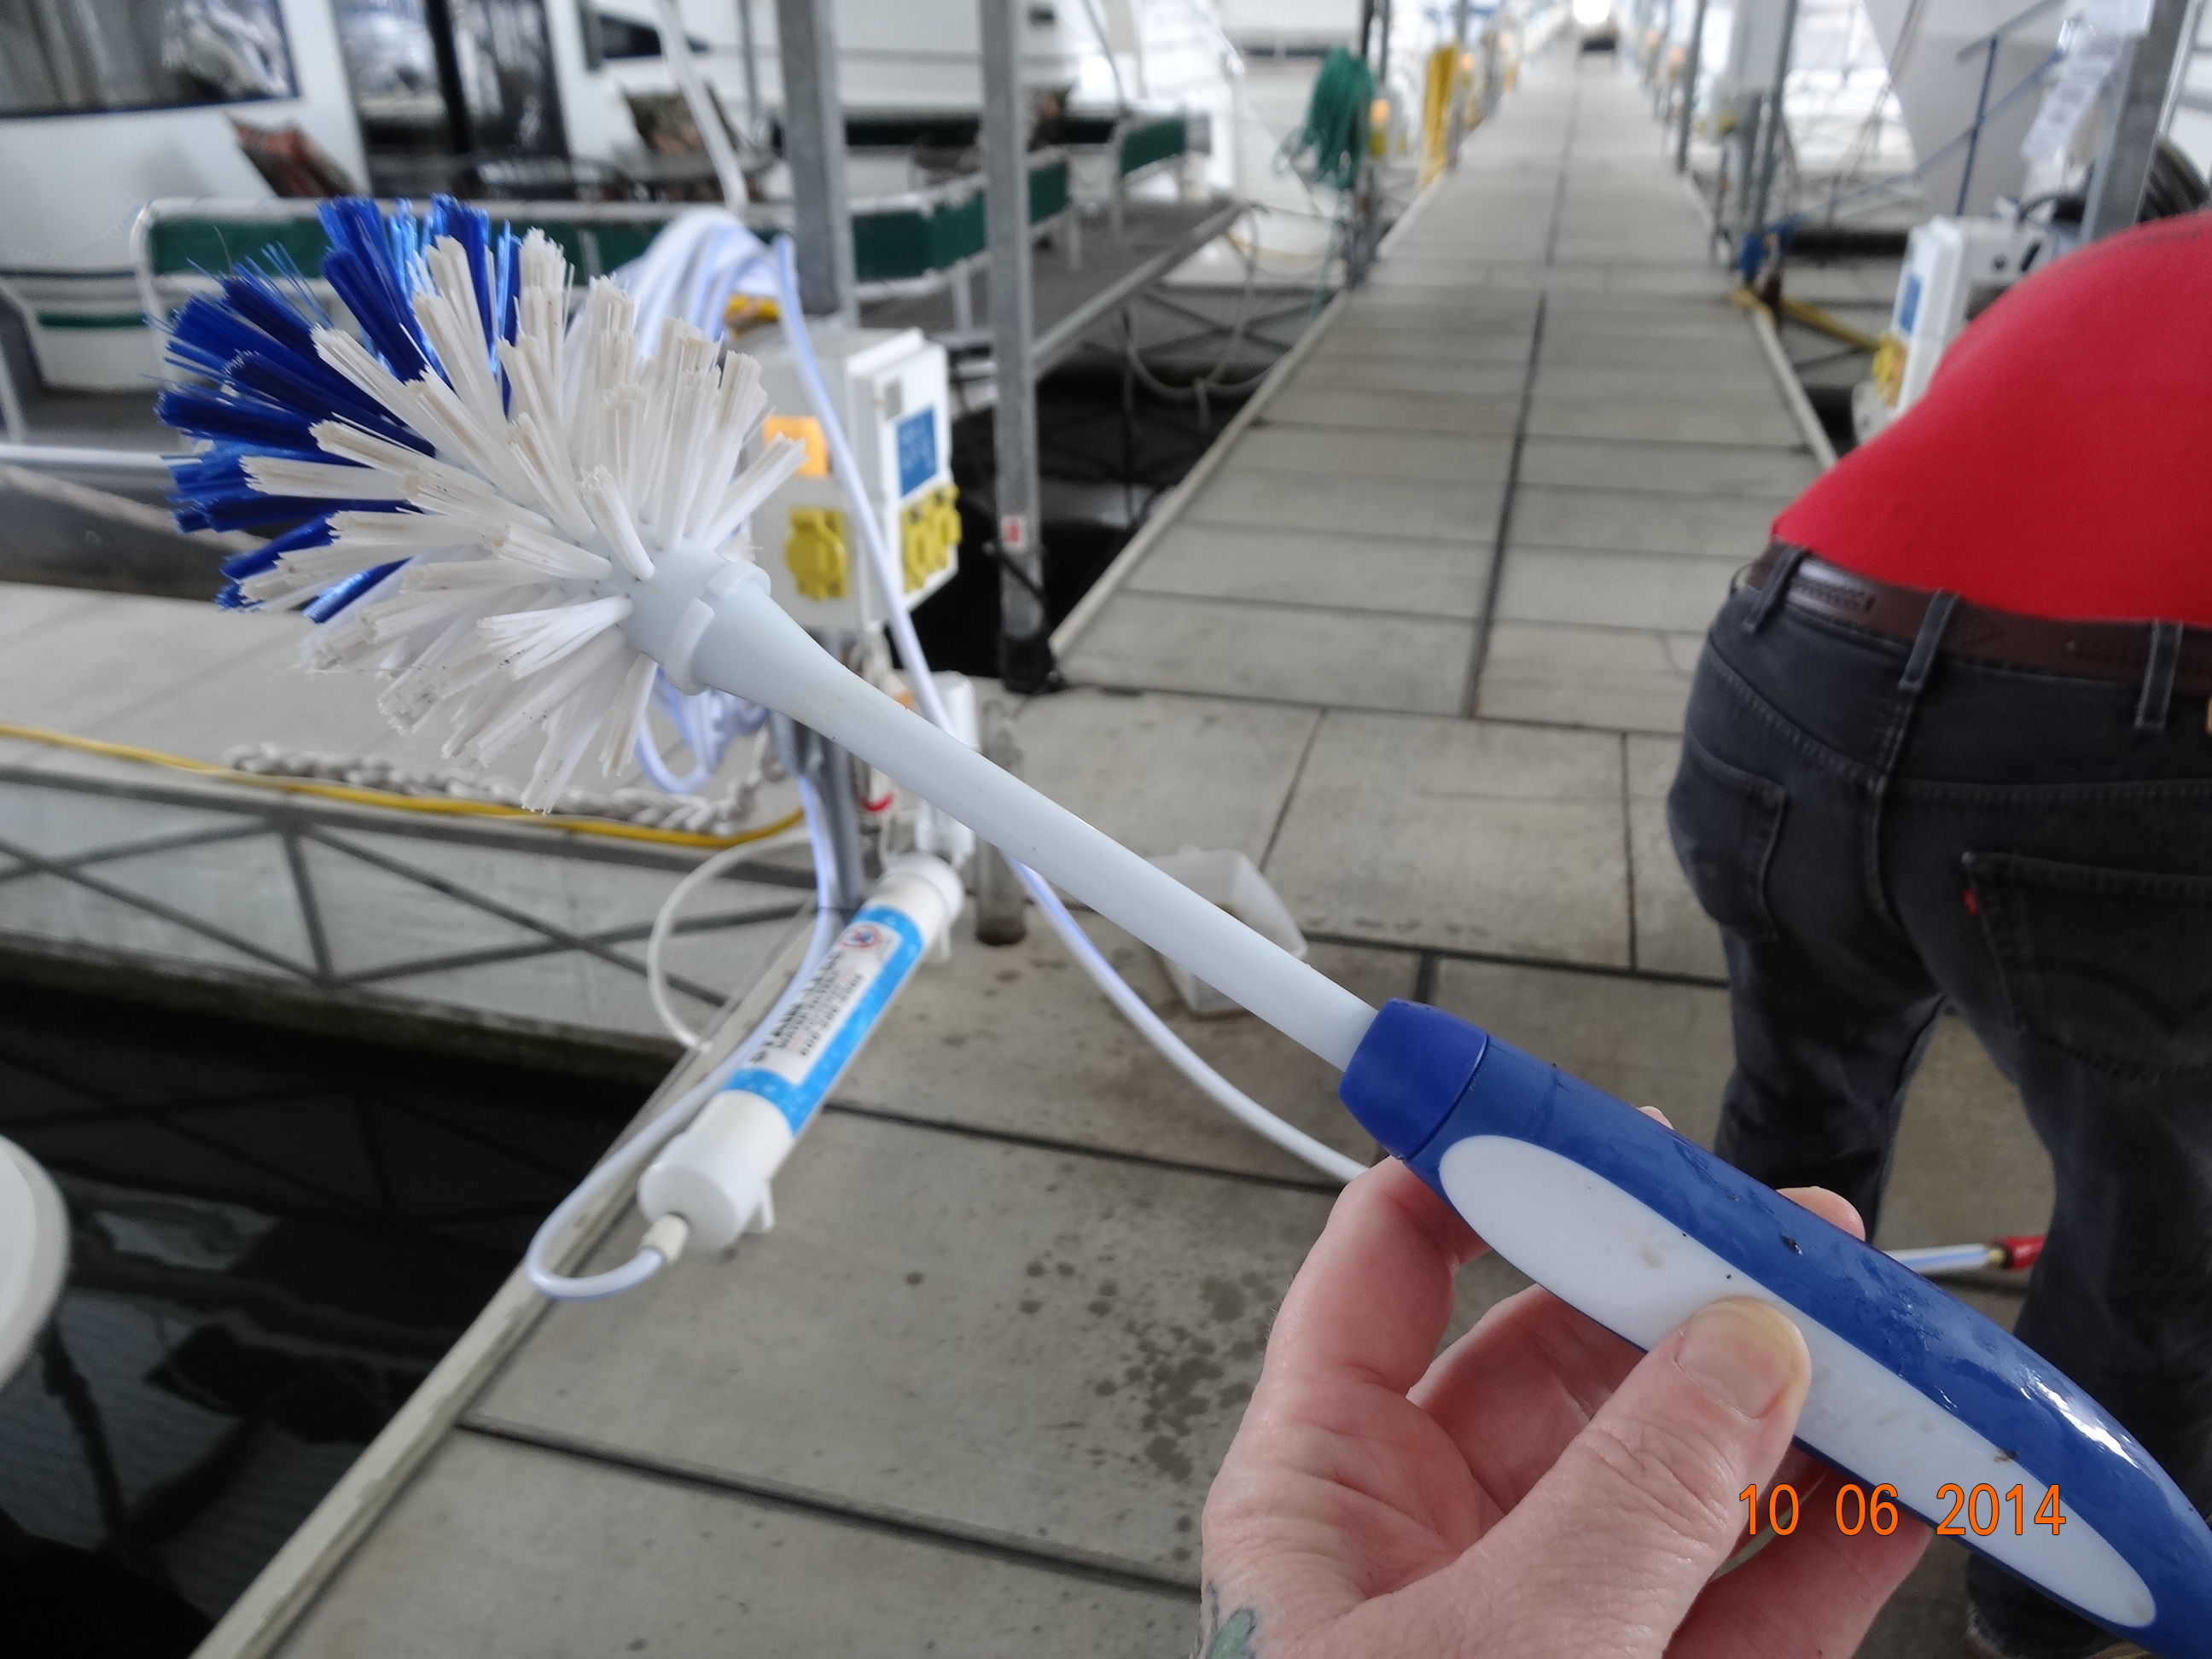
Multipurpose Brush
Don’t worry Victor, we’ll buy a new one before you come to visit :).
When he is all done cleaning the baskets he simply puts them back in the sea strainers, closes the lid, screws back on the wing nuts and then the 2nd most important thing he does is OPEN THE THRU HULL or your machine will over heat and you’ll wreck your impellers. If you wreck your impellers, not to worry, we’ll be covering how to replace an impeller later :).
See, this is not to difficult, providing you can see and reach your sea strainers. Gary also stresses that you should move the thru hull levers quarterly just to keep them limber. Of course not all boat are as wonderful as our Navigator ;), so if you need to be six feet five and weigh 100 lbs with arms as long as a gorillas to reach these or any items in your engine room, it might be time to hire those lean, lanky and limber mechanics they have working at your marina :).
Now that I am fully trained I suppose I’ll be expected to clean them the next time. I just hope they don’t have any of those nasty worms in them!
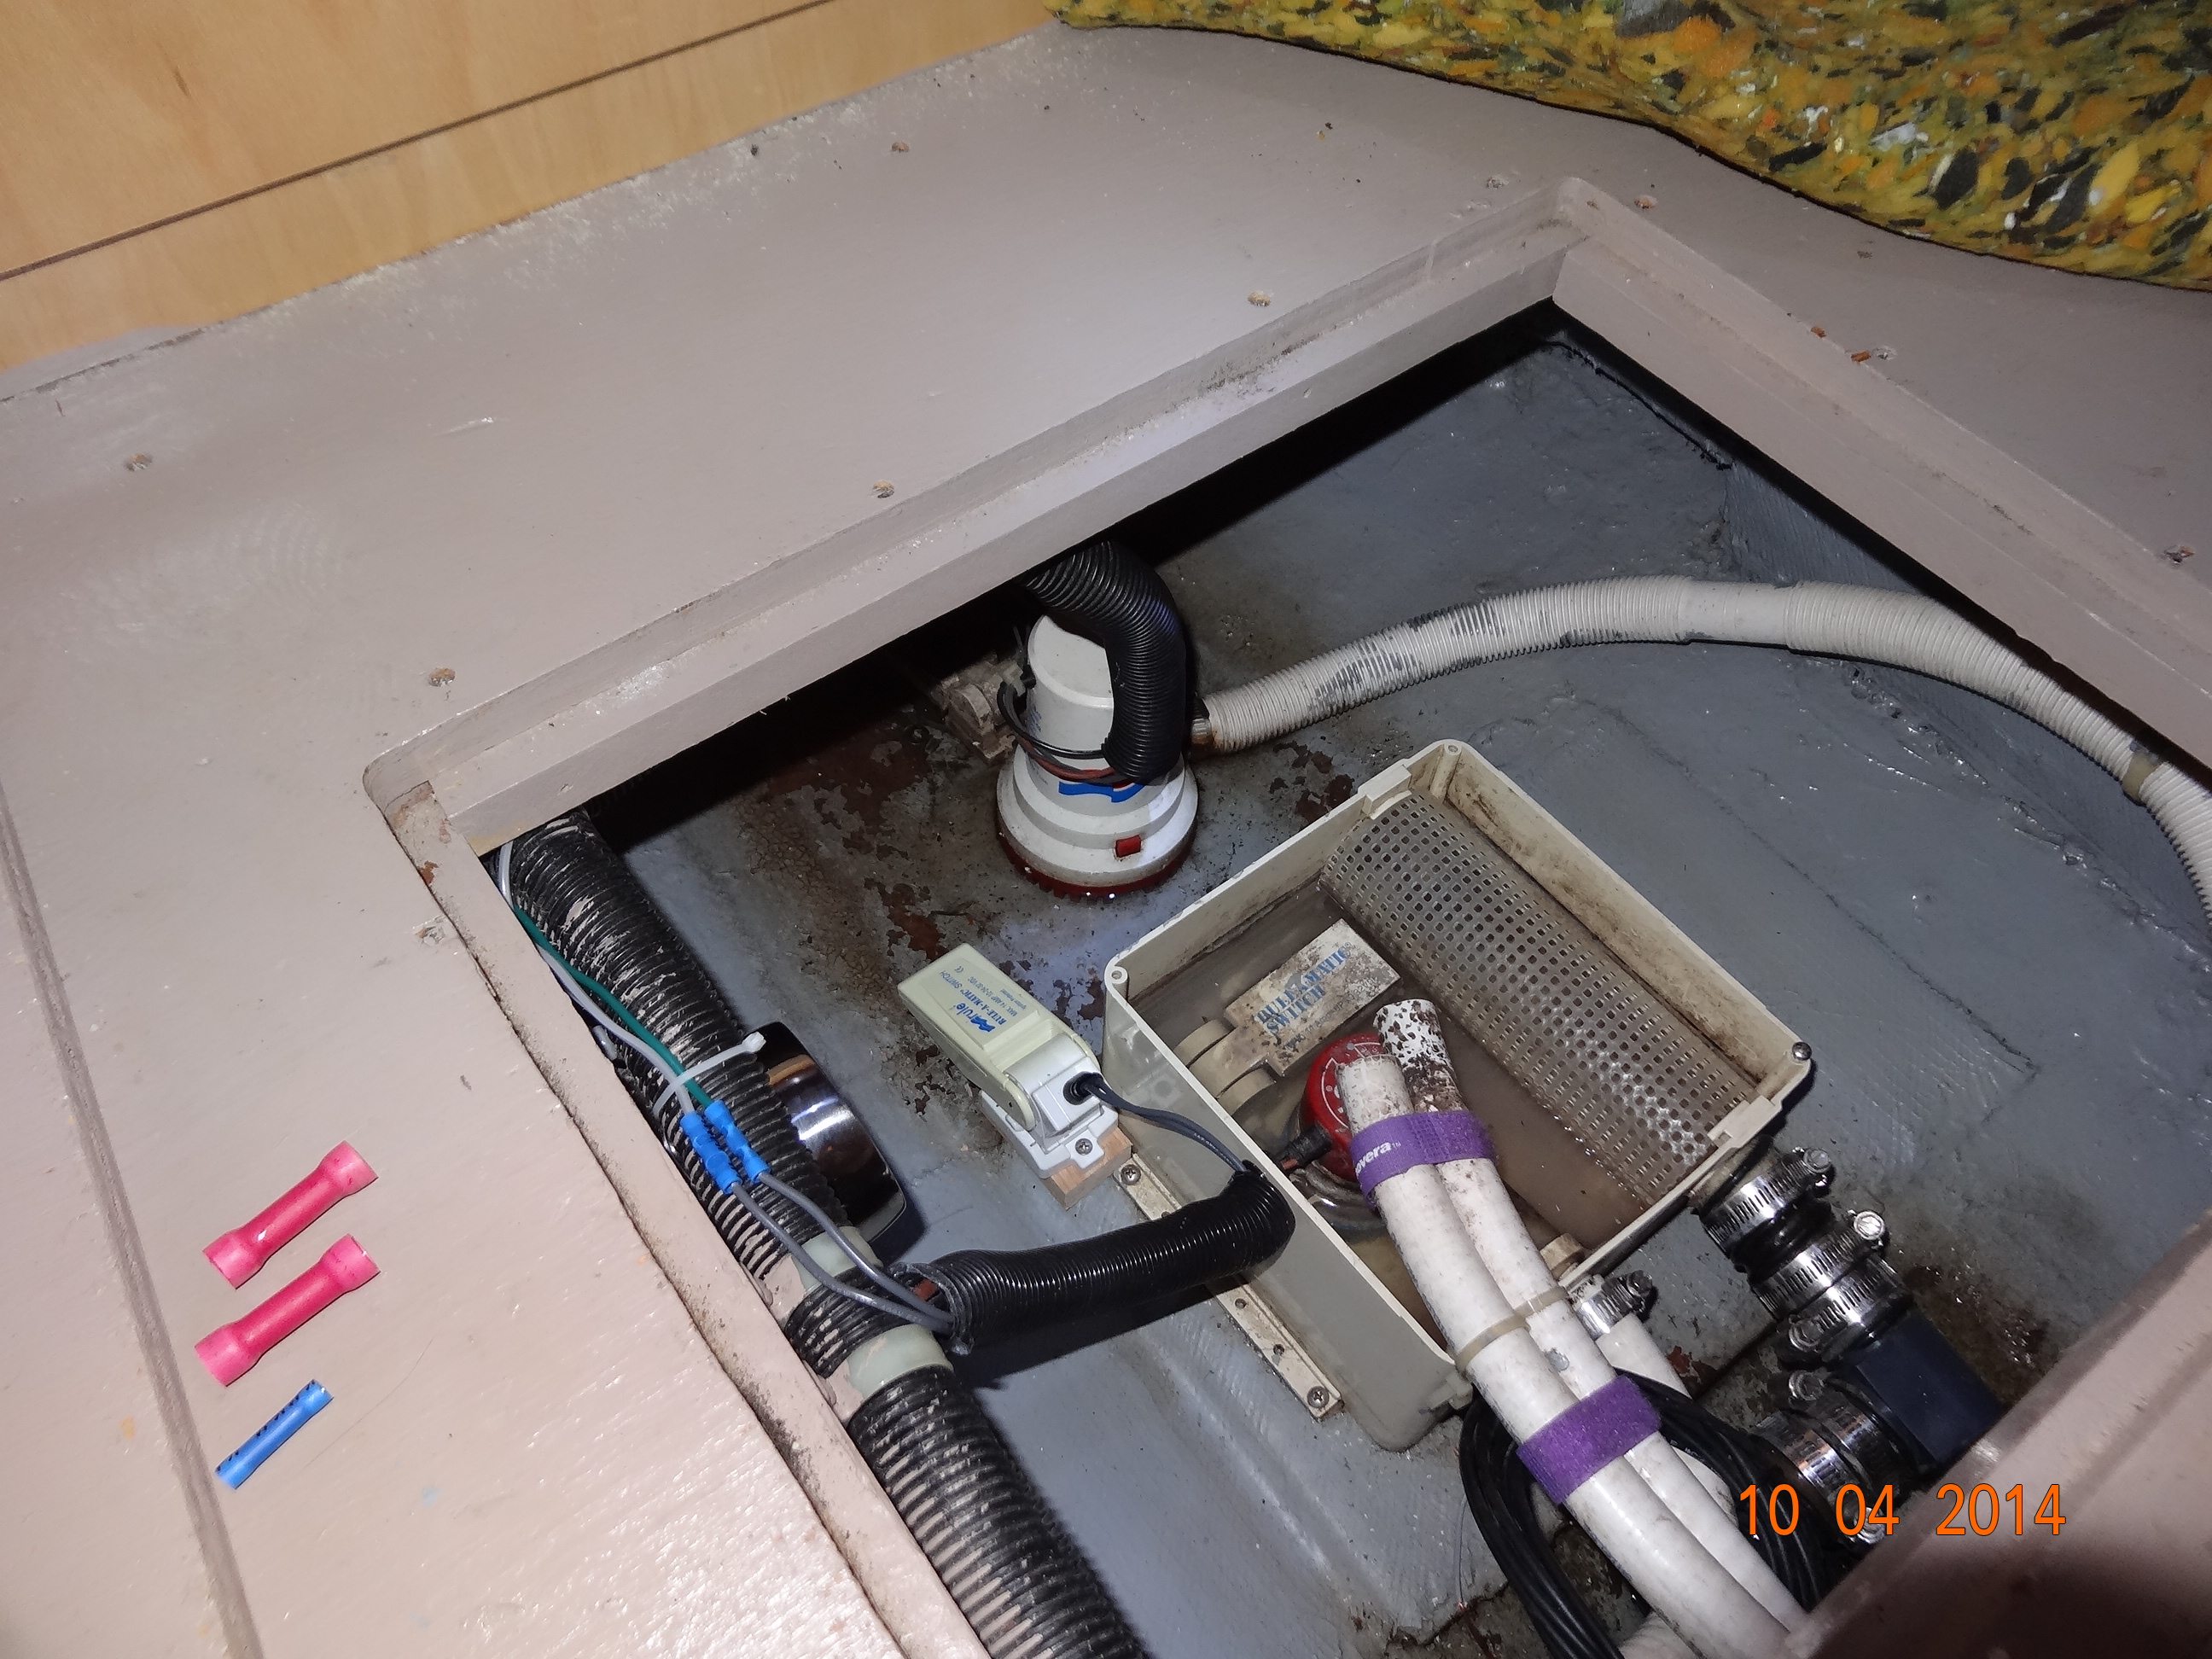
Installing High Water Alarms
We currently have one high water alarm installed in our aft bilge. The purpose of the high water alarm is so that, if for some reason, our bilge malfunctions, and we are taking on water, when the water gets to a certain level it will trip the float for the high water alarm and a horn will sound. This will give us a clue that something is wrong and we should investigate it.
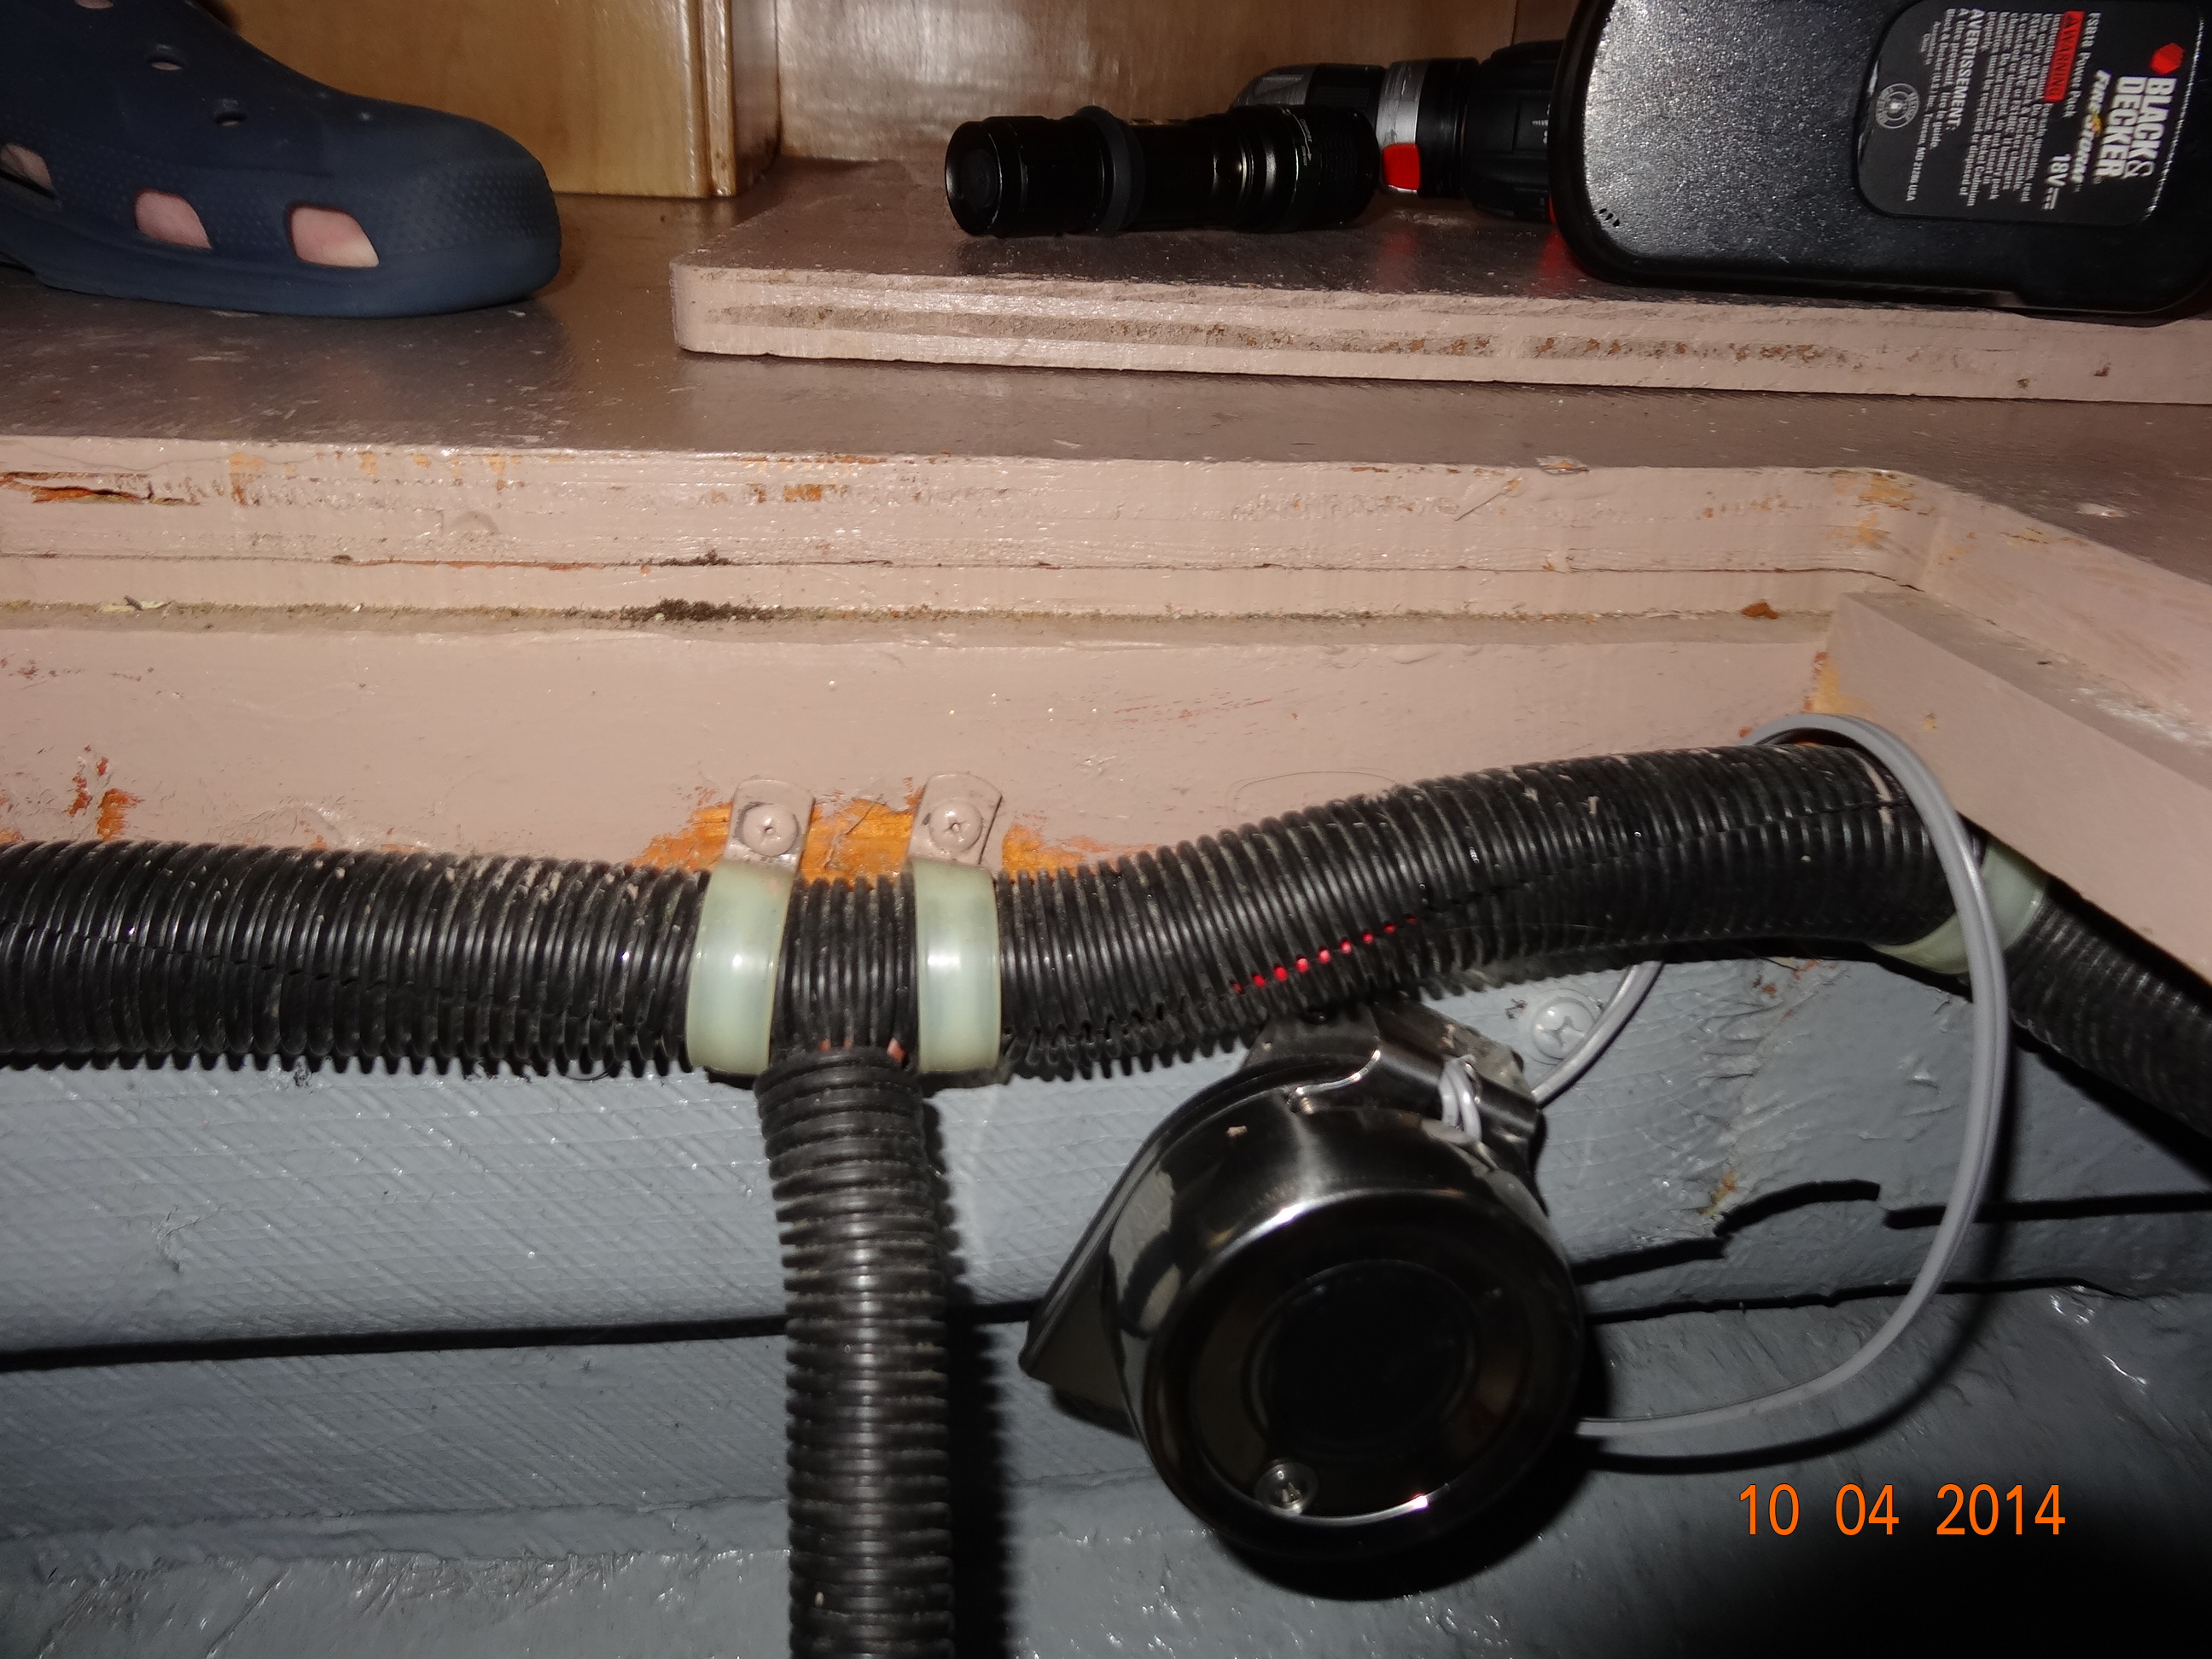
So, as I said before, we were doing some of our monthly maintenance and Gary was checking out the shower sump pump to make sure it was still working. We also clean it occasionally to get all the goop and hair out of it. The shower sump (the thing with the white hoses with purple straps on them) is located under the carpet in our stateroom. The white thing above it with the white hose coming out of it is our mid-ship bilge.
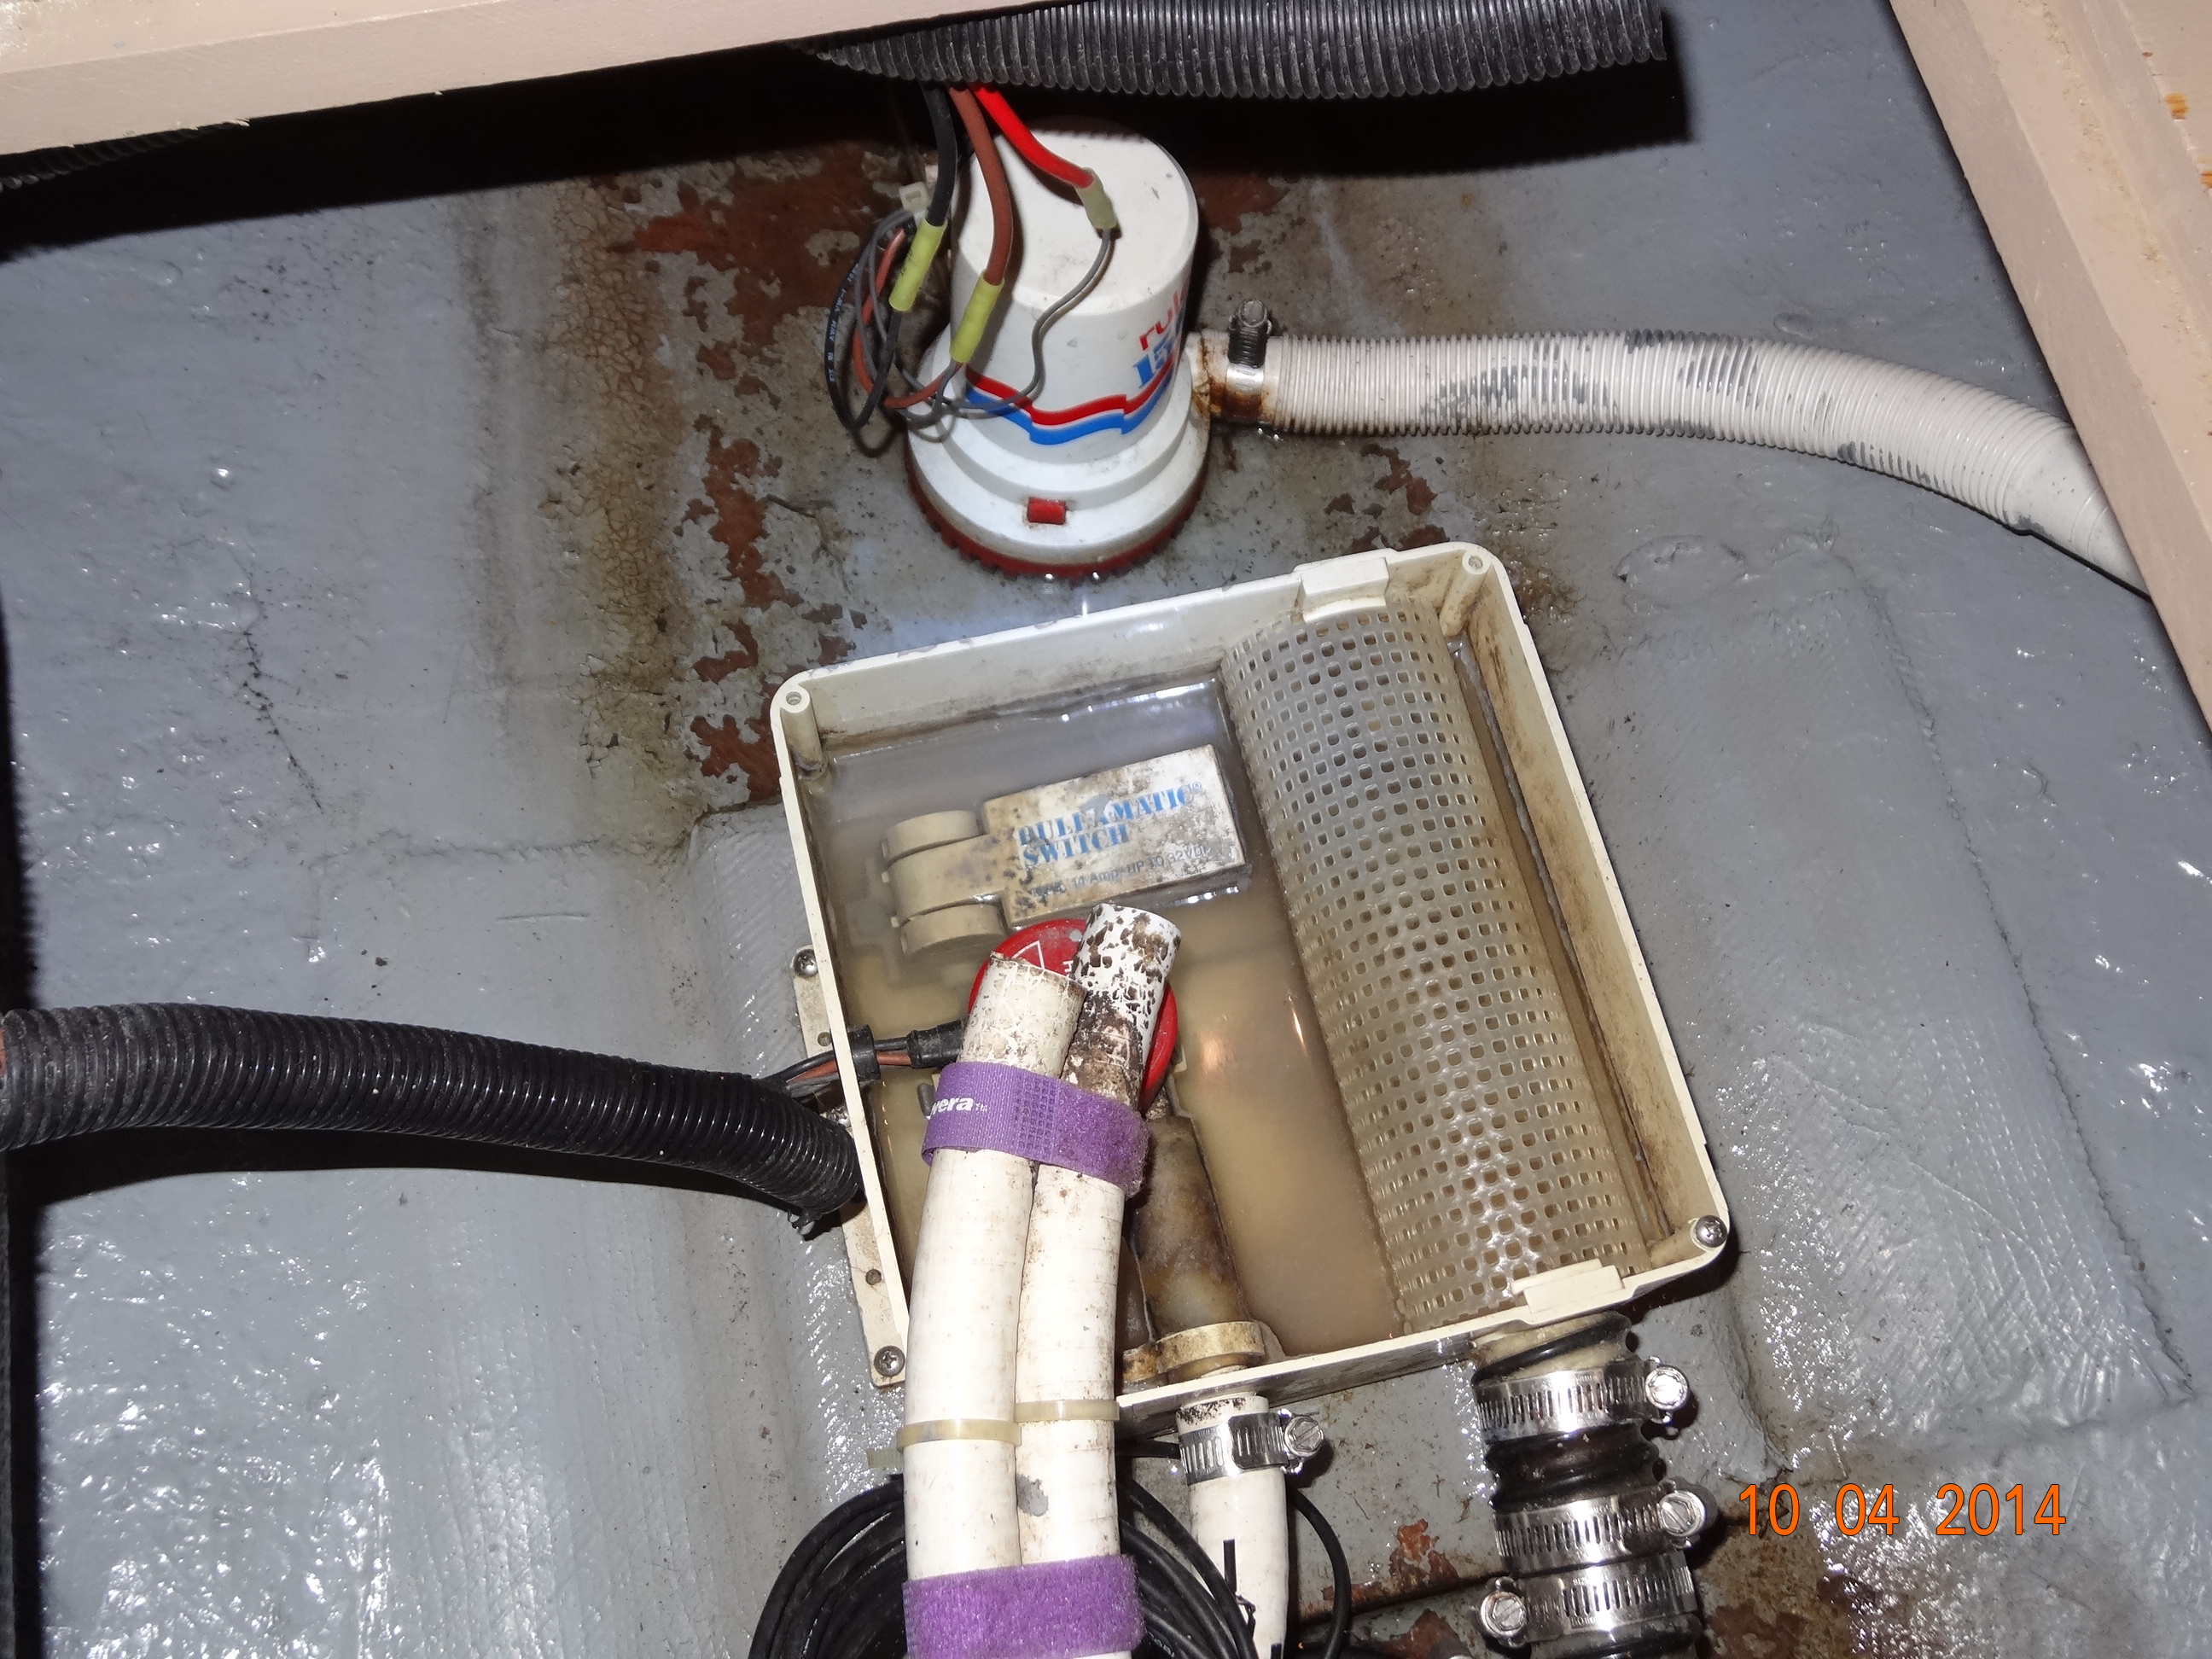
Shower sump pump
While Gary was checking the sump pump out he decided to install another high water alarm here because when the fuel tanks aren’t full, some of the water will flow up into the mid-ship bilge where the shower pump is located. Gary had already purchased the 12 volt Mini Compact horn and the Rule-A-Matic float switch
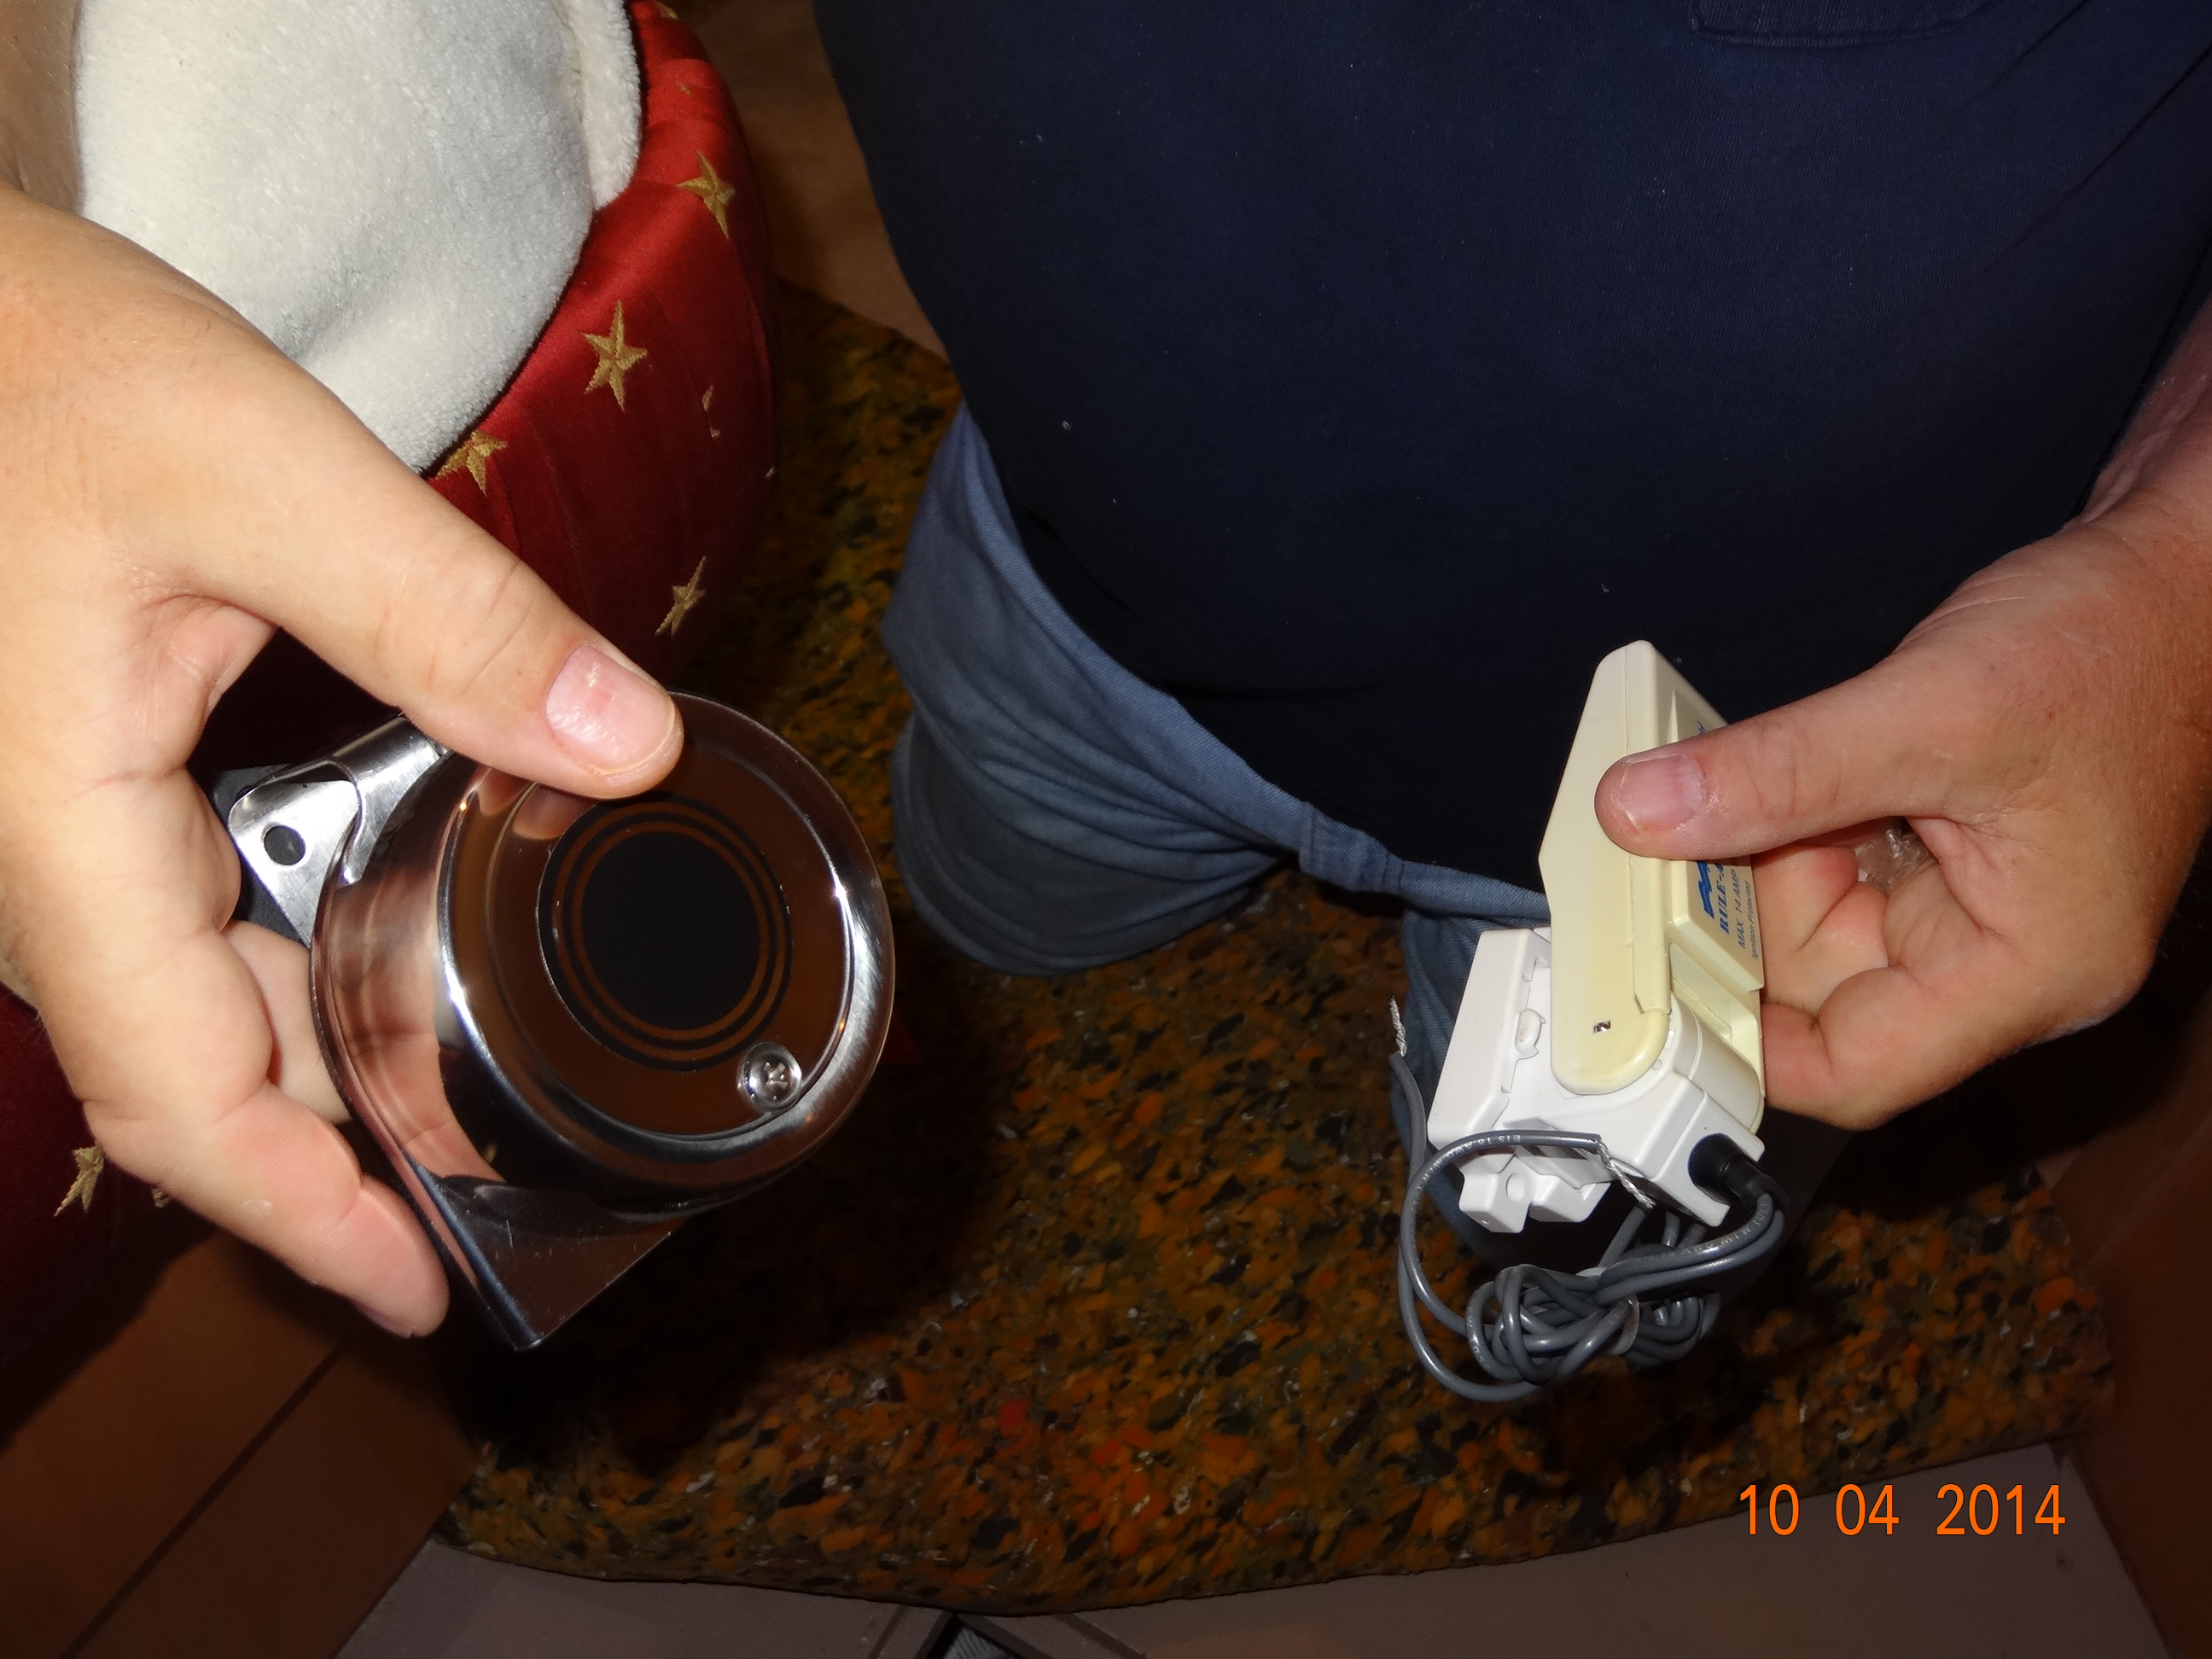
Horn and Float Switch
So all we had to do was install them. First he installed the horn right below the hatch opening, a few drill holes, a couple of swear words and two screws and it was attached securely. And this was the easy part! Swearing already…..not good 🙂
Horn Installed
Then he wanted to install the float at a little higher level than the bilge float that was already installed in there, hence the High Water Alarm ;). So he found a small block of wood from his stores of supplies
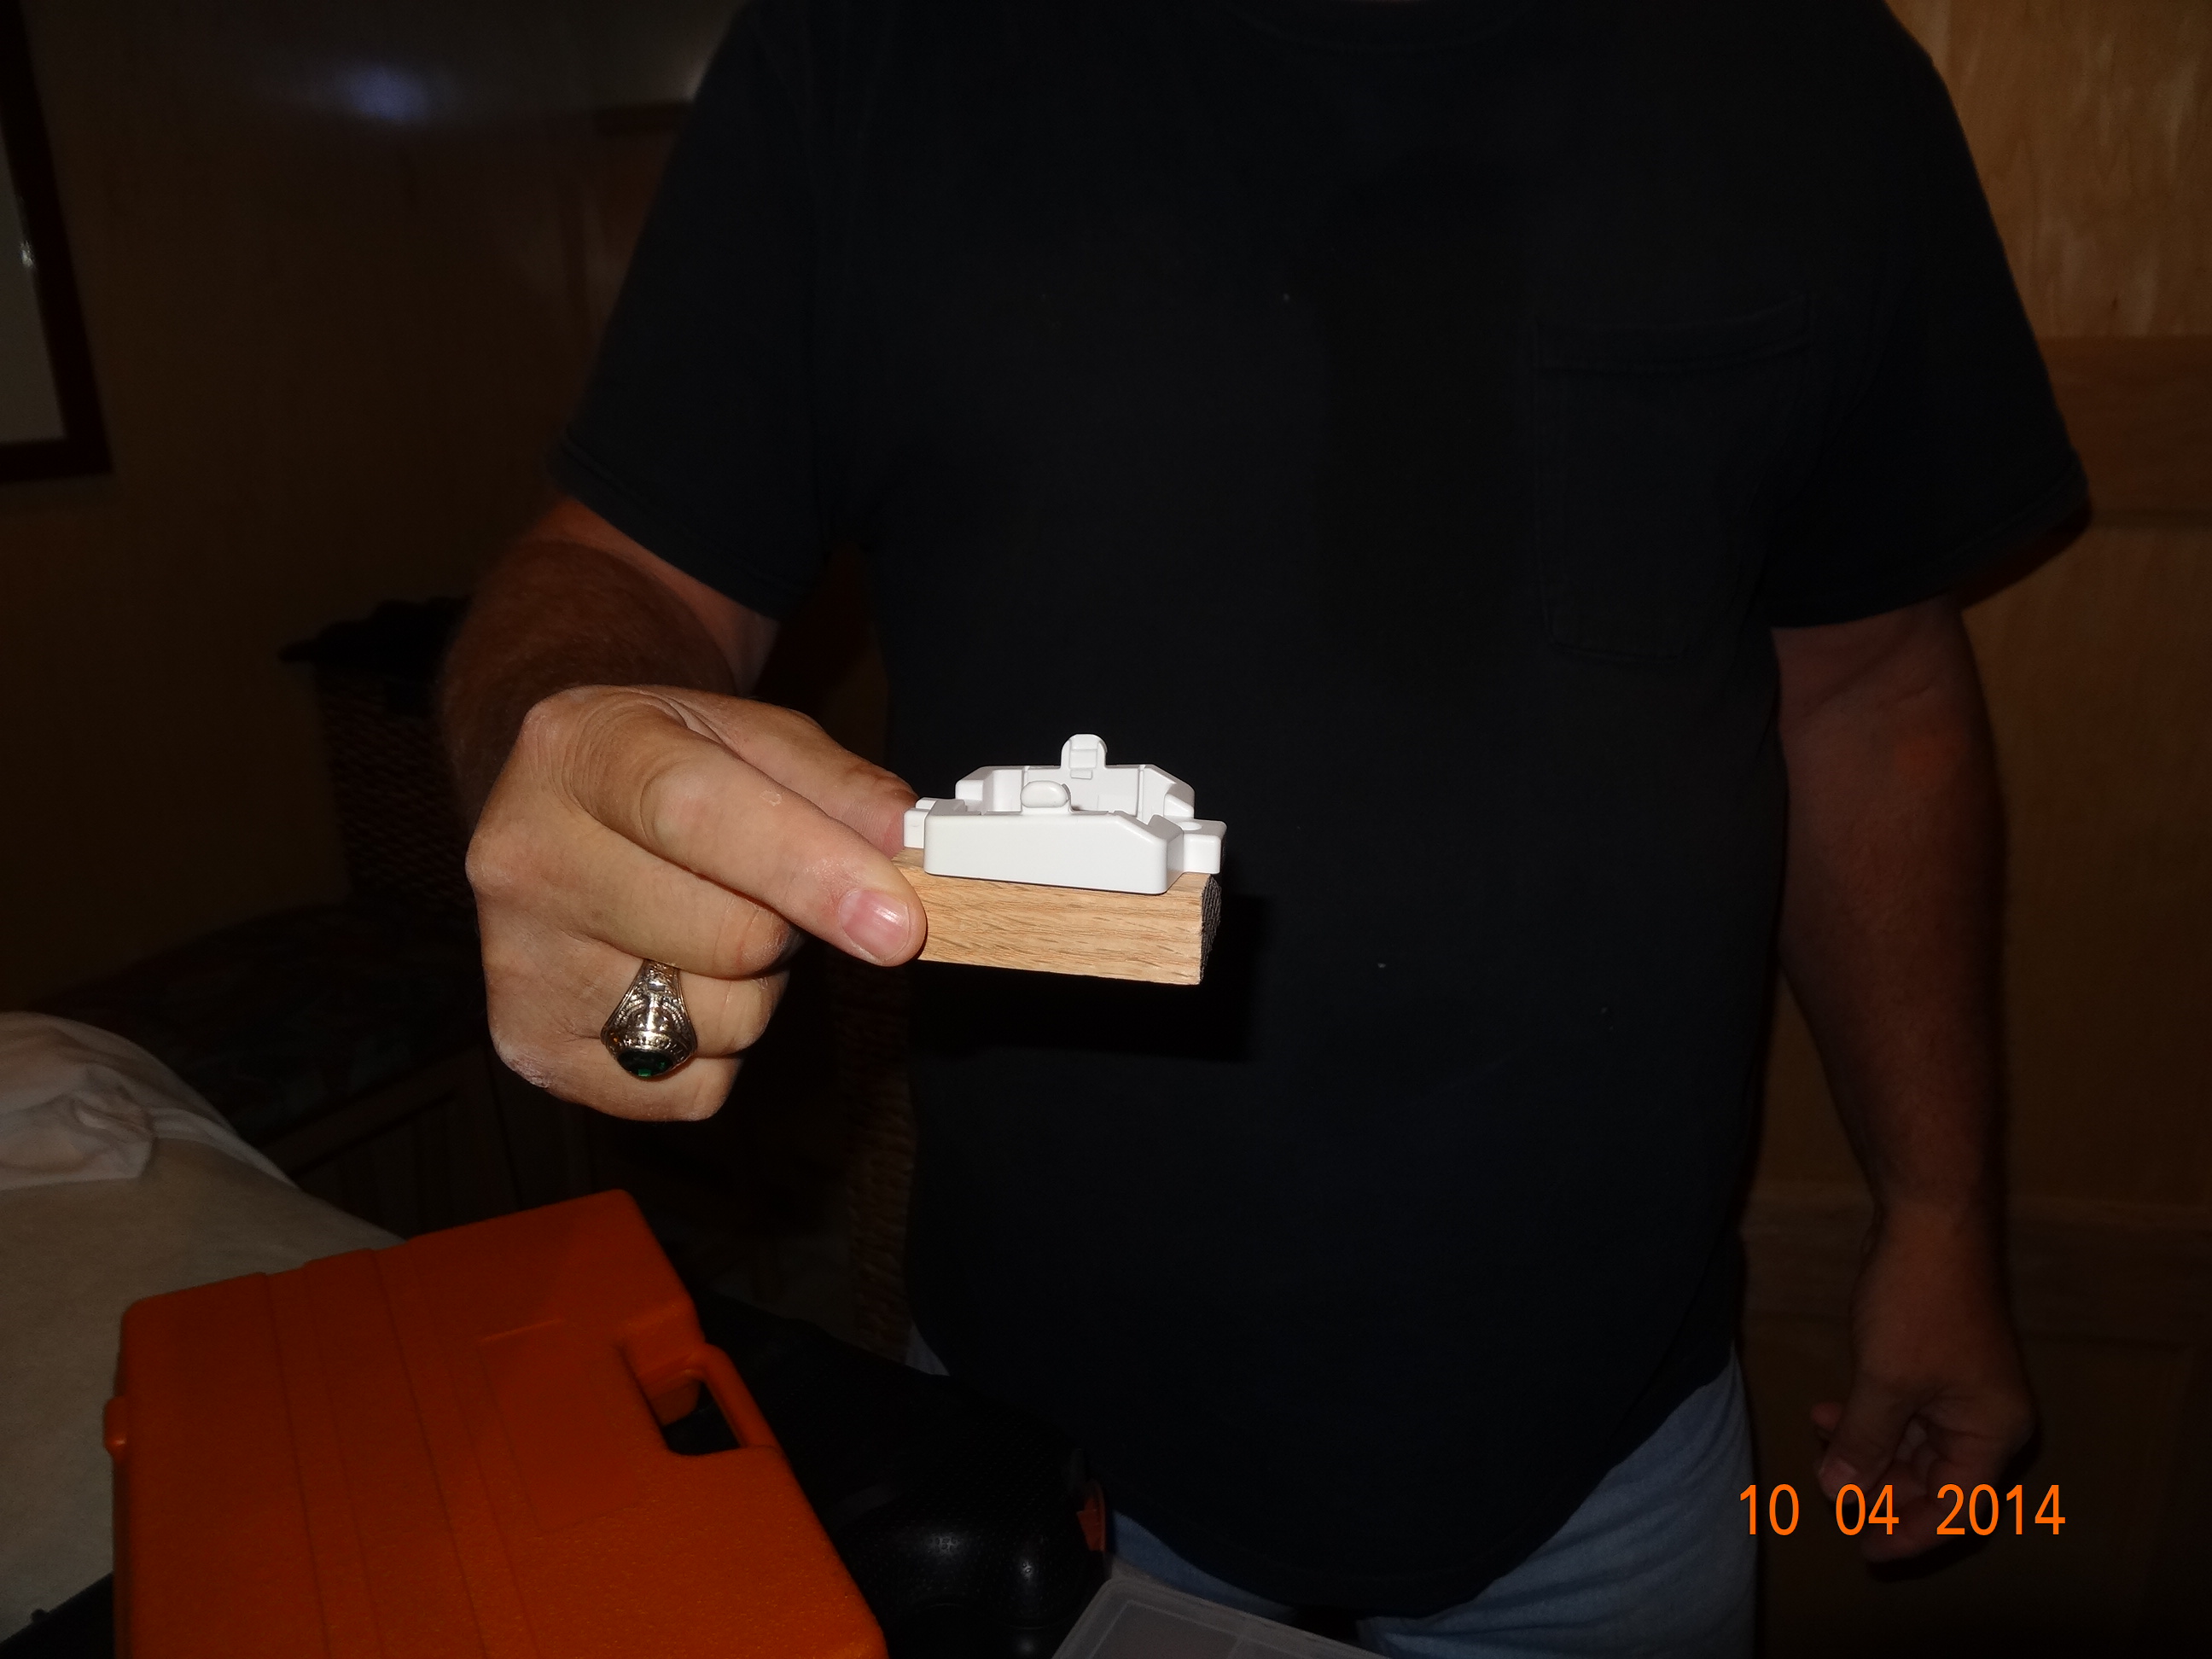
Wood to raise up the float
So he used his trusty drill and drill bits and drilled two starter holes thru the wood and into the hull, making sure he didn’t actually drill thru the hull. That would have been a BIG NO NO! Then he was able to screw the piece of wood and the float base to the floor of the boat.

Float Base secured to floor of boat
Then the float just snapped right on that base. Now we were ready to hook up the wires. Now hooking up the wires you have to have some concept of how things work, how the electricity flows from part to part. Cause if you don’t have any idea how things work, and you can’t figure it out yourself, or phone a friend to help you, you might as well throw in the towel, pick up your phone call a professional to do it for you. Luckily for us, Gary is a very handy guy to have around. I am totally amazed by the stuff he knows, or can figure out how to do. So…..he pondered the electrical flow and how to hook up which wire to which so it can be connected to the bilge pump to get power. Cause you have to have power to make the horn blow. Kind of like cutting a board, measure twice, cut once :), Gary thought this all out before he started cutting and attaching wires. So he took one wire from the horn and one wire from the float and hooked them together. How did he do that? He took this handy dandy little tool
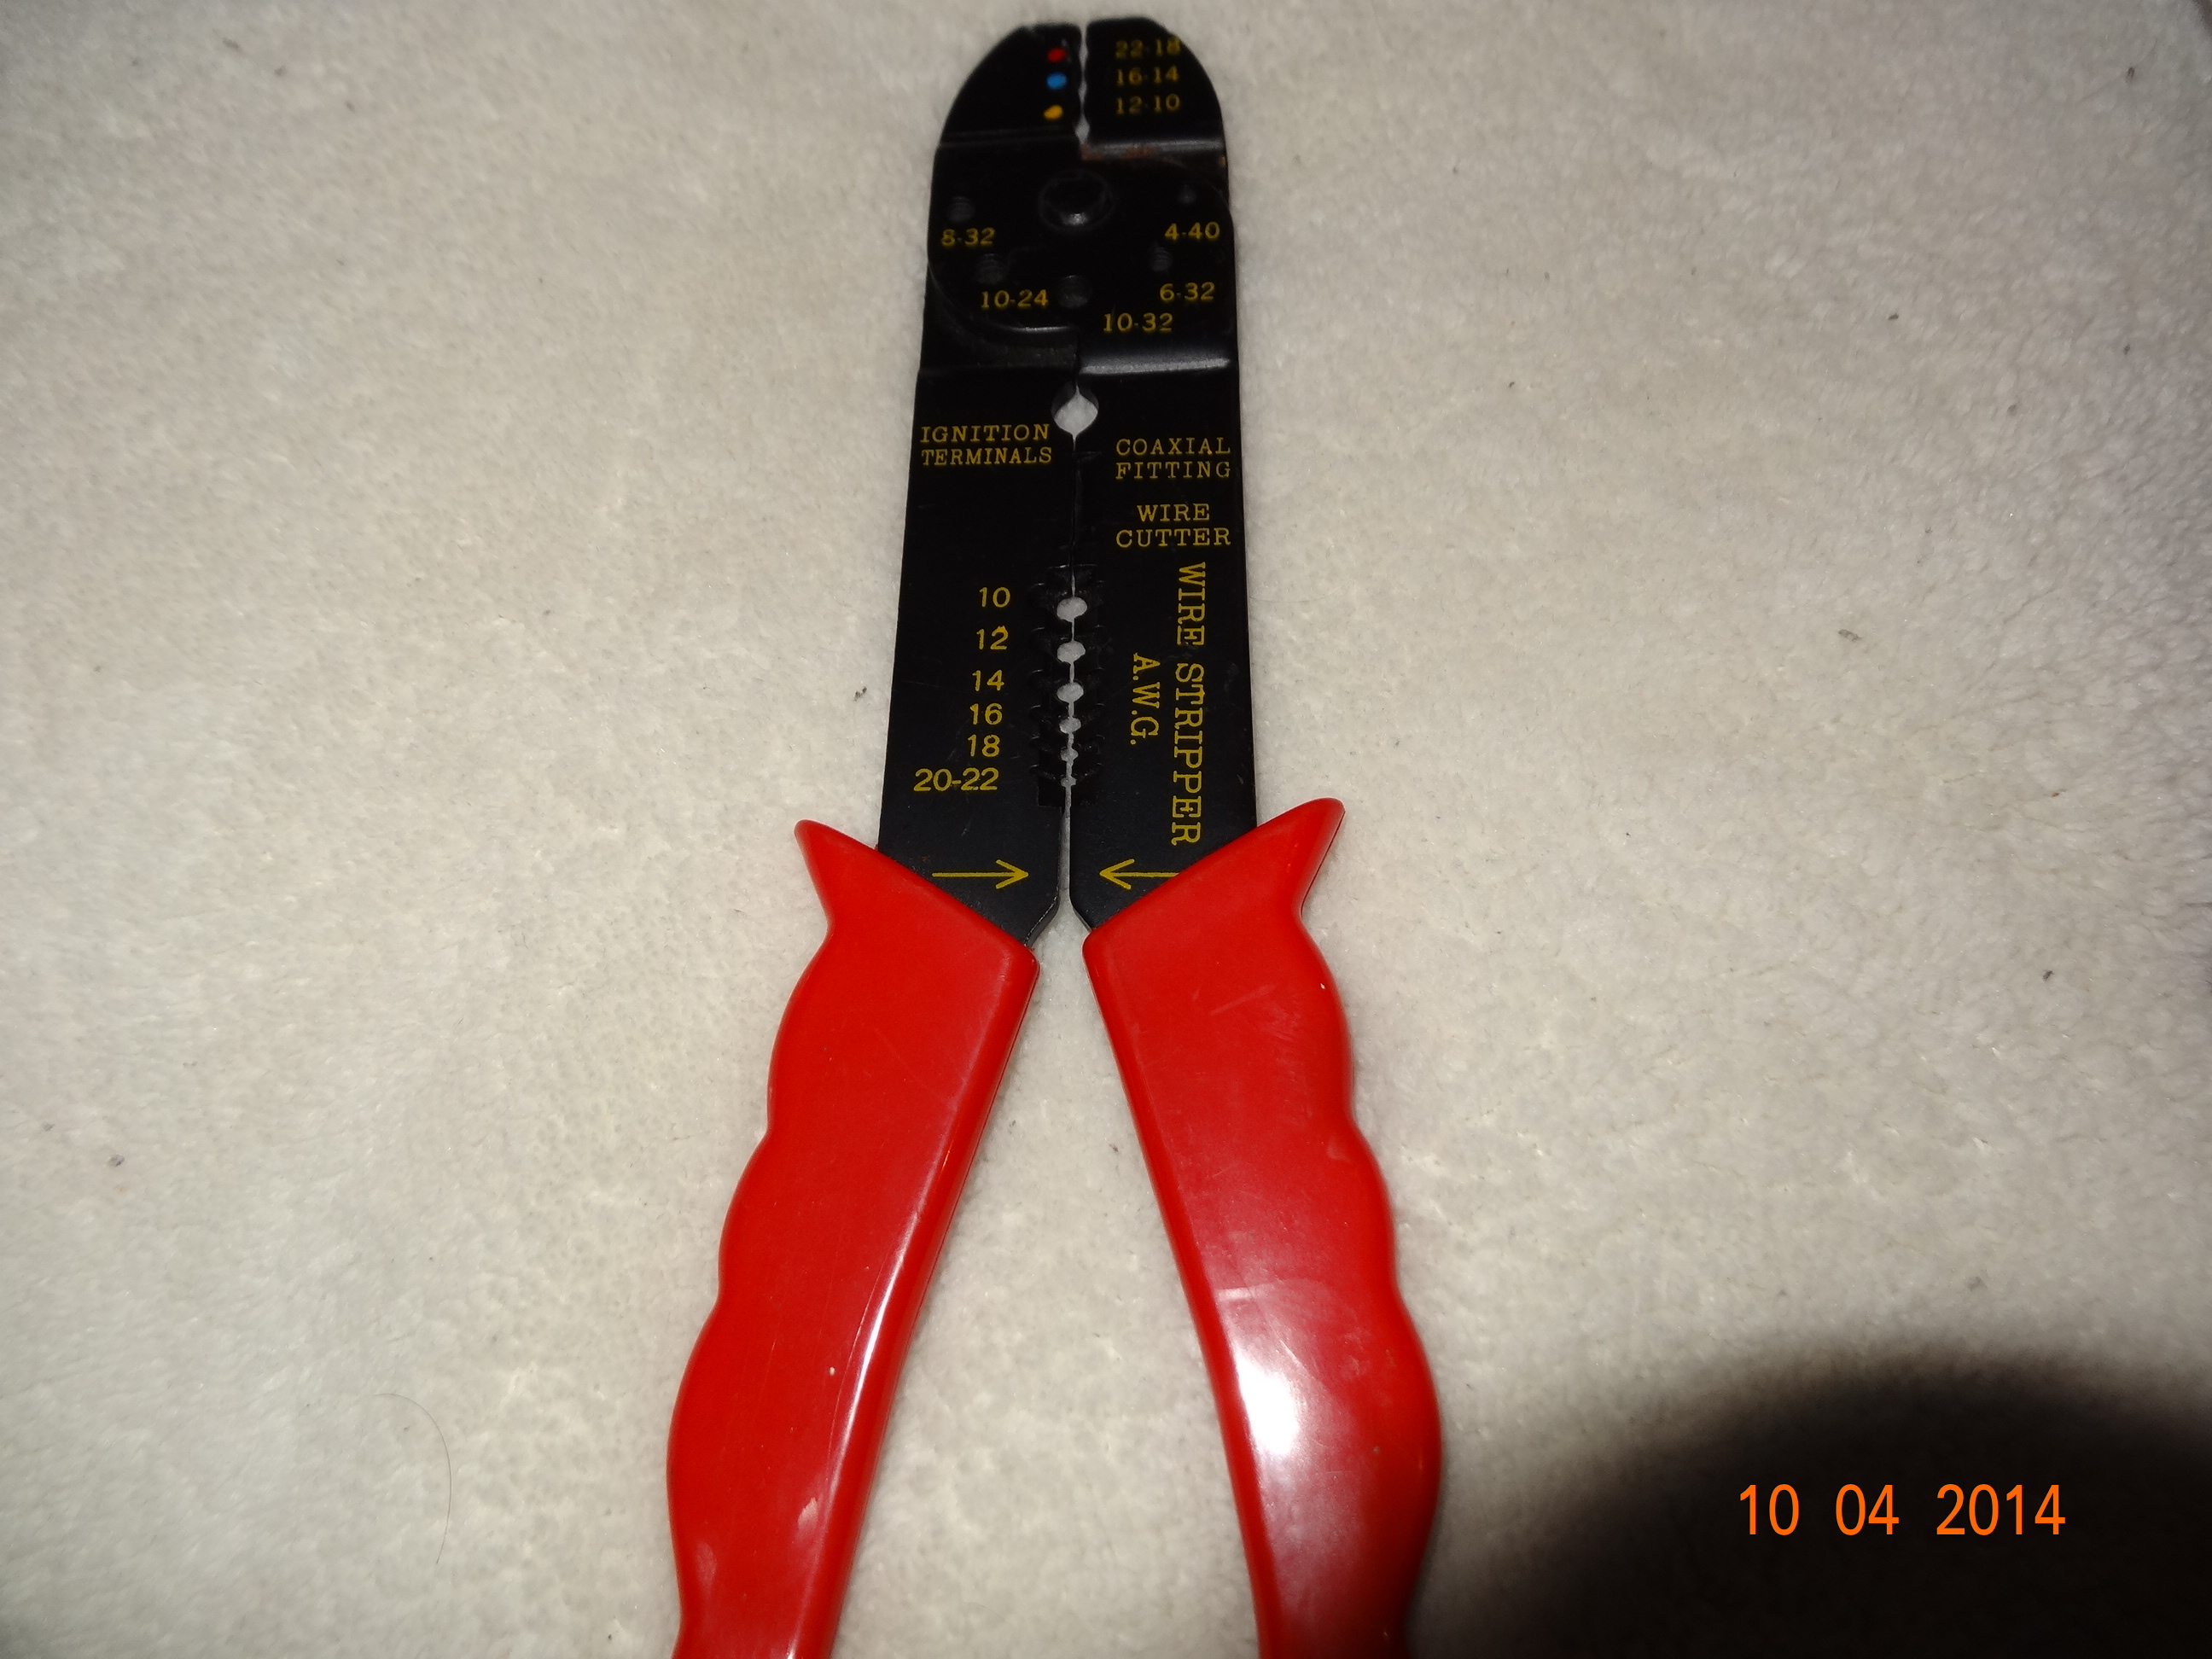
Wire crimping and cutting tool
and used it to first cut the wires so they were shorter (don’t need or want all that excess wires hanging around, looks untidy :)). Then he used the bottom part of it to peel off some of the plastic covering on the wire to expose the wires themselves.
Cut off some of the plastic to expose the wire
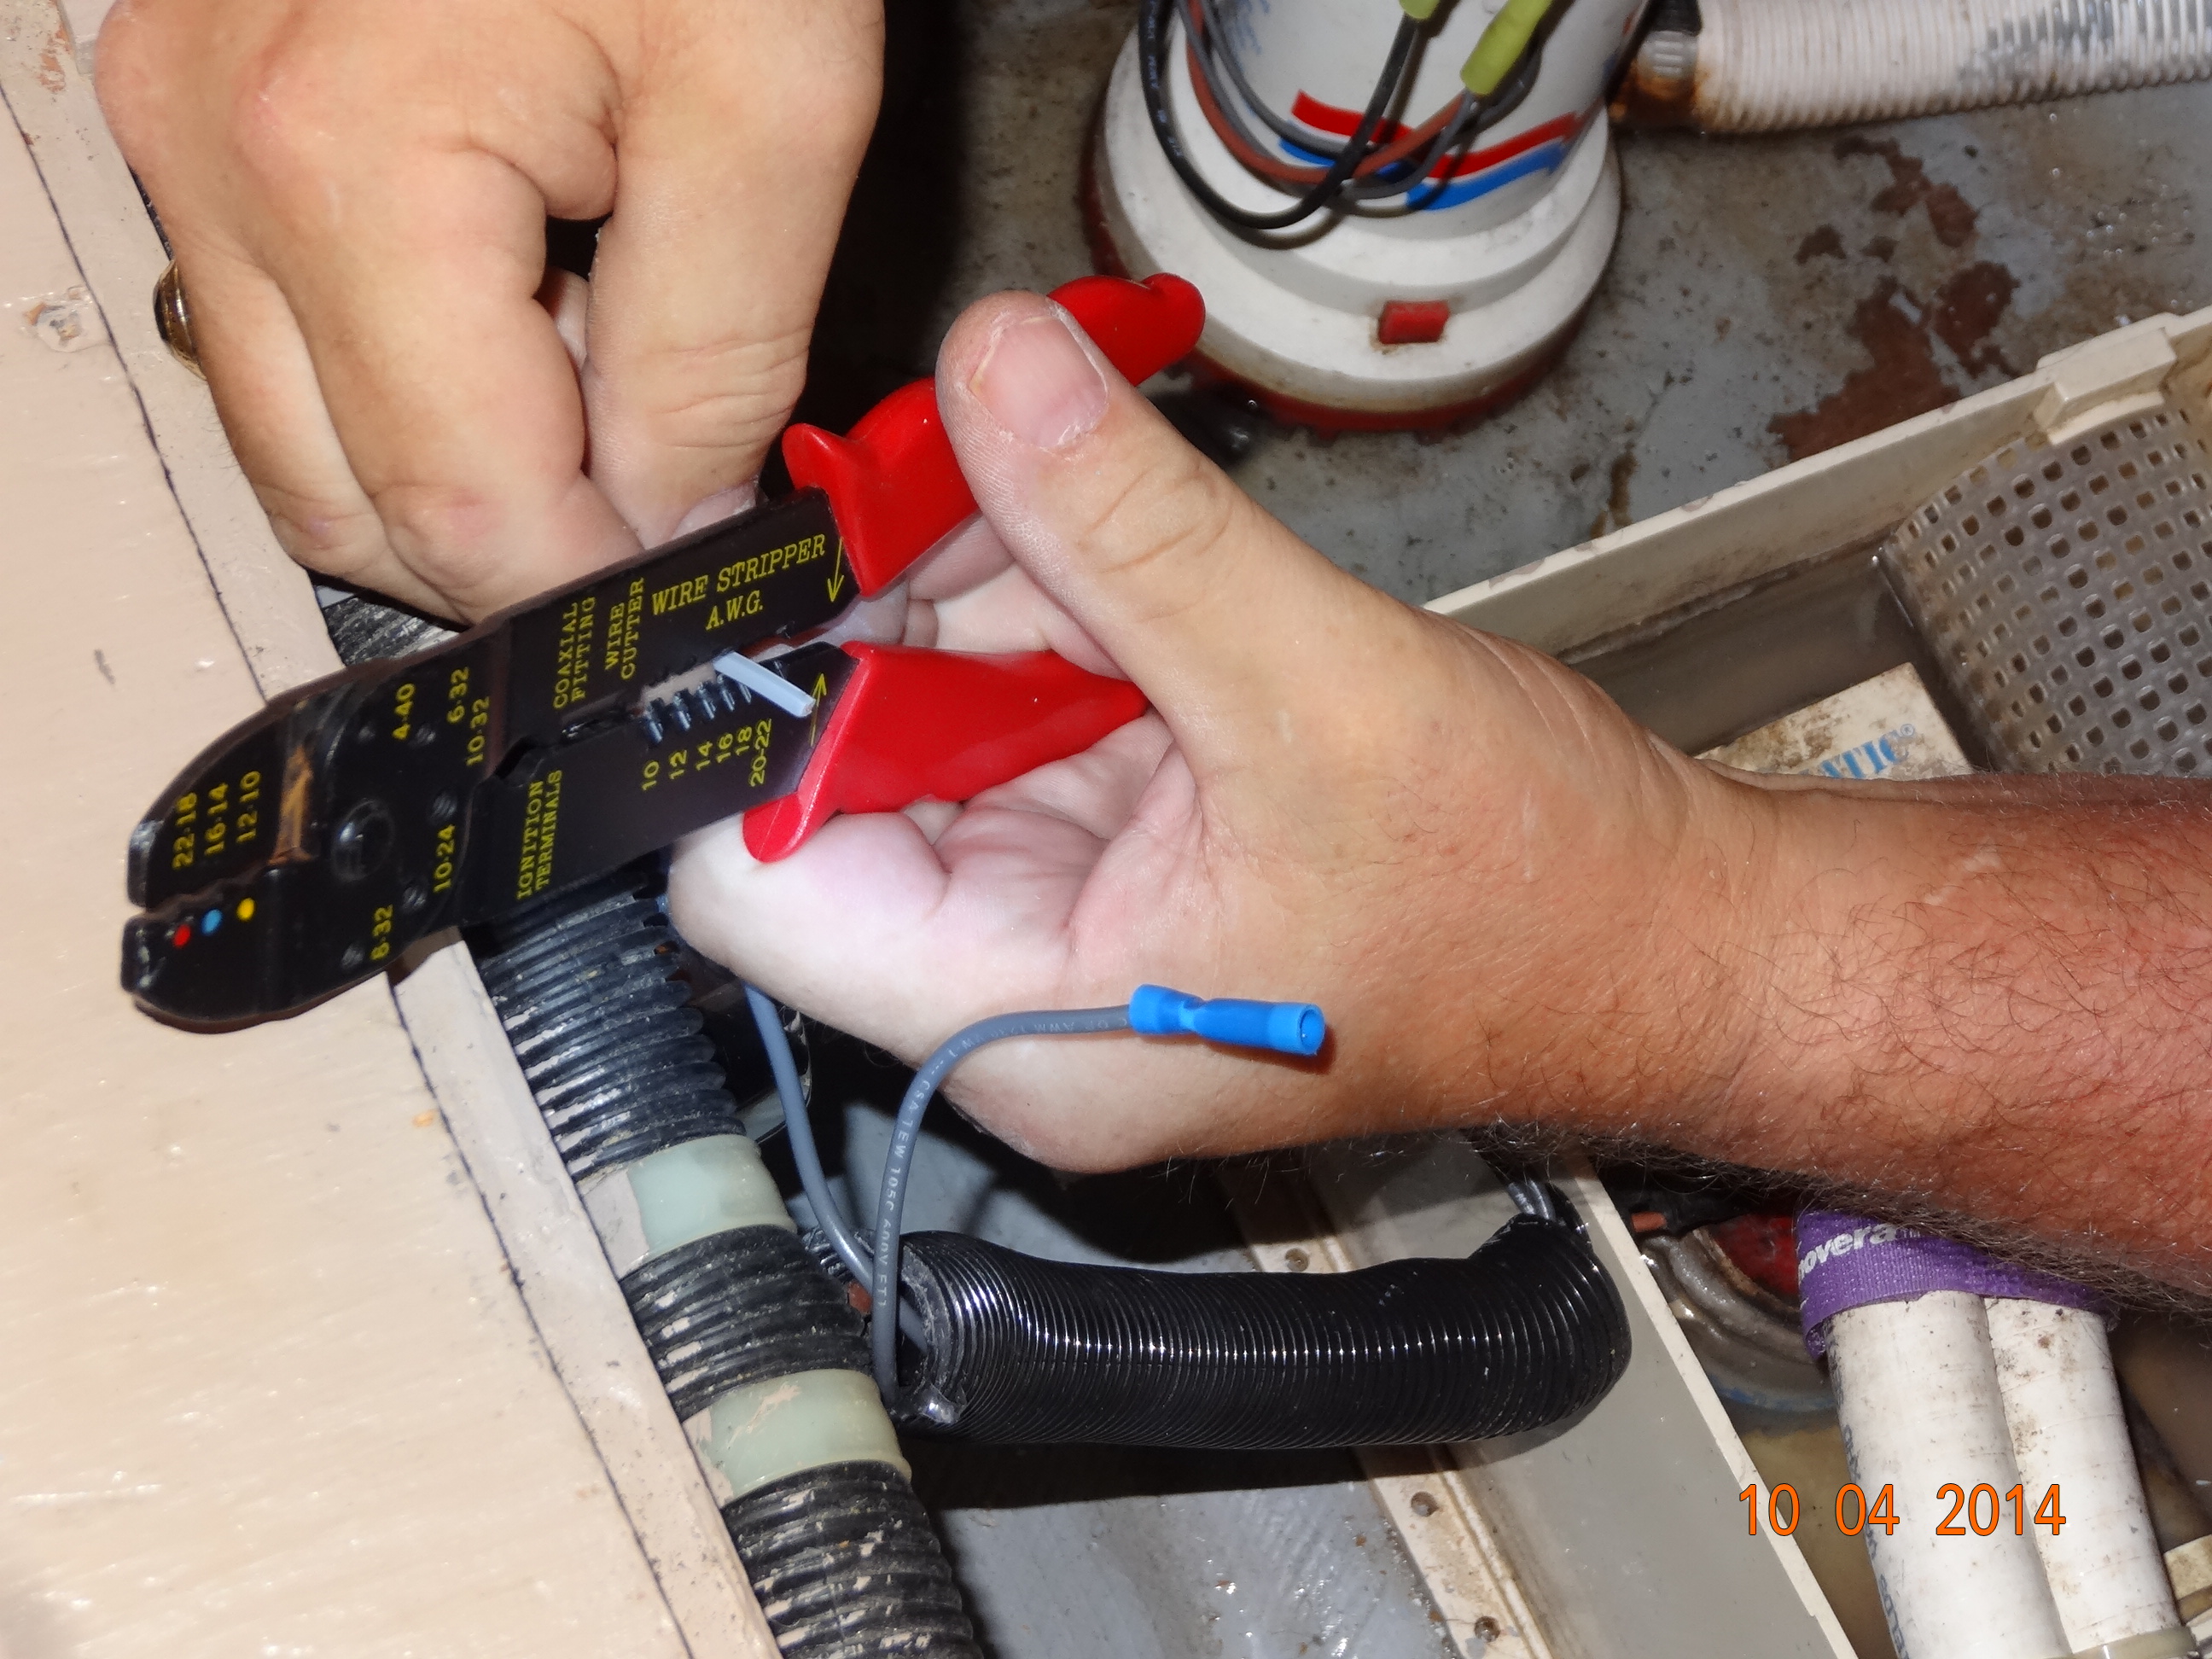
Then he took a wire crimp connector (people used to use black electrical tape back in the day but this is much easier and holds up better), stuck the horn exposed wire in one end and the float wire in the other end then used the top part of the tool to squeeze or crimp, each wire in the connector
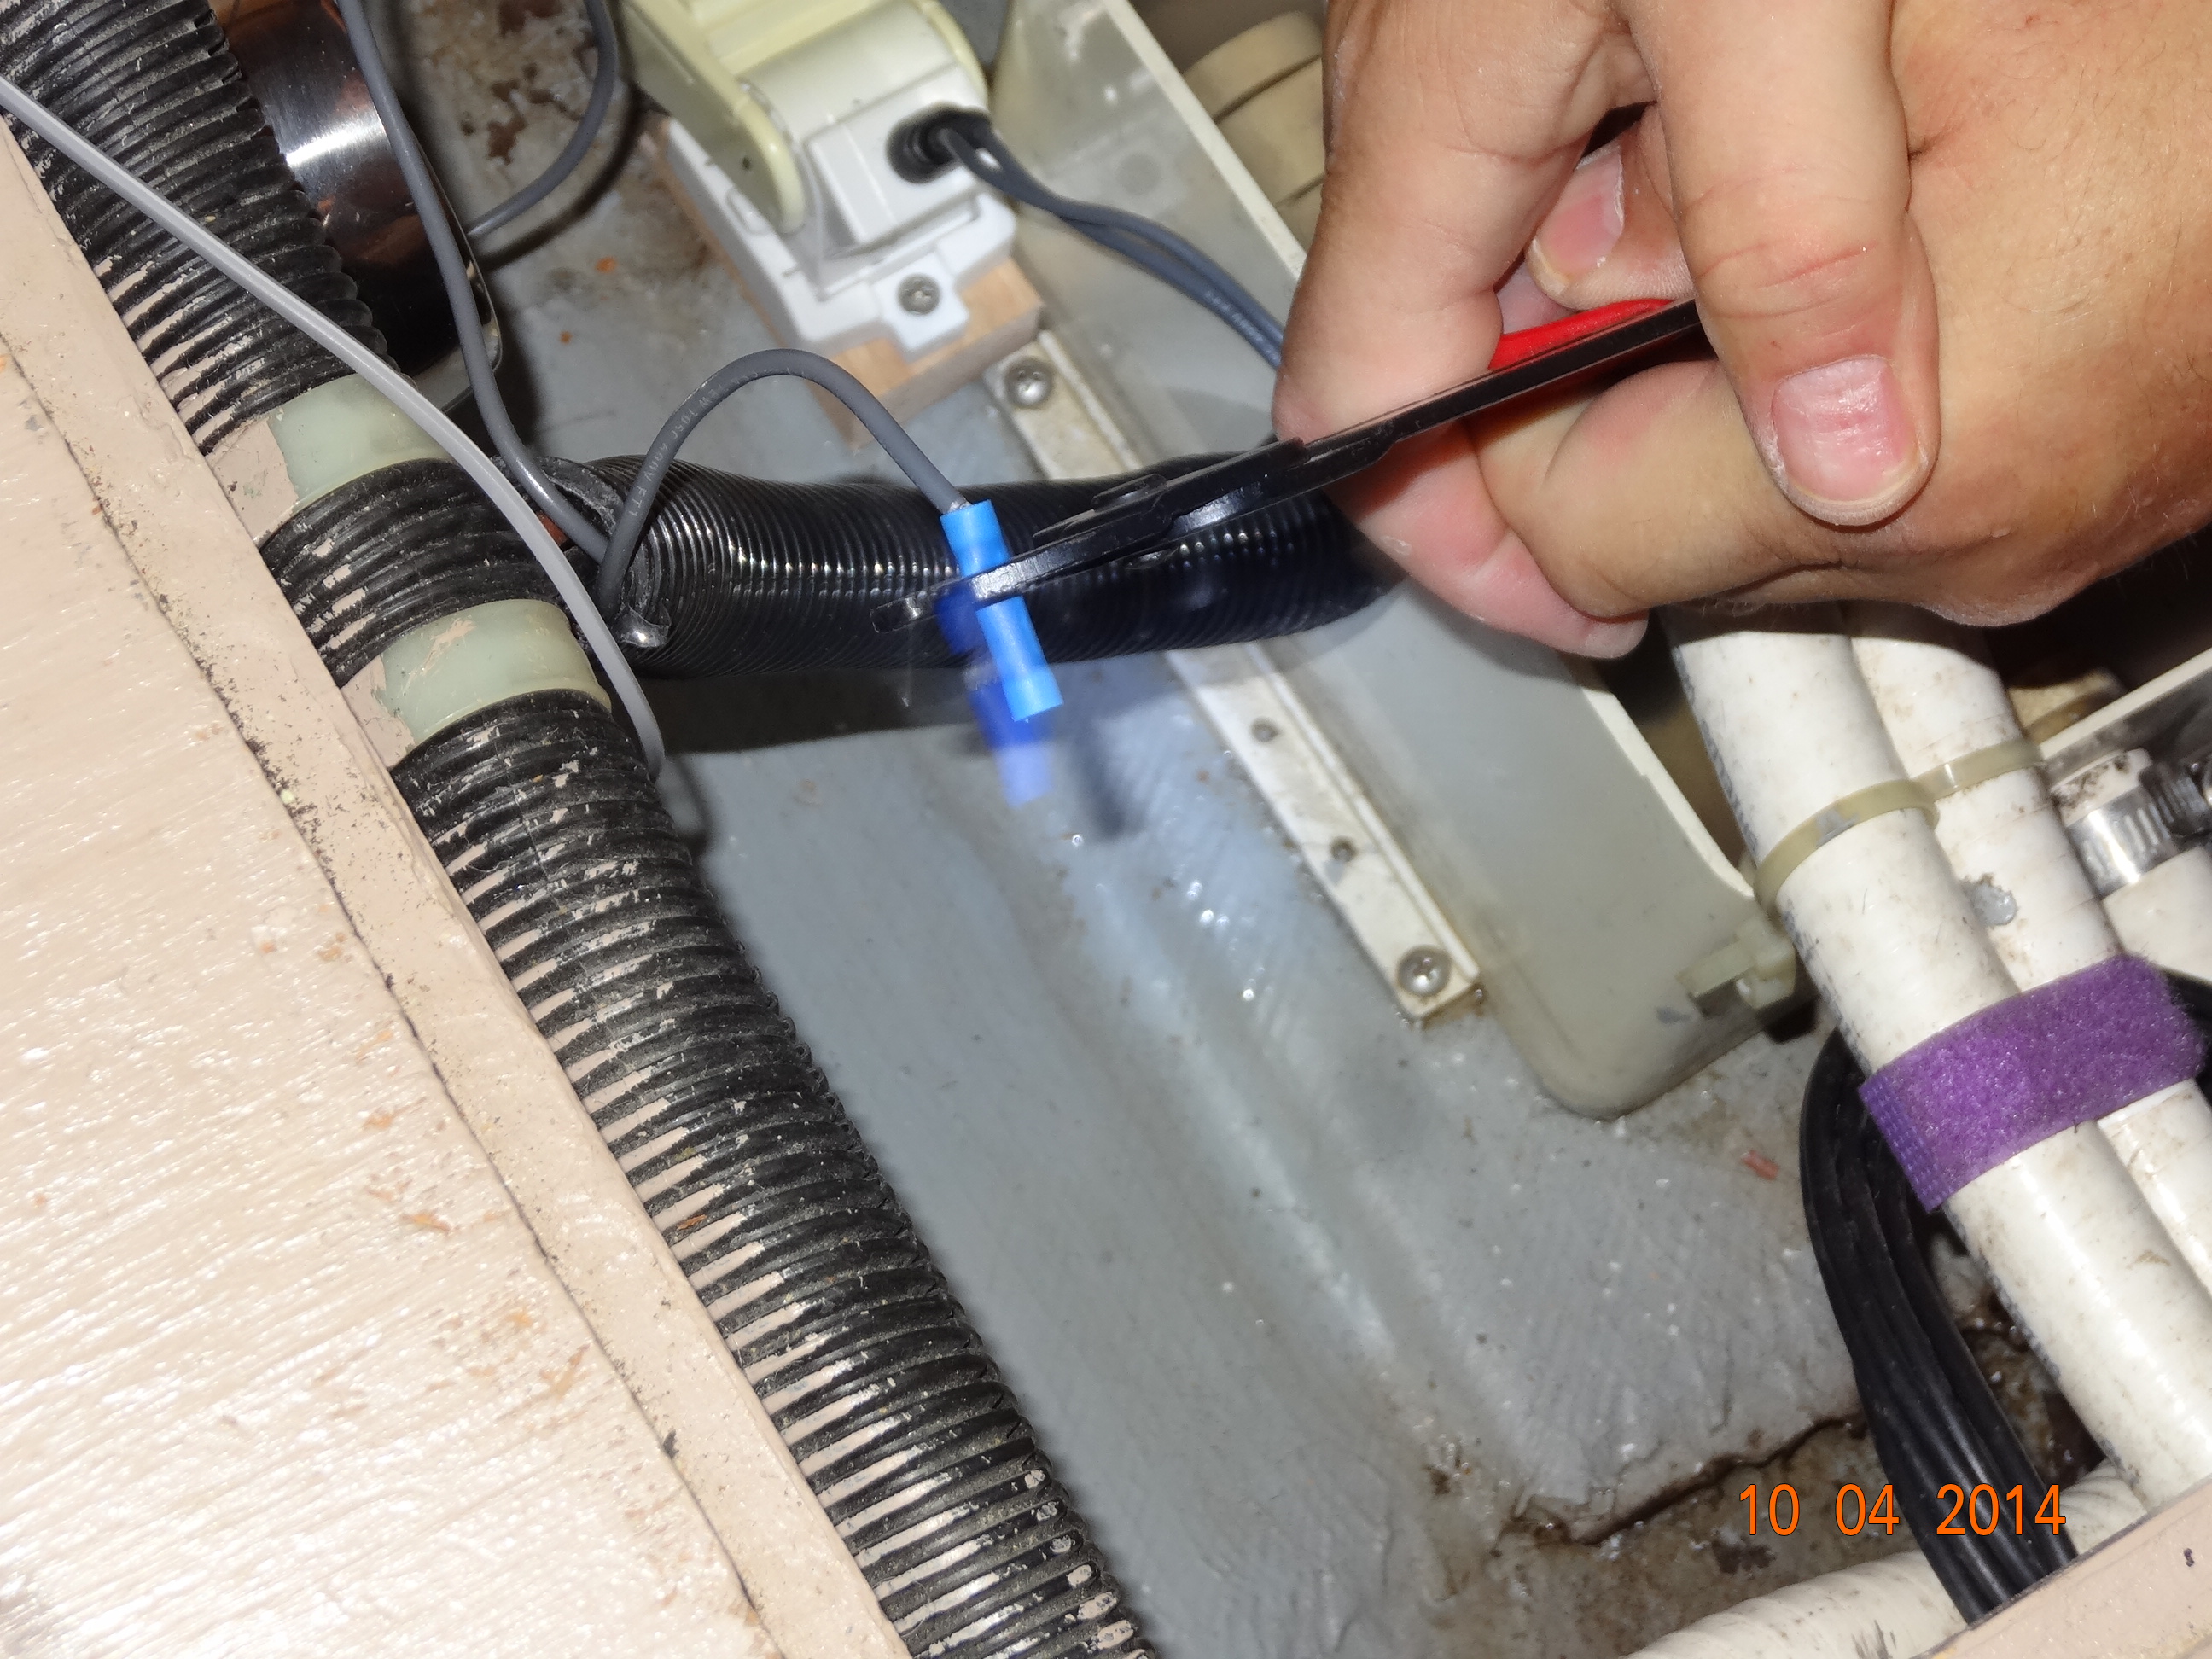
Crimp on the wire
Whala…all done
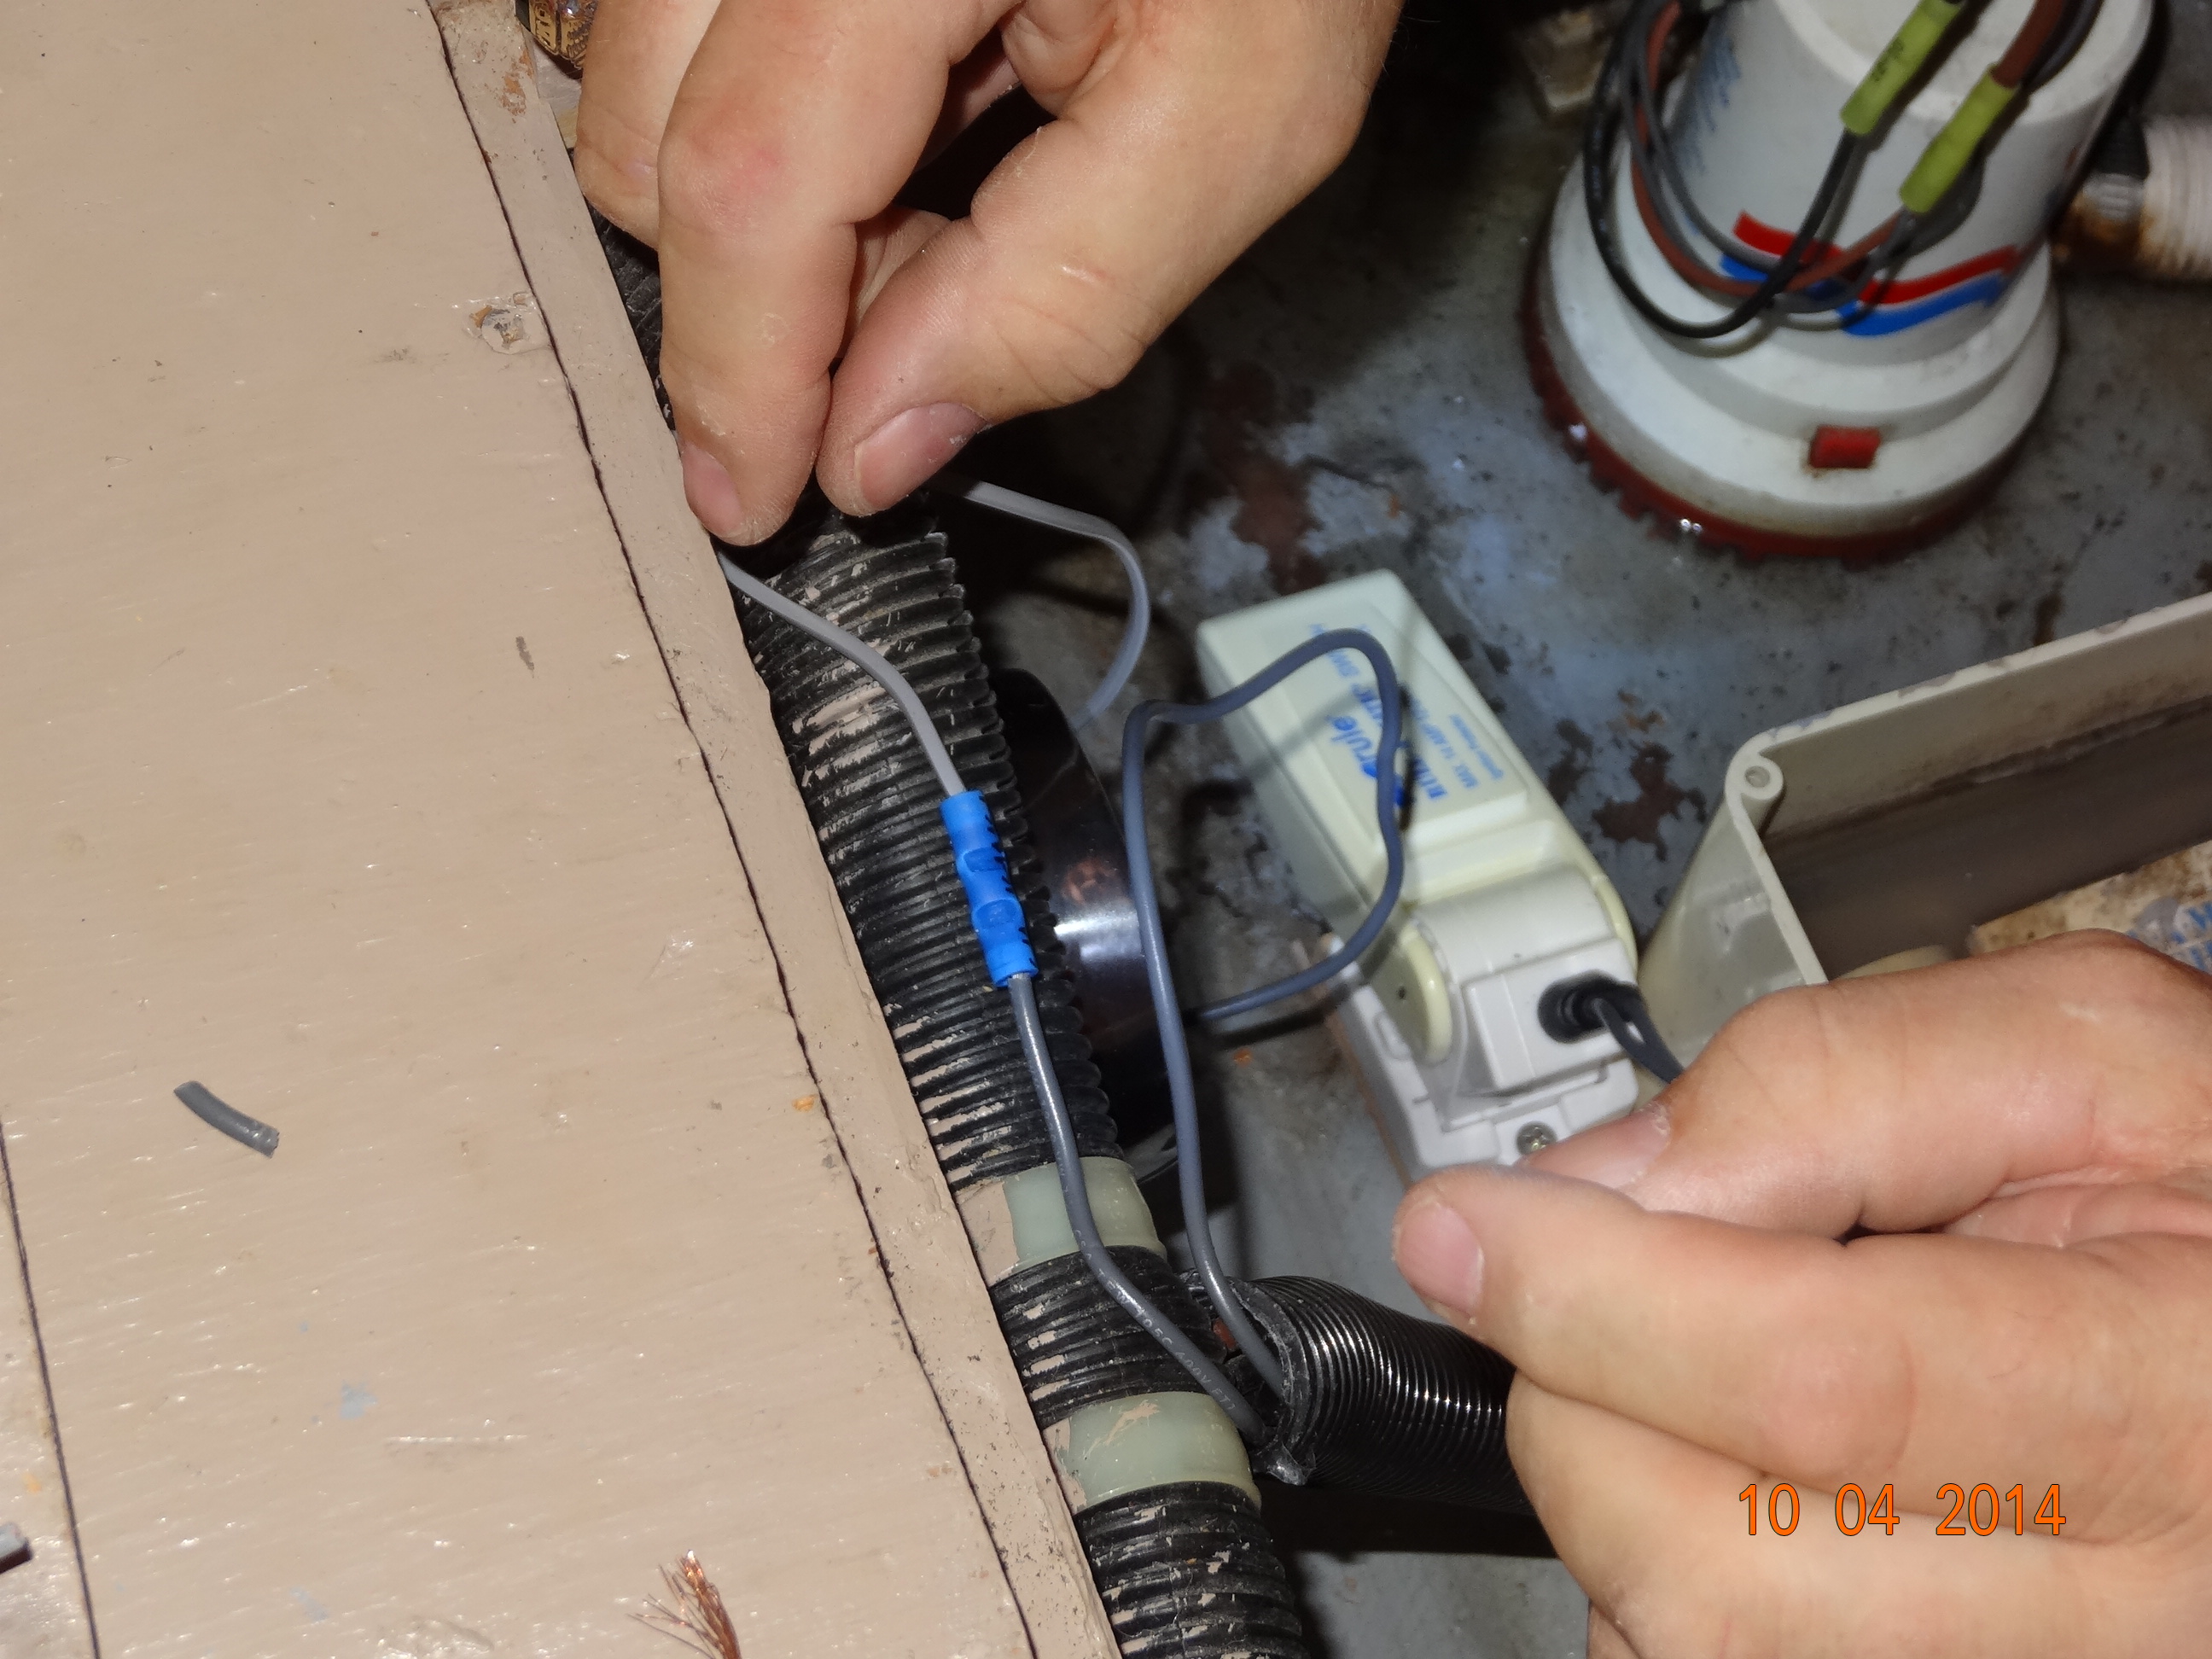
Then he had to figure out how to hook the horn to the power of the bilge pump. The bilge pump had three wires on it
Bilge pump wires
The black one was the ground, the light red one is the on/off from the switch on the electric panel and the dark red one is power from the battery. So he needs to hook the horn to the bright red wire and the float to the ground wire. But, darn it, the wires are too short to reach. Touch of Class to the rescue! Extra wire in the engine room, Gary is just like a boy scout, always prepared.
So Gary added the extra wire to the end of the horn wire and the float wire just like he attached the horn wire and float wire together….cut to length, strip off plastic to expose wire, put on wire crimp connector and crimp on. Then he took the black wire, cut the current wire crimp connector off, stripped off some plastic on both of the ground wires then put the new connector on the bottom of the ground wire and crimped it on. Then he took the two wires, the ground and the float wire, twisted them together and shoved them both in the connector and crimped them on. Then he did the same thing with the dark red power wire and the horn wire.
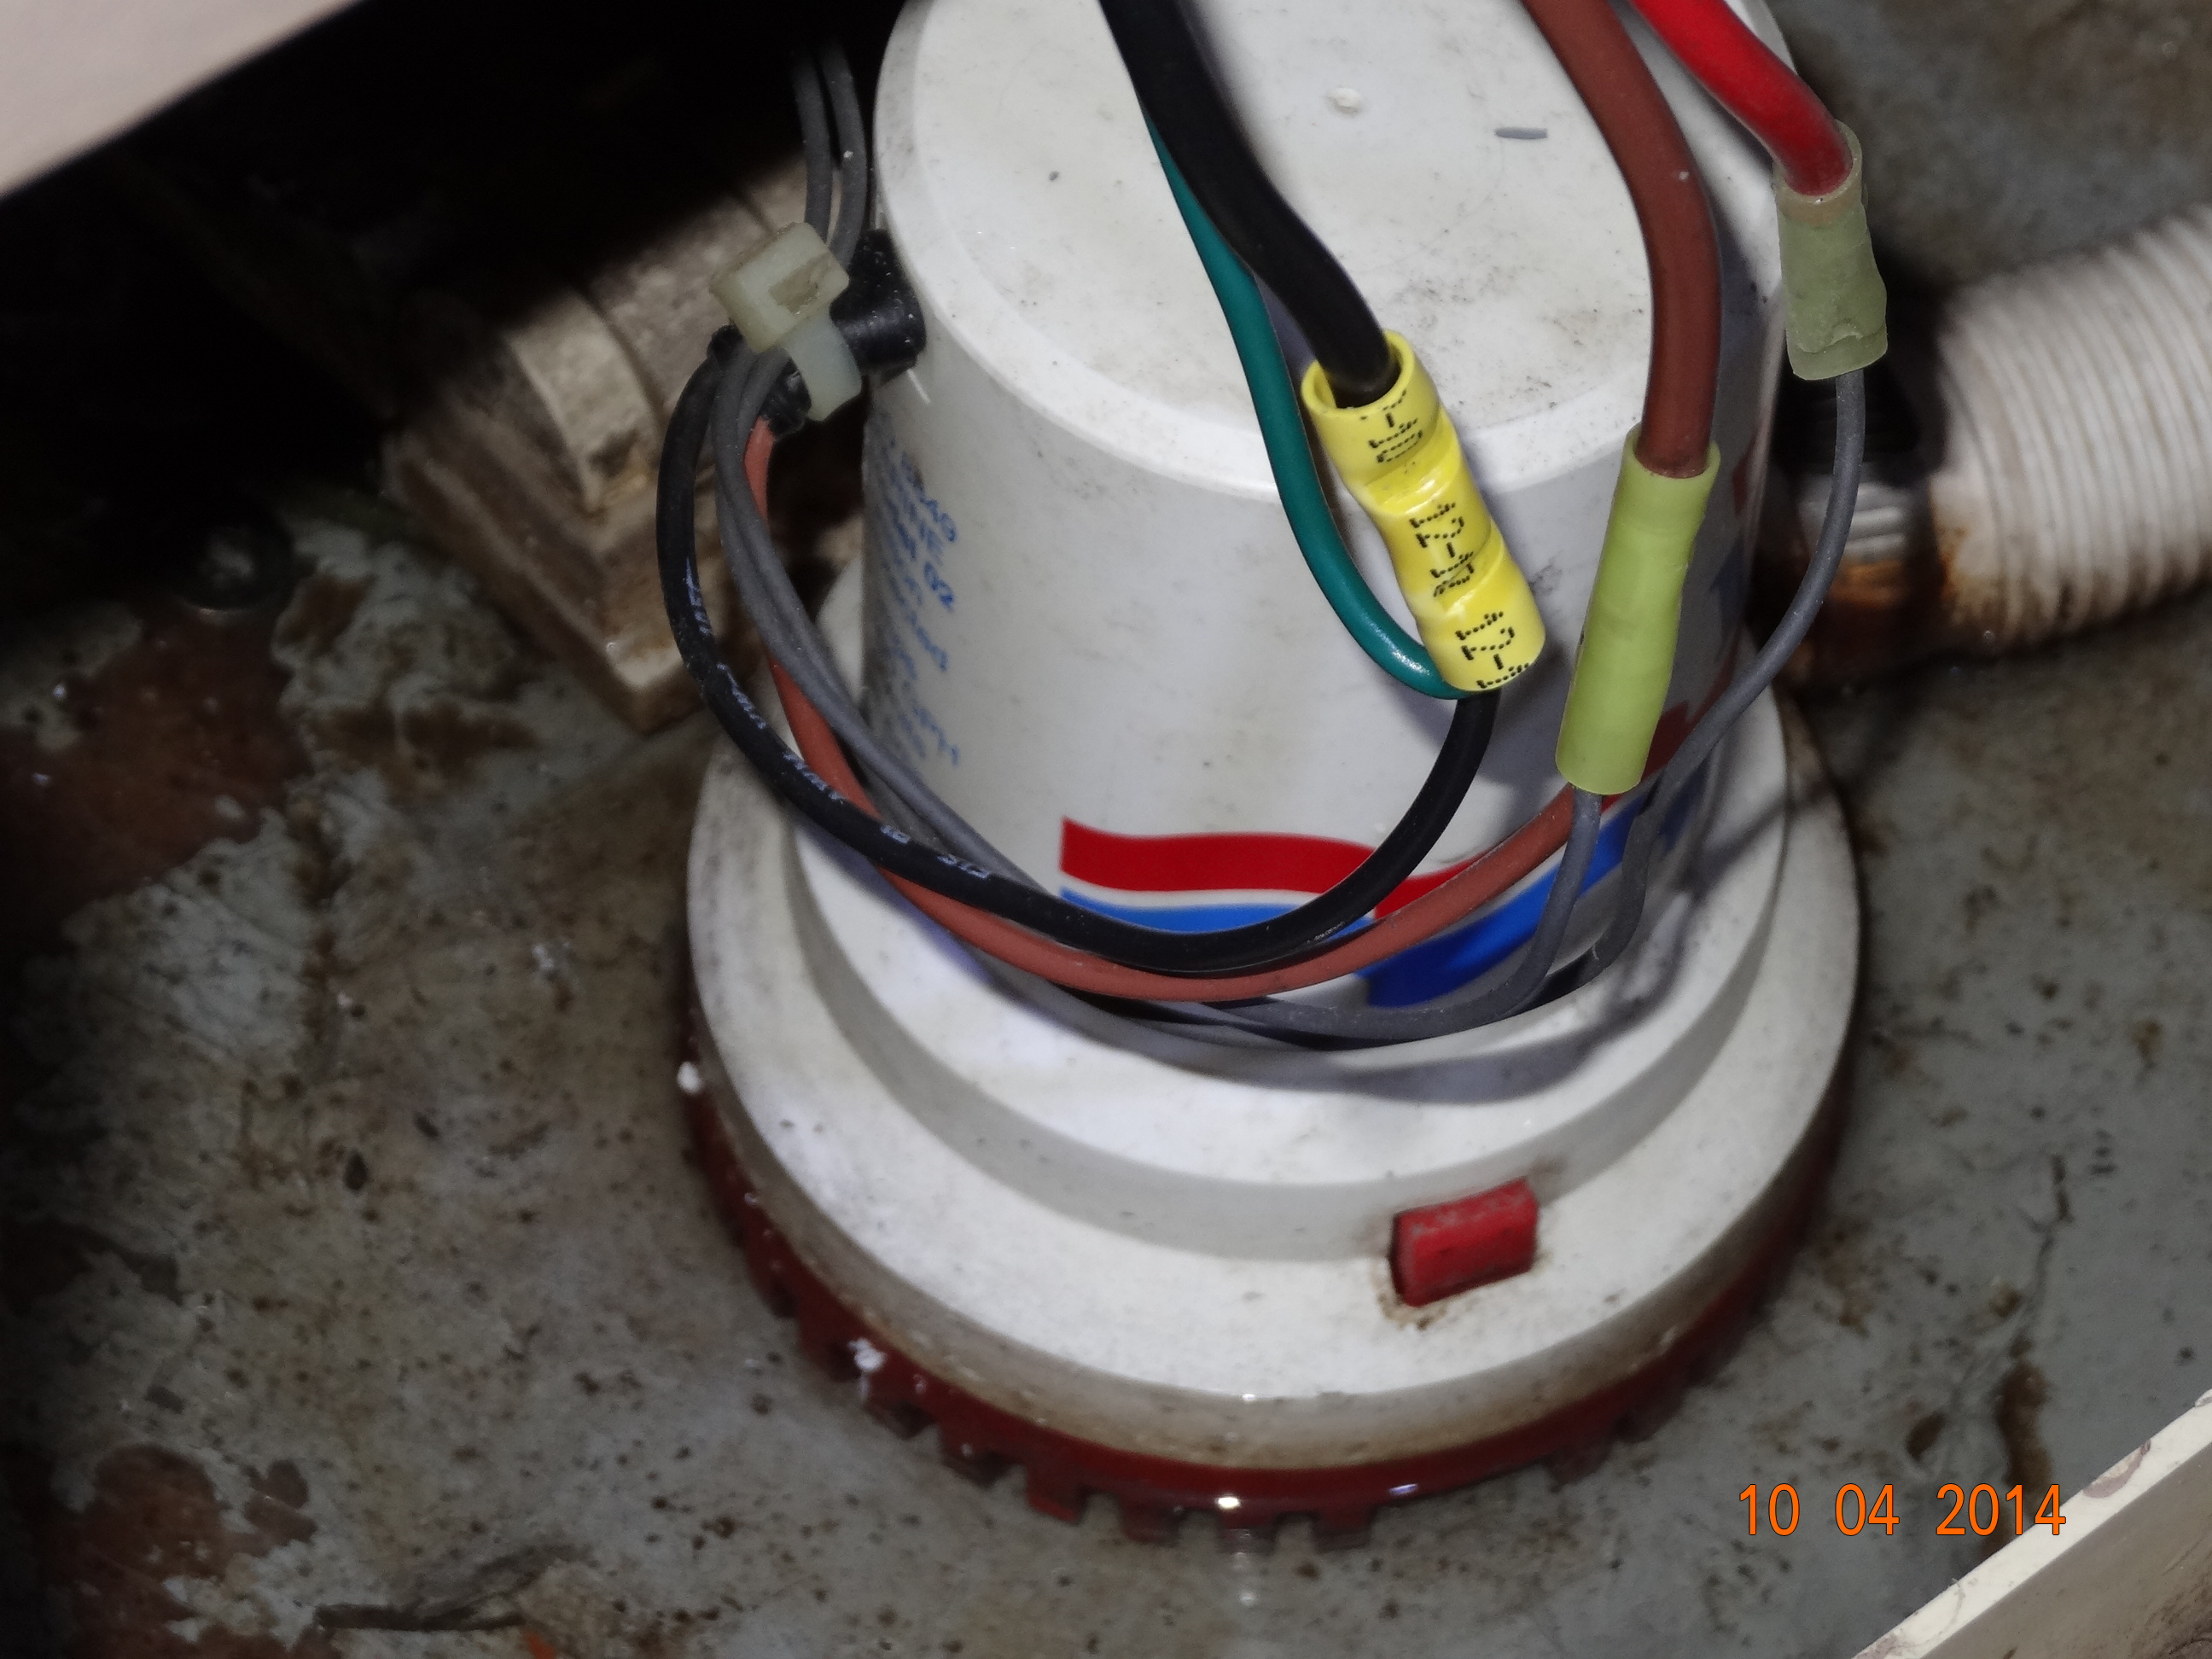
All done, a working High Water Alarm
Of course, Gary had to get in there and make sure everything was all tied up. Notice the head lamp? Something every DIY person should have in their arsenal of tools.
Checkin things out
And guess what? It works! Hallelujah! But for those of you who’s eyes have glassed over half way thru my little story, it would be time to dig out your wallet and make that call to a professional :).
Heidi
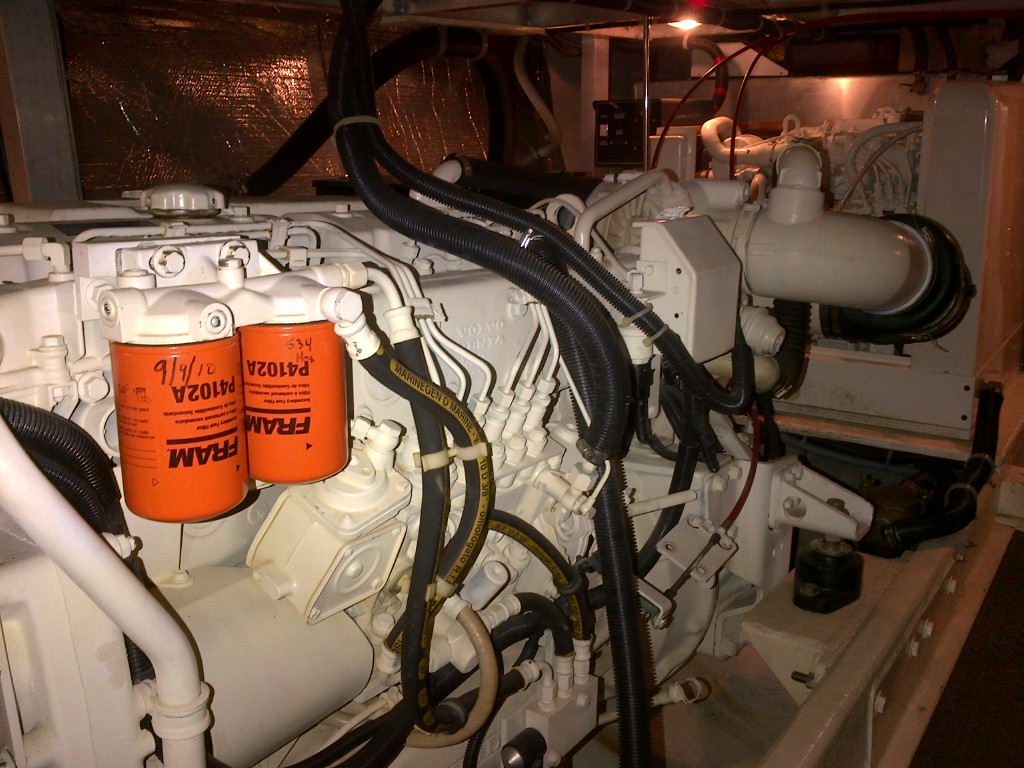
Helga
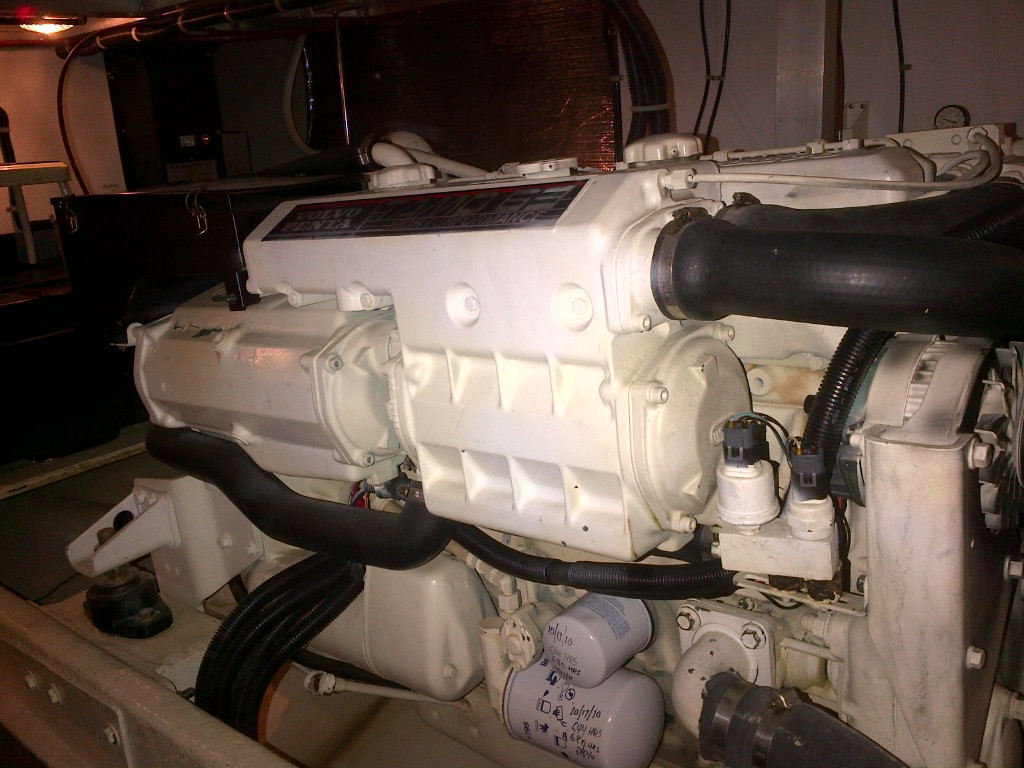
Meet our Swedish Girls, Heidi and Helga. They are 340 Volvo Turbo Diesels and look they are even blond! Gary takes very good care of them. Sometimes I am jealous, J/K.
This page will have tips or updates from Captain Gary. I am sure the men will be following this closely 🙂

Hey Admiral .. Updates?? Oh, s’pose you’re too busy driving .. ‘scuse me, Navigating! 😉
Would you be willing to share your spreadsheets with us fellow geeks? If so, I would love to have a copy if can send an email with them attached.
Many thanks, and happy, carefree boating.
I will send our geeky spreadsheet to you under separate cover. Glad you are enjoying our blog 🙂
Well Done Admiral!
I’m impressed. It’s just like one of the boating mags.
Pictures and everything.
A picture is worth a thousand words 🙂
When we trucked our boat down to Cincinnati the marina manager was inspecting the engine compartment before putting the boat in the water. He said where are the strainers? I said the water was so clean on the St. Croix the boat never had them. He said we must get them because of the condoms floating in the marina water will cause big problems if sucked into the engines or generator. We bought three big strainers. That was the start of our adventure on the Ohio river. Later we were up stream and anchored out below a big Carver. We were swimming and one of the boys started hollering there were turds in the water. The upstream boat had just pumped their holding tank into to river. We and the boys never swam again in the river. Now you know why we moved back to MN. LOL.
I am impressed with those engines! The Crusaders we had look like babies in comparison. Take care.
Sounds like you guys had a lot of fun too. Always new adventures on the waters. Have a wonderful Thanksgiving. Colleen
Gary and Colleen
It’s always good to run into you at Bear Trax. I never thought I would meet such great people as you and the bunch at Bear Trax!! I really enjoyed looking thru your site and seeing some of the things you have done and also getting a few tips on caring for our own boat. Hope to see you at the Margarita party on July 25th. Enjoy your time back in MN and will see you soon. You had asked if the Robalo we bought has AC and generator. I gave you the wrong answer, it has AC but no generator. I have two Yamaha generators and am planning to mount one in the boat. Do you think this will work or should I have Robalo do it? Much cheaper if I can do it!! Take care